360 pushups are a fun, show-off move that you can weave into a floor game freestyle to add a nice touch to your flow.
But what exactly do we mean when we refer to “360 pushups?”
I’ll talk about that first and then I’ll show you how you can do the most basic version of the move yourself.
Table of Contents
Three Types of 360 Pushups
To the untrained eye, there is seemingly only one kind of 360 pushups. However, once you get more familiar with it, you’ll realize that there are, in fact, three varieties of it. In order of difficulty, they are:
- Pseudo 360
- Standard 360
- Advanced 360
An advanced 360 is very difficult to pull off and requires an insane amount of athleticism – way more than even advanced clapping pushup variations or the Aztec pushup.
I’ve only seen two people ever do it. It entails launching yourself and generating enough torque to spin an entire 360 degrees in the air with no point of contact with the ground until the spin is complete.
Do-able?
Yes.
Insanely tough?
Also yes.
This is why we have the standard 360 pushup and the pseudo version for the rest of us.
Unlike the advanced 360 pushup, the standard version allows one point of contact with the ground. This point of contact is your pivot foot and it’s where all the magic happens.
I’m going to assume that most of you reading this are not athletic freaks of nature so we’ll stick to describing the steps for a standard 360 and the pseudo 360.
The difference between the two is subtle, but that subtleness makes a difference. I believe that both versions are fairly achievable for most intermediate level calisthenics practitioners.
Dissecting the 360 Pushup
Before you begin, you need to decide which direction you are going to spin in. That is going to define which of your feet is going to be the designated pivot foot and which arm will be the support arm.
Assuming you will be spinning to your left, then your pivot foot will be your left foot. Your support arm will be your right arm at the start of the movement and your left arm in the second half of the movement. I don’t think I need to say this, but if you’re going to spin in the opposite direction, then these things are reversed.
Here’s the breakdown:
-
Begin by doing a few half-rep pushups to stimulate your CNS (central nervous system) while visualizing what you are going to do.
-
When you’re ready, as you’re pushing up from one of these half reps, start crossing your left leg above-and-over your right leg while simultaneously shifting your weight onto your (right) support arm. Note that this shouldn’t be a total weight shift. The reason is because you will need to generate maximum power – which requires both arms. However, the purpose of the slight shift is to signal to your body that “hey, we’re going that way.”
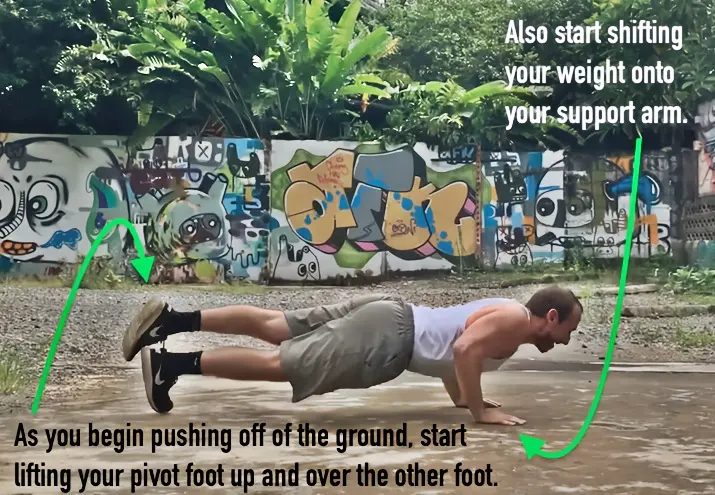
Step 1: Shift weight onto support arm
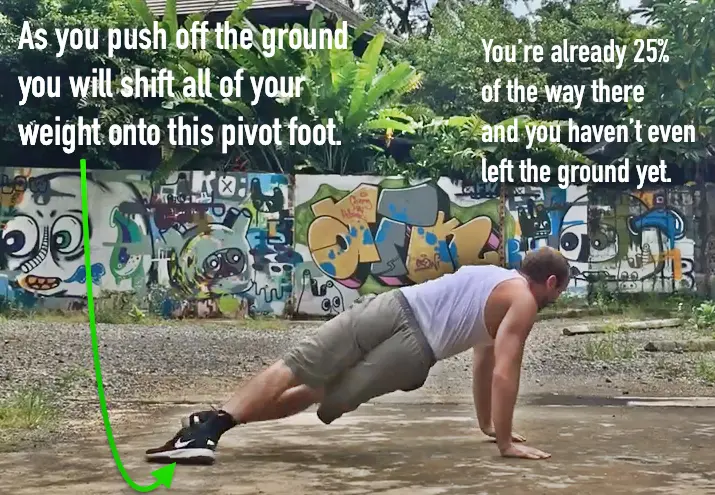
Step 2: Transfer weight to pivot foot
As you can see from the images below, it’s not actually a 360 pushup because there is a transfer of pivot points halfway through the turn. Hence why I call it a pseudo 360 pushup.
The first pivot happens at the foot as seen in the third image, but as soon as that arm touches down in image four, all of your bodyweight transfers to it. The remainder of the spin happens at the shoulder girdle of that arm. When you do it fast enough though, it creates the illusion that you are doing a 360 spin.
From this pseudo 360 pushup you can eventually work your way to a regular 360 pushup.
The regular 360 takes away the second pivot point. You launch yourself and make the entire 360 turn on only the pivot foot before your body comes back to the front and you land on both hands simultaneously. You need to generate considerably more force in order to pull it off.
I recommend starting with the pseudo 360. Then as you get more comfortable with it, you can build up the confidence and power to do a full spin.
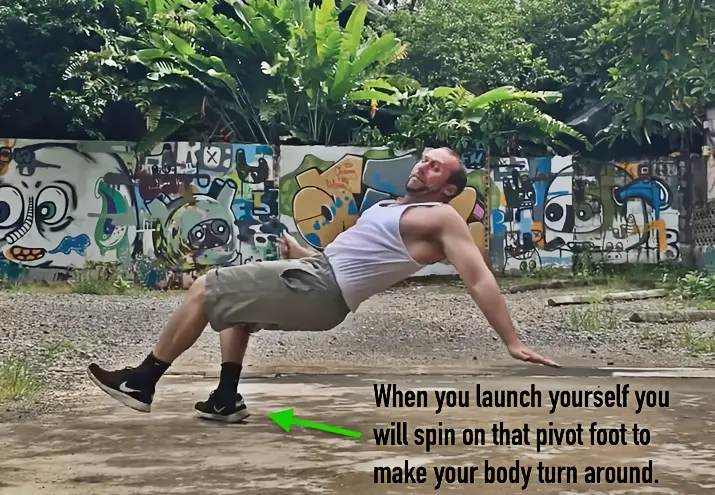
Step 3: Begin rotation on pivot foot
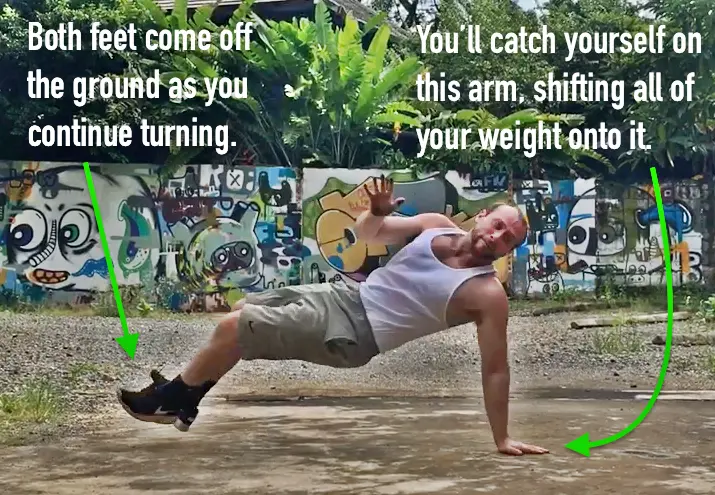
Step 4: Catch with support arm
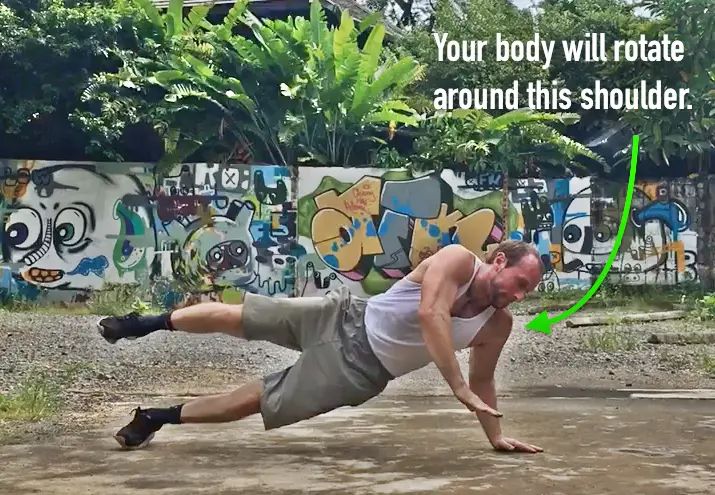
Step 5: Continue rotating around shoulder
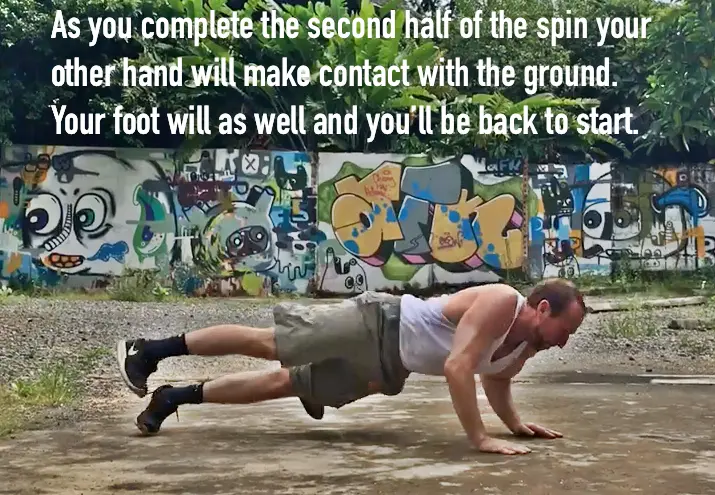
Step 6: Complete the rotation and land
Final Thoughts
While 360 pushups are primarily a show-off move used as part of a floor game freestyle sequence, they do teach you how to generate and control force.
In order to successfully pull one off, you need to develop enough power to force your body to spin and then you need to control it as you make your way back to the ground. While they aren’t appropriate for everyone, if you feel like you’re up for it, then use the progressions above to help get you there.