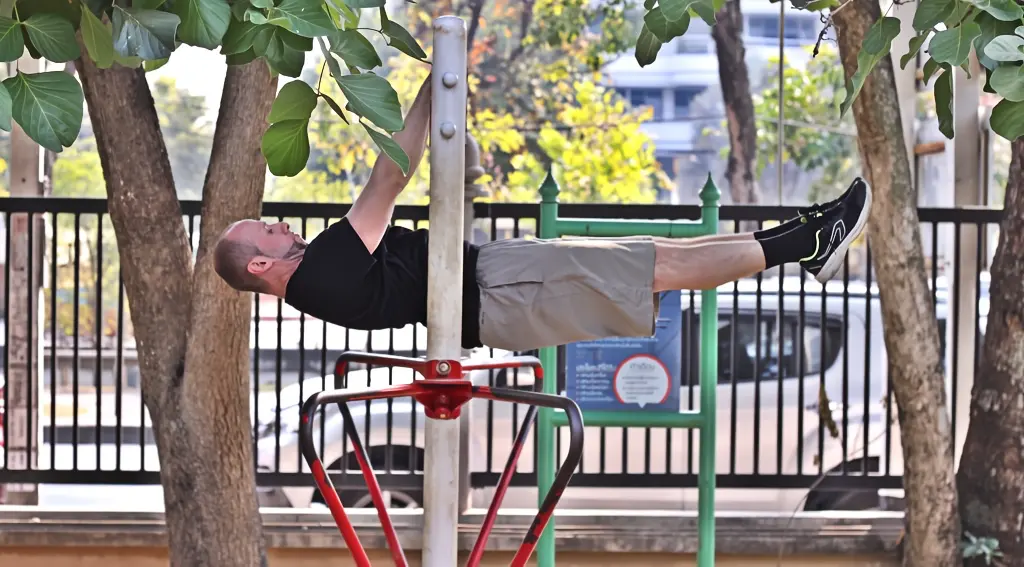
Despite not looking as mind-blowing to the general public as perhaps the human flag, the front lever is deceptively more difficult. In fact, aside from the planche, it is arguably the most difficult of the basic static holds.
It will take some time and lots of practice, but with the help of this front lever guide, you’ll get there.
Ready to learn the progressions?
Let’s get started.
⚠️ Prerequisites
Strong scapulae awareness is a must. A good strength-to-bodyweight ratio and a general foundation in some type of strength training would be helpful, though not absolutely necessary.
Those who are accustomed to moving heavy external weight, but not necessarily their own bodyweight may have a more difficult time. Lastly, overweight folks should consider losing some excess fat prior to attempting front lever work.
Table of Contents
- Breaking Down the Front Lever
- Tuck Front Lever
- Capital L Front Lever
- Slanted Front Lever
- One Leg Tuck Front Lever
- Straddle Front Lever
- Front Lever Raises (Reps)
Breaking Down the Front Lever
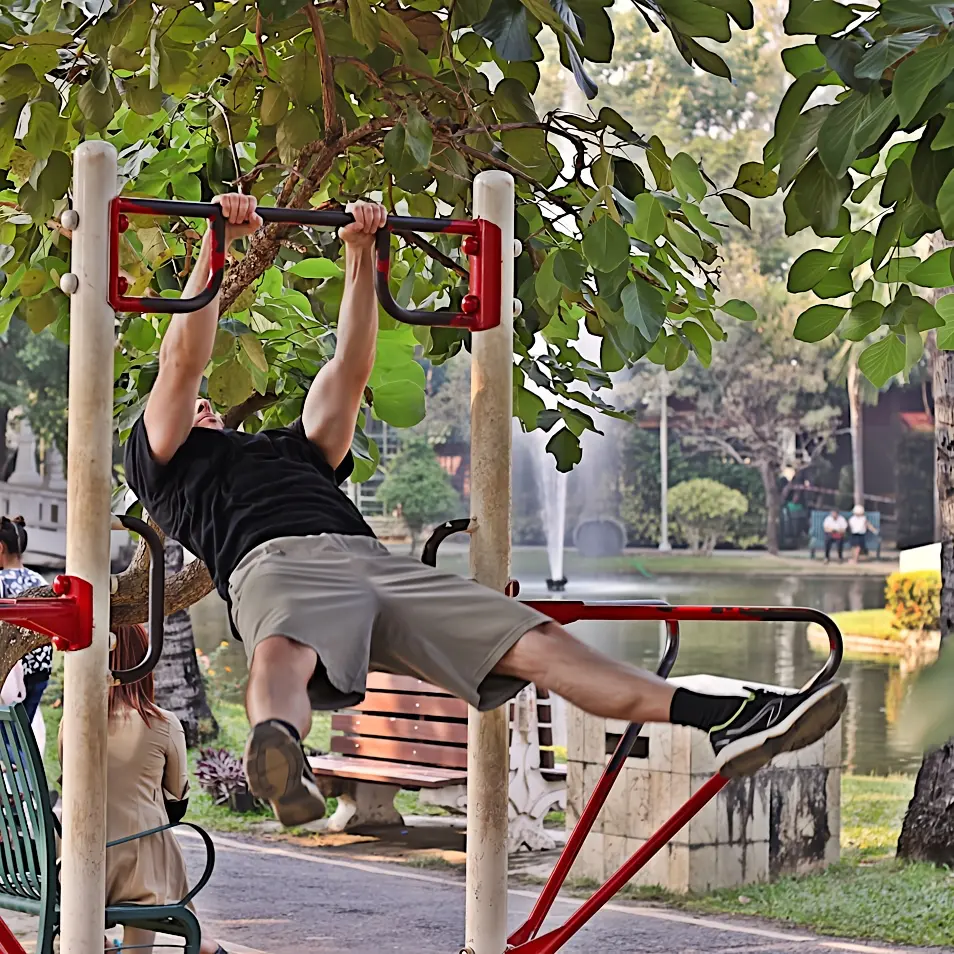
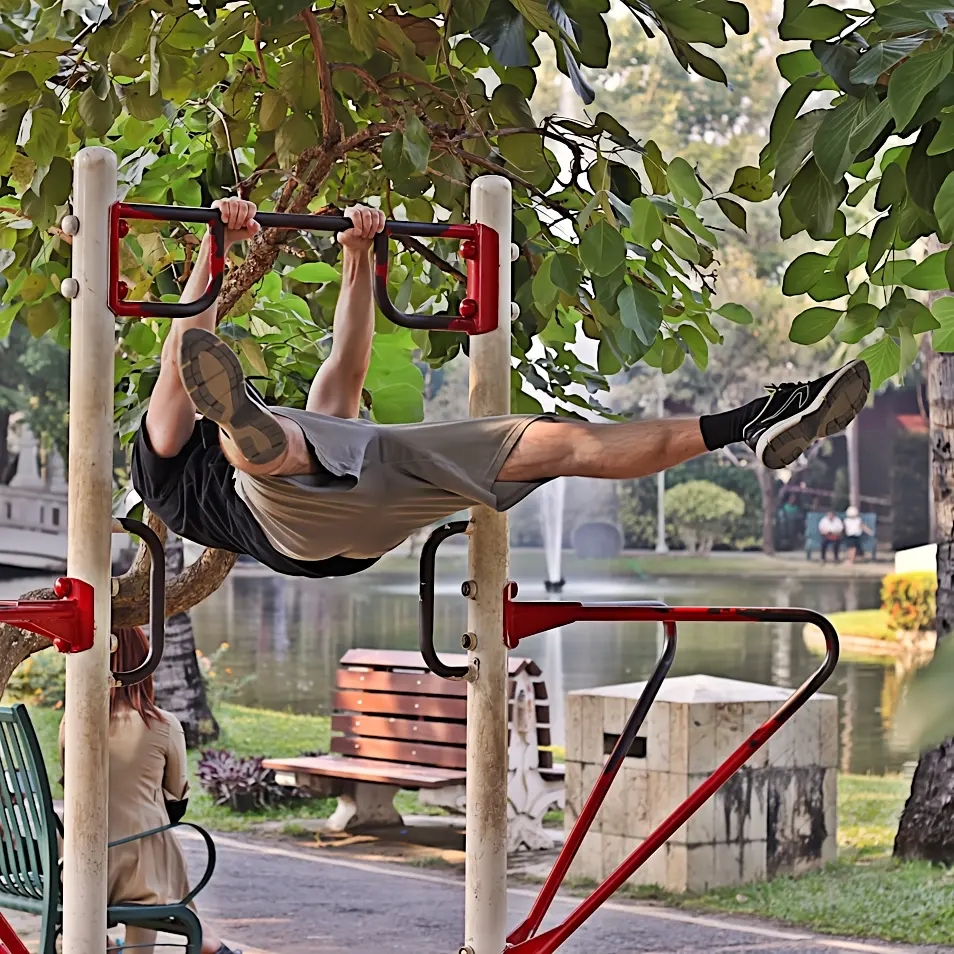
The front lever is a static hold borrowed from gymnastics. For gymnasts, it is considered a ‘basic move.’ For the rest of us, it’s hard as all hell and definitely on the ‘advanced’ end of the exercise difficulty spectrum. The technique is outlined below.
When performed on a pullup bar, the front lever can either be:
- Elevated into from below
- Descended into from above
Generally speaking, lowering into the front lever is easier than raising into it. We’ll break down both methods below.
Raising Into a Front Lever
- Grasp the bar at about shoulder width.
- Get into hollow body position (tighten core, squeeze glutes, point toes, etc – don’t forget to keep breathing!).
- Activate the scapulae by performing a scapulae depression. In fact, you’ll notice that if you go from a deadhang on the bar to a scapulae depression, that your body will naturally start to move in the direction of the front lever. Your torso will begin elevating and your feet will begin to move forward and up.
- Continue to elevate your body while maintaining hollow position and without bending your elbows. If you are strong enough, you will eventually be parallel with the floor below you.
A helpful visual cue is to pretend you are trying to rip the pullup bar in half.
In other words, pull the bar in opposing directions. That tension you create will help you. Some people prefer to do more of a bending-in-half force, but I think the ripping action is more helpful than the bending. Try both and see what works for you.
Lowering Into a Front Lever
Lowering into the front lever is how most individuals begin doing it. The reason for this is twofold:
First, as I mentioned, it’s slightly easier.
Second, it’s a natural outgrowth of following the front lever progressions we’ll get into below. Aside from the very last one (front lever raises), all of them have you descending into the hold. Therefore, it only makes sense that eventually as you get stronger from the progressions that you will unlock the move by descending into it.
Here’s how to do it:
- Grasp the bar at about shoulder width.
- Perform a knee raise and do the first half of skin-the-cat.
- Once your torso is vertical, unfold your legs so that your entire body becomes vertical. Your legs should be in front of the bar, not behind it.
- Slowly lower your body from vertical to horizontally parallel. As you lower, think about your cues. Try to maintain that ripping-the-bar-in-half tension. Maintain scapulae awareness. Keep your core and glutes tight. Point your toes. Keep breathing.
Much like with the back lever, it can sometimes be difficult to tell if you’ve hit the point of being parallel. A training partner can help with this in real time, but recording yourself also works for delayed feedback.
The Kinesiology Explained
If you’ve read other chapters of the bodyweight exercise library then you’ve probably already seen the images below. They show up frequently and there’s a reason for that – scapulae (shoulder blades) control is necessary for a lot of advanced calisthenics moves.
The front lever is no exception.
If you have weak scapulae, you won’t be able to maintain support in the front lever position.
If you choose to elevate into the front lever, then the movement will be initiated via scapulae depression as you see in the image below and as was mentioned above.
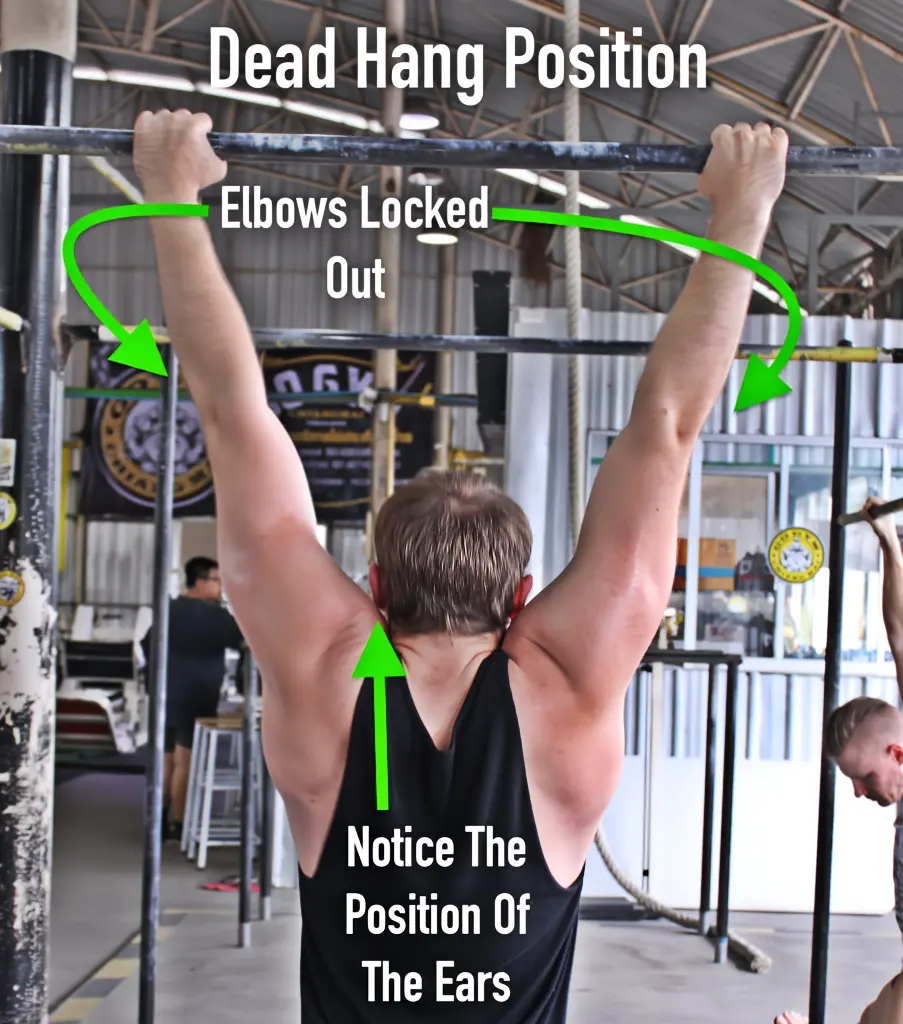
Dead hang position
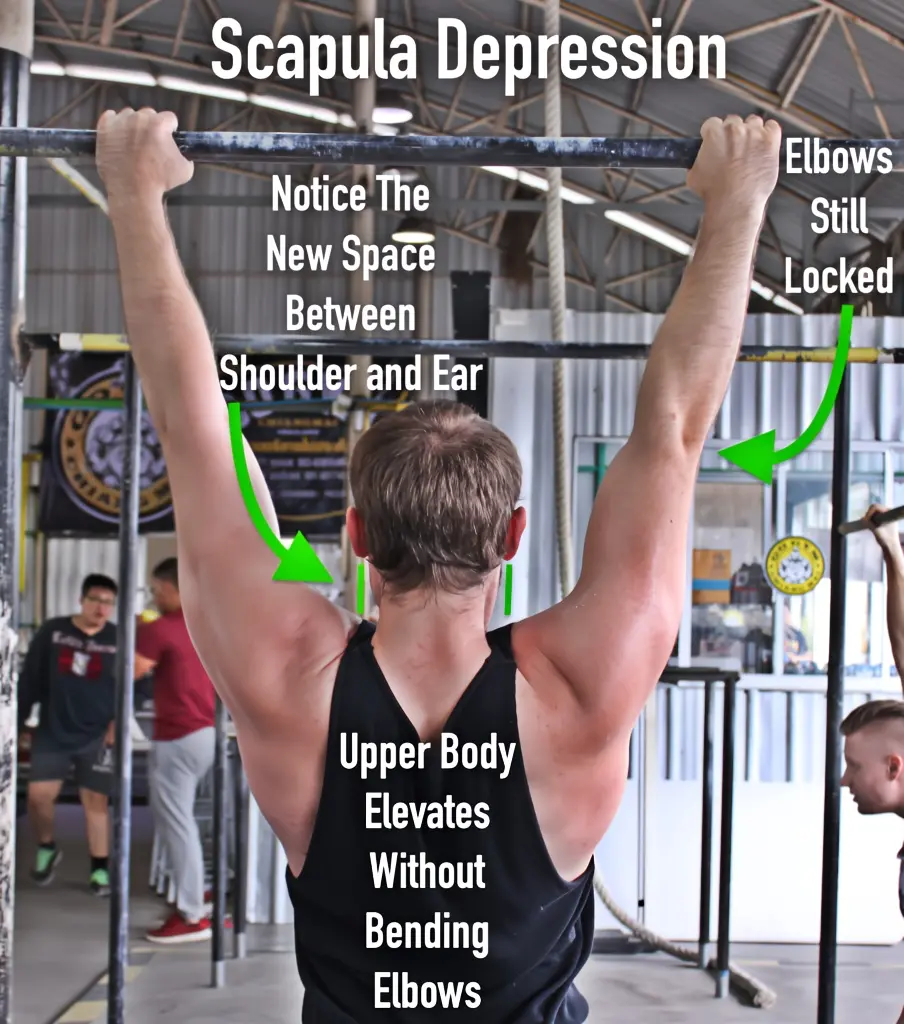
Scapulae depressed
Once you reach a certain angle, the serratus anterior will begin to take on more load to support your body. If you aren’t familiar with this muscle, it’s what gives you the extreme winged / mutant abs look. Think about where your inner lats connect to your ribs and torso. If the serratus is developed enough, you’ll see these ab-looking muscles in that area. These are the serratus. Due to the angle of gravity coming down on your body and the position that your body takes up in space when performing the front lever, this serratus anterior muscle has to work hard to keep you there.
Tuck Front Lever
As with all of the lever static holds, if you can shorten the length of the lever, then you will effectively make the exercise easier. The tuck front lever is the first and easiest of the progressively more challenging exercises. Each of them gradually increases the load on your body.
You should aim for a solid 20 second hold in the (1) beginner tuck front lever position before moving on to the (2) 90 degree tuck variation.
Notice the angle of the hips and legs in each one.
With the beginner tuck, you will be at about 45 degrees (give or take).
When performing the 90 degree tuck, the angle between your hips and torso will be exactly as the name implies – 90 degrees.
The (3) next step after this would be to bring the knees forward even more while simultaneously lifting the hips upward.
This will eliminate the 90 degree angle so that only a straight line will exist between your shoulders and knees. Your body will be at a slant. If this is too difficult to hold but you feel like you aren’t too far from being able to hold it then you can try to do reps where you transition back and forth between (2) and (3).
90-degree tuck front lever
Advanced tuck with slanted body position
Don’t forget the cues from the front lever technique described earlier!
Capital L Front Lever
Regular capital L (legs pointing up)
Advanced capital L (knees bent)
The capital L front lever might have a more official name but I call it that simply because that’s what your body looks like when you do it.
Sort of.
There are two ways to do it.
One version looks like a capital L that’s been written backwards. The other version looks like it’s been written backwards and then tipped over. One of them is also easier than the other. We’ll start with that one first.
The way to get into it is the same as the tuck front lever with simply the addition of one extra step. Once you are in the tuck front lever, just unfold your legs, but unfold them upward instead of forward. The caveat is that you do need to have some hamstring flexibility to do this correctly. If you have tight hammies then you won’t be able to unfold your legs completely straight to create the backwards capital L shape.
In terms of difficulty, this variation would like somewhere between progressions (1) and (2) in the previous section.
The more challenging version is very close to a full front lever and thus significantly more difficult. For this one you will also begin in a tuck front lever position. You will then unfold forward at the hips, but not at the knees. This will result in half of your lower body getting into the full front lever position, while the other half (from the knees on down) will be hanging below.
Again, this variation is very close to the real deal hold and a big step forward from the easier version. You can also think of it as progression (4) if you were following the path from the section above.
Slanted Front Lever
The slanted front lever is a progression where things can escalate very quickly with only a slight adjustment. It also happens to be an excellent gauge of just how close (or far) you are from being able to do the full front lever. That’s because your body is in a fully straight position just like it is in the front lever, but instead of being parallel to the floor, it is at an angle. The degree of that angle is controlled by you.
If we think of the starting position as having our body in a vertical line and the ending position as having our body in a horizontal line, then the degrees of difficulty are along that range.
The way to do this is:
- Perform the first half of skin-the-cat.
- When your torso is vertical, just unfold the legs upwards to position yourself into a (mostly) straight line.
- Then tighten everything up and begin lowering your straight body down. Do it slowly.
- When you feel like you are about to lose control – freeze! That’s your support position. You will hold that for time.
Do 10 sets or so and try to hold it for 15-20+ seconds each time. If you can hold it for longer than 30 seconds then it’s time to descend a little further down next time.
One thing to note with the slanted front lever is that while it doesn’t matter where you begin, you need to be able to maintain support somewhere along the aforementioned axis. In other words, if you can’t lower your body out of the vertical straight line even a tiny bit, then it’s too early for you to start incorporating slanted front levers into your training. Hanging vertically is great for your grip strength but won’t do all that much to help you unlock the front lever. Go back and work the tuck lever for a while until you can create some kind of an angle with your straight body.
One Leg Tuck Front Lever

The one leg tuck means that you are almost there. If you can get into this position and hold it for at least 10 seconds then start working it for sets. If you can’t get quite parallel but close then that’s okay too. Take the slanted front lever and combine it with this to do a slanted one leg tuck front lever.
One important thing to note is to make sure you alternate which leg is tucked. Do one set with the right leg tucked and the next set with the left leg tucked. Then just keep going back and forth for the duration of your sets. This way you strengthen each side equally.
When you get to the point where you can hold yourself parallel to the ground for at least 15-20 seconds then you can also begin experimenting with the advanced tuck. This works on the same principle as the two legged advanced tuck. The adjustment is the same, which is to adjust the angle of the tucked hip. Instead of being at a (roughly) 45 degree angle, you’ll want to bring the tucked leg forward so the knee stacks above the hip, creating a 90 degree angle.
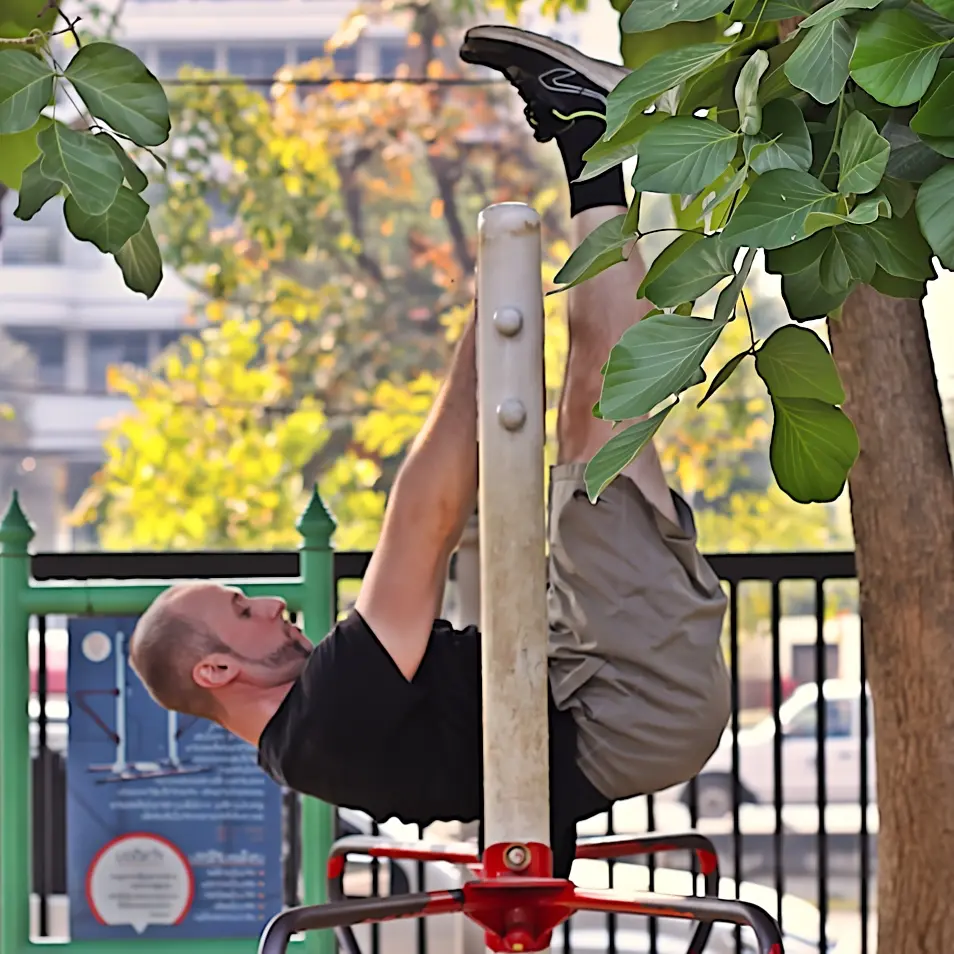
Straddle Front Lever
The straddle front lever is the wild card of front lever progressions. I say that because it can be easier than some of the other progressions, but it can also be almost as tough as the actual front lever.
The variable that decides the difficulty level is how flexible you are at the groin. If you can do a full split then then the straddle front lever can be a really good beginner to intermediate progression.
If on the other hand you’re tight as a…(I’ll let you pick your own analogy)…then it shouldn’t be approached until you make significant progress on your tuck front lever, capital L front lever and one leg tuck front lever.
The way you get into it is the same as the other front lever progressions:
- Do the first half of skin-the-cat.
- When your torso is vertical, unfold your legs.
- Separate them into a straddle position and begin lowering your body down.
- Once you hit parallel, hold for time.
Again, having a training partner can help with letting you know if you’ve reached parallel level. Otherwise just use your cell phone to record yourself. This will give you an idea of how low you are getting.
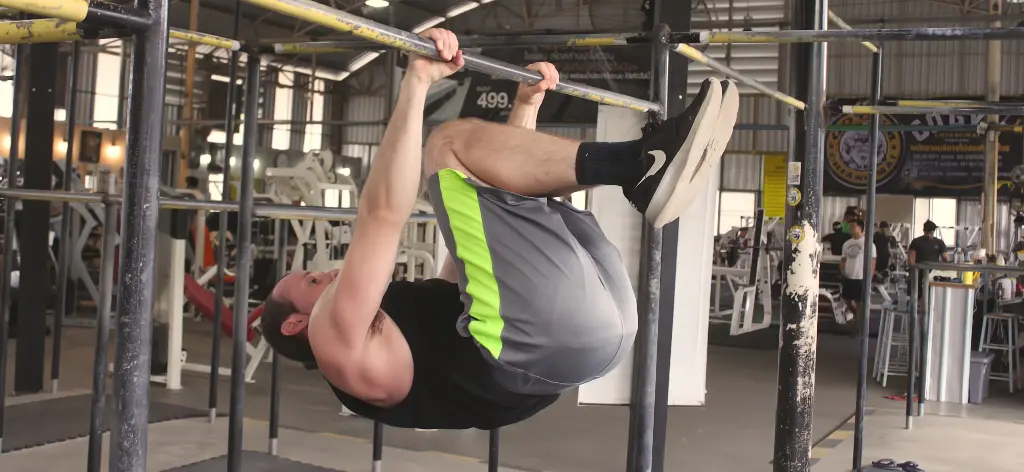
Front Lever Raises (Reps)
Much like getting into the front lever itself, these can also be attacked from a bottoms-up or a top-down approach. The top-down style is sometimes referred to as ‘ice cream makers’ in the calisthenics world and ‘sling bar’ in gymnastics. Let’s take a look at both below.
Starting From the Bottom
The technique for these is identical to performing a front lever from a deadhang position. This was described earlier in the ‘elevating into the front lever’ section.
The only difference – and it’s a major difference – is that it doesn’t ask you to actually hold the front lever. You only have to be able to raise yourself to the point of being parallel to the ground (i.e. – the front lever). You can then lower back down to the starting deadhang position.
The important thing to remember is that this is done in a controlled fashion. It’s not a wild swing into the front lever with a subsequent sudden drop. You are using your strength to elevate your body and then using your strength again to allow it to go back down as one solid unit.
That’s not to say that the reps won’t happen relatively quickly, but they need to be as controlled as possible. Tension should be maintained throughout the duration of the set or for as long as you can do so.
You can also perform these using the advanced capital L front lever shape or a straddle front lever shape. Another option is to use an assistance/resistance band. Just step into it so it’s stretched from the bar to the bottom of your feet and then proceed to do your reps. Remember the initiation force with these will be your scapulae.
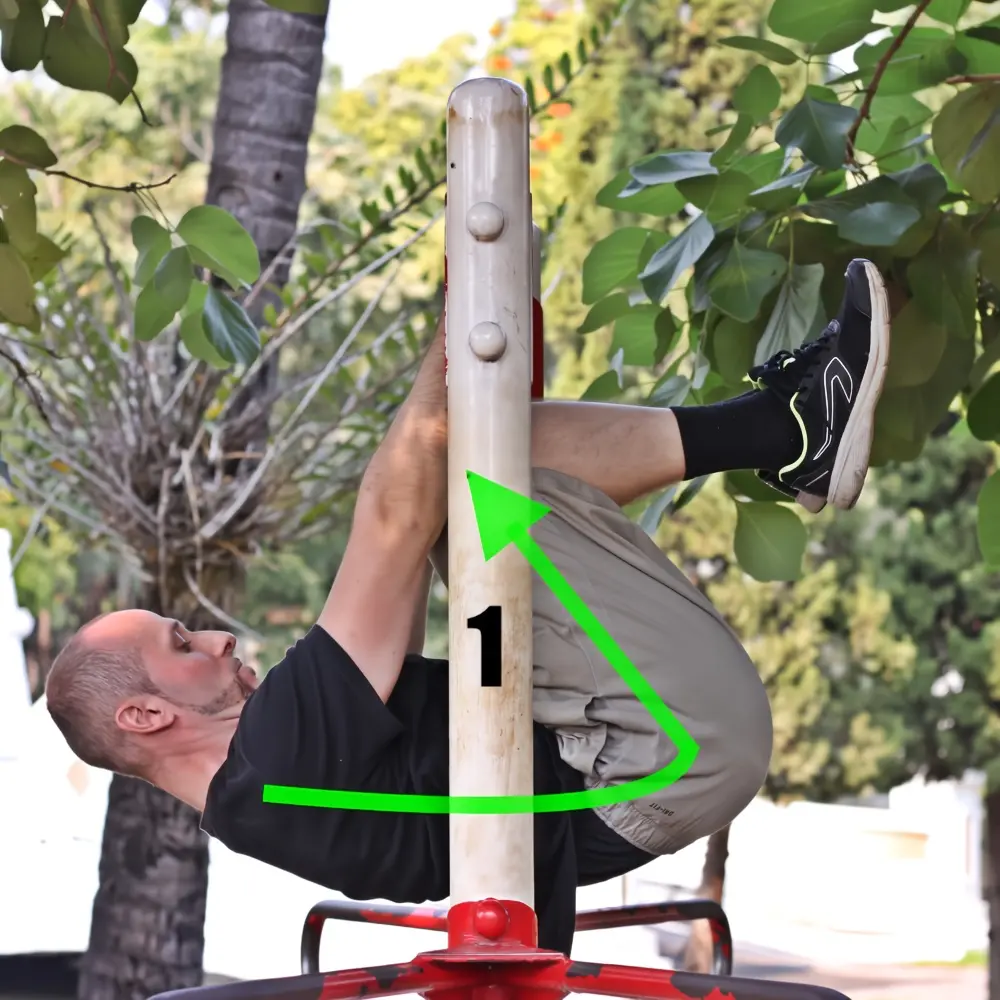
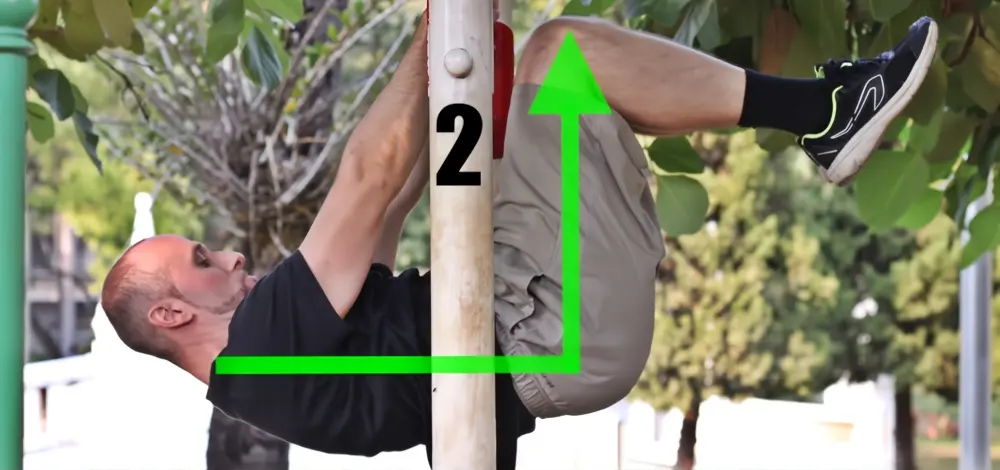
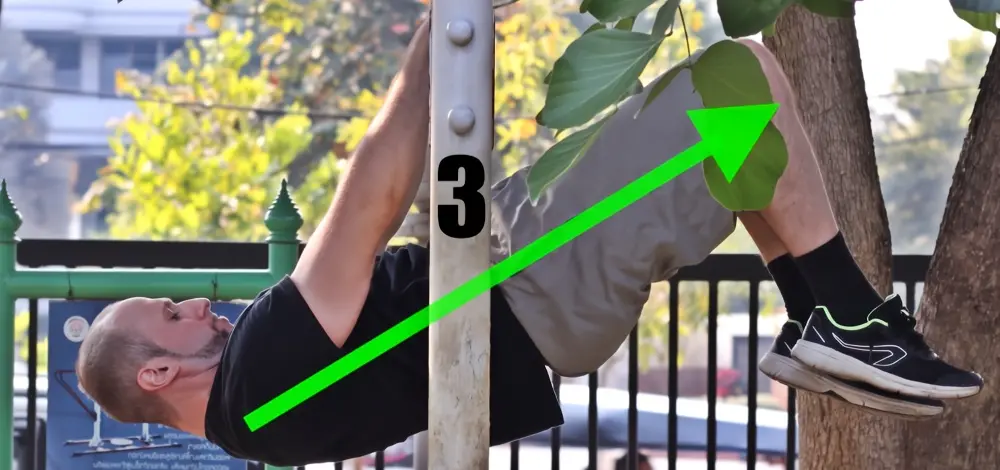
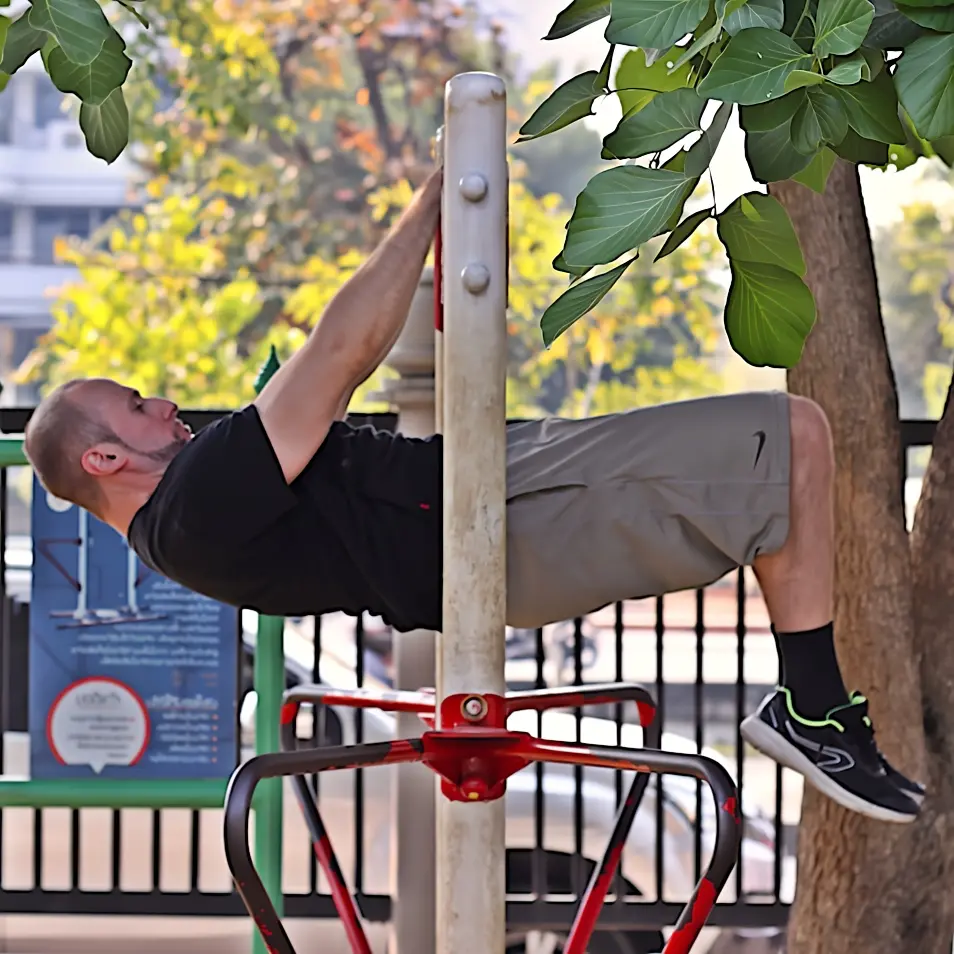
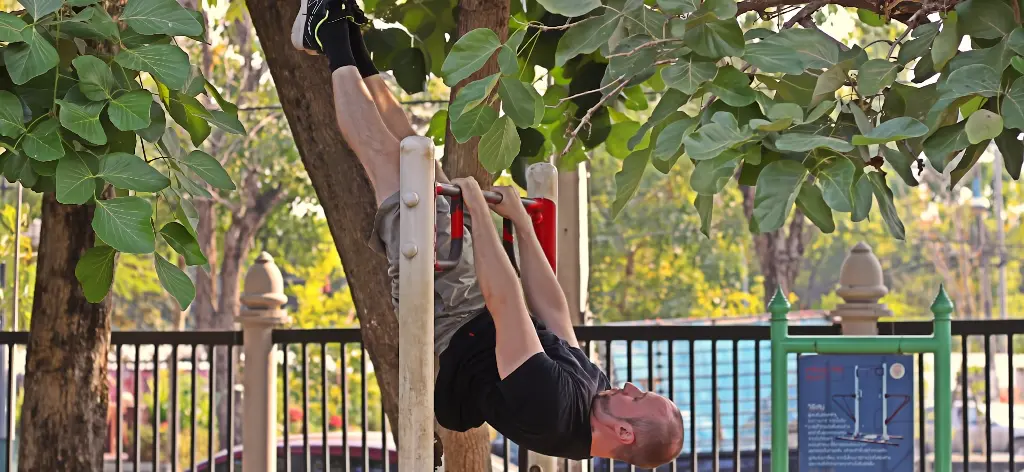
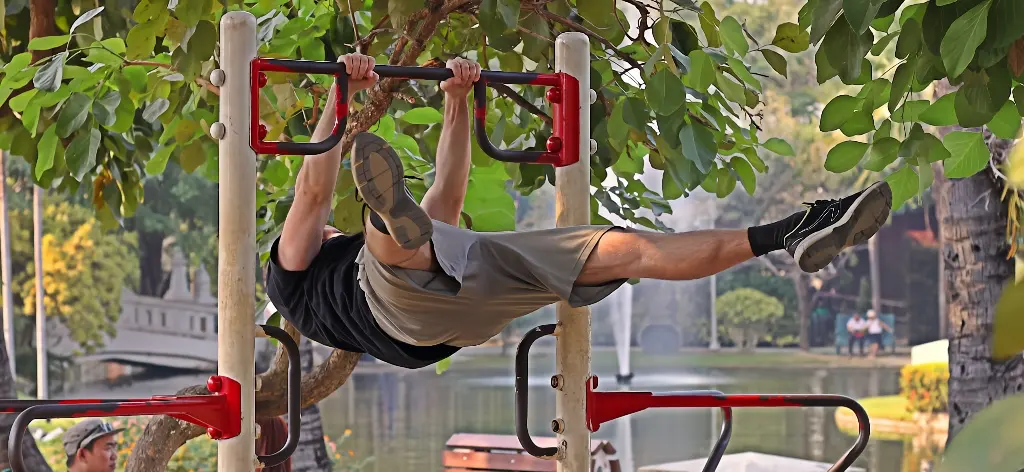
Check out the images below to get an idea of what it should look like using the straddle front lever as an example.
Starting position
Midway position
Final position
Lowering Down From the Top
This variation is sometimes also referred to as ‘ice cream makers.’ Here’s how you do it:
- Take an about-shoulder-width hand position on the bar.
- Perform a pullup but don’t go back down. Hold your chin over the bar at the top at the very least, but preferably bring your upper chest to the bar.
- Tense everything up so that your body is one stiff, solid unit. Core and glutes should be tight. Toes should be pointed.
- From the top of the pullup, lean backwards as if you are trying to lie down. Your feet should elevate at the same time. Essentially, what you are doing is leaning back into the front lever.
- Once you hit that parallel point (i.e. – you are in the front lever), try to pause for 0.5 – 1 second and then pull yourself back up in the same exact way you came down. This is where it gets tricky for most people so you really want to pay attention to what you are doing here. The going back up motion should not be another pullup like you did to initiate the exercise. Your body should remain stiff as one cohesive unit. Don’t let your legs drop or allow any other part of your body to relax. When looked at the from the side, your entire straight-line body is simply moving from vertical to horizontal and back. No limbs dropping. Of course when you become fatigued and can’t do it anymore then you’ll lose the form, but the goal is to try to remain in it for the duration of the set.
Final Thoughts
In gymnastics, the front lever has its place alongside the elbow lever, back lever, human flag, and planche as a foundational static hold. There are other holds such as the iron cross or the maltese which are considered even more advanced, but despite this, even the foundational ones are out of reach for most folks who would otherwise be considered fit. This just speaks to how insanely dedicated and hard working gymnasts are.
With that said, you don’t need to be a gymnast to achieve the front lever. You just need dedication, consistency, persistence, and the right set of tools. I can’t help you with the first three things, but you now have the tools at least. Put them to use and get it done.
If you use this guide to achieve your first front lever, please tag @kalisthenics_nomad and #CalisthenicsNomad in your success post on Instagram. I may even repost it to feature you!