If you’re just getting into inversions and you want to learn how to do a headstand properly, then it’s crucial to grasp some fundamental concepts. These will help you execute the movement properly and help reduce your chances of getting injured.
While the headstand is not a difficult strength move, it does require some balance, proprioceptive awareness, and, most importantly, a comfort level with being upside down. It’s this last part that throws most first-timers for a loop.
In addition, anyone attempting a headstand should also take into account the pressure it puts on the neck. If you aren’t extremely overweight and you don’t have any preexisting neck / spinal problems, then in most cases you’ll likely be fine. While the neck isn’t typically exposed to pressure in daily life in the way that it is while performing a headstand, it is by nature fairly strong because it has to hold up your skull at all hours of the day when you aren’t lying down.
Having said that, some people find the pressure uncomfortable, but this sensation usually either goes away or lessens with time as you continue to practice.
⚠️ Prerequisites
Normal bodyweight (not too skinny / not too overweight). No preexisting neck or spinal cord injuries. No recent history of whiplash or other similar accidents that may have left your spine vulnerable to injury. Finally, a willingness to be upside down.
Table of Contents
- Understanding the Self-Preservation Mechanism
- Understanding the Tripod Setup
- Ways to Enter the Headstand as a Beginner
- How to Dismount from the Headstand
Understanding the Self-Preservation Mechanism
The human brain operates with the goal of preserving the organism at all costs. It does many of these things on autopilot via the autonomic nervous system.
For example, you’re likely already familiar with the ‘fight-or-flight’ mechanism, where the brain signals the body to release massive amounts of adrenaline, norepinephrine, and other hormones if it senses imminent death. That hormone release can sometimes result in displays of superhuman strength.
Another example is when the body is confronted with freezing temperatures. The brain ends up allocating all of the oxygenated blood supply to the most vital organs. That’s why we develop frostbite on our fingers, toes, etc. The brain performs these functions (and many more) to ensure the survival of its host – you!
How does all of this play into the headstand?
Well, if you’ve never played around with inversions (getting upside down) before and you try it for the first time, your brain will receive that feedback and immediately sense ‘danger.’
That’s because it hasn’t been trained to balance and perceive the world when your body is positioned in that way. It’s unfamiliar territory. In an effort to save you from this perceived danger, it will attempt to thwart your efforts to get upside down. This can manifest in all sorts of ways, ranging from dizziness to a feeling of ‘head rush.’ Fear and uneasiness are also common accompanying emotions. With practice, these feelings and sensations will all gradually subside.
There are three main ways to override the self-preservation mechanism. These are:
- Frequent practice to increase proprioceptive awareness while being upside down.
- Using a support of some kind. This could be a wall or another human spotting you. We’ll cover those below.
- Self-confidence, which is derived from knowing how to properly set up for the headstand and understanding the mechanics of it. We’ll touch upon that next.
If you leverage the three points above to your advantage, you’ll be headstanding like a champ in no time.
Understanding the Tripod Setup
Unlike the handstand, which requires two points of contact with the ground, the headstand allows for three.
This makes it much easier to perform from both a strength and a balance perspective.
The key is to create a tripod between your two hands and your head.

A lot of beginners get this wrong by placing their head too close to their hands. By doing this, they don’t take advantage of the balanced distribution between the three points of contact. The position actually begins to resemble more of what’s going on in a handstand, which is considerably more challenging.
The easiest way to think about it is to visualize a camera tripod and then recreate it. The image above gives you an insight into what it should look like.
Now that you see the tripod, it’s time to think about how to get upside down.
In my opinion, the best way – at least initially – is with a spotter’s assistance. The reason for this is that by relinquishing a lot of the control over your body to someone else who is in a mechanically stable position, you will accomplish two things:
First, the safety override signal from your brain will be a little weaker, and second, they will be able to guide you into the exact position.
What do I mean by exact position?
Until you get very comfortable with maintaining a perfect headstand, you will often have difficulty discerning whether your legs are completely straight or not. This is because you won’t know what it feels like until you do it many, many times. The spotter can give you feedback you can’t give yourself, and in the beginning stages, they will simply place you into the proper form, with legs straight and pointed up.
Having said that, I understand that you may not always have access to a spotter. In that case, you can use a wall.
Ways to Enter the Headstand as a Beginner
Now, let’s review the fine details of how to use a spotter versus using the wall.
Using a Spotter
As I just mentioned, utilizing the assistance of a friend, acquaintance, professional – or even your mom if that’s what it takes – is the ideal route to follow when first beginning your headstand journey. Spotting someone on a headstand doesn’t require a crazy amount of technical expertise, but certainly if the person understands body mechanics or exercises themselves, then they will make a more ideal spotter than someone who doesn’t.
At the very least, your spotter should:
- Feel comfortable helping you.
- Have enough strength to lift your legs and hold you steady. If the person is significantly smaller than you (unless they are very strong), then I would also be careful. I say this if a worst case scenario happened and you both lost balance. You don’t want to accidentally crush your spotter, but if they are around your size or of a larger stature, then it reduces the risk of injury should you both happen to fall.
How to Do It
The process itself is straightforward:
- Get into the tripod formation with your hands and head on the floor.
- Tuck your knees.
- Have your spotter pick your legs up by grabbing at the ankles. Stay tucked as they invert your torso upside down.
- Once you are vertical, your spotter should unfold your legs and raise them upward toward the ceiling / sky.
- Depending on how tall they are, they may need to bring their hands lower (to your shins or upper legs).
When doing this, the first few times, you should mainly focus on finding a sense of comfort with being upside down. Don’t worry that much about balance yet. Just adjust yourself so that it doesn’t feel that weird.
Release and Catch
When you get over the awkward feeling and you are ready, you should ask your spotter to play release-and-catch with your legs.
You’ll follow all of the same steps above, but once you are in perfect headstand position, your spotter will slowly remove their hands from your legs.
However, they will keep them very close. This way, when you start losing your balance, they will immediately be able to catch you and bring you back into position.
You can play around with this by making several attempts at self-balance every time you get upside down. Do it to your comfort level.
Two Fingers Only
If you find that you aren’t ready for a complete release yet, then an intermediate method is to have your spotter let go of your legs with most of their hands and just keep one finger on each side.
This will still require you to take over some of the balance work because one finger on each side is only going to help you so much. If you start tipping, your spotter can always re-grab your legs with their full hands and just repeat the process. Then, at some point when the one finger becomes too easy, they can do a full hand release as described in the previous section.
By following the steps above, you will eventually train your brain to balance by itself.
Remember that when you were a little baby, you also had to learn to balance in order to walk. That also didn’t happen instantly, and your parents or someone else also probably spotted you. Eventually, you figured it out, and you’ll figure this out, too. It’s all about consistent repetition. Your body will adapt if you compel it to do so. So find a spotter and get to compelling.
Using the Wall
For those of you who are unable to find someone willing to help you with your headstand journey – don’t worry! You can do it by yourself, too. While it’s not as easy and there are certain disadvantages to it, it is possible!
In terms of thinking about the learning curve, what ends up happening is that you will face a steeper initial curve, but once you get over that first big hump, you’ll actually have an easier time unlocking the full headstand.
In contrast, a person who uses a spotter will have an easier time in the beginning, but may take longer to transition to the unassisted headstand due to possible over-reliance on their spotter.
The best way to self-spot is to use a wall and (optionally) a chair.
The steps here are also straightforward.
- Find a wall that has a good amount of open space on either side.
- Get into the tripod formation so that your head is positioned roughly 1 – 1.5 feet (0.30 – 0.45 meters) away from the wall.
- Get upside down. You have three options here.
First Option: One Leg Leads
Kick up and back with one leg and allow the other leg to follow. Don’t break the wall, but generate enough force to get your legs up there. The first few times, you will likely struggle with this, and your kicks will be too weak, so it’s best to overdo it against a dense wall that can take the impact.
Second Option: Knee Tuck Entry
Start in a knee tuck. Carefully raise your legs up so that your entire torso is vertical. If you need to tip back against the wall, then do so. Once you are upside down, unlock your legs from the tuck and extend them upward.
Third Option: Chair Assist
Place a chair so that you will be between the wall and the chair if someone were looking at you from the side. The purpose of the chair is to allow you to perform option (B) if you don’t have the strength to elevate your torso by yourself.
What you’ll do is lift up one leg at a time onto the chair. This will place your body into the vertical leg tuck or semi-tuck position. From here, you’ll be able to remove one leg at a time from the chair as you extend your legs into a headstand. The wall will be behind you, so you can fall back against it once you start losing your balance.
Regardless of which of the three options you end up choosing, at some point, you should end up upside down in a wall-supported headstand. From here, you will use the tap-away method to learn how to balance. The method is just what it sounds like – you tap your feet off of the wall so that you can try to control your balance. If you start losing it, then just fall back into the wall and restart. Play around with it for a few attempts and then dismount for a few minutes before getting upside down again.
How to Dismount from the Headstand
If you will have the assistance of a spotter during your headstand practice, then you can, to a large degree, rely on them to slowly guide your legs back to the floor. Having said that, at some point, you should start trying to do it yourself. If you’ll be using the wall as your spotter, then you’ll have no choice but to familiarize yourself with the dismount from the very beginning. There are several ways you can approach it, and with the exception of completely falling, no way is better than another.
Below are three common ways you can do it.
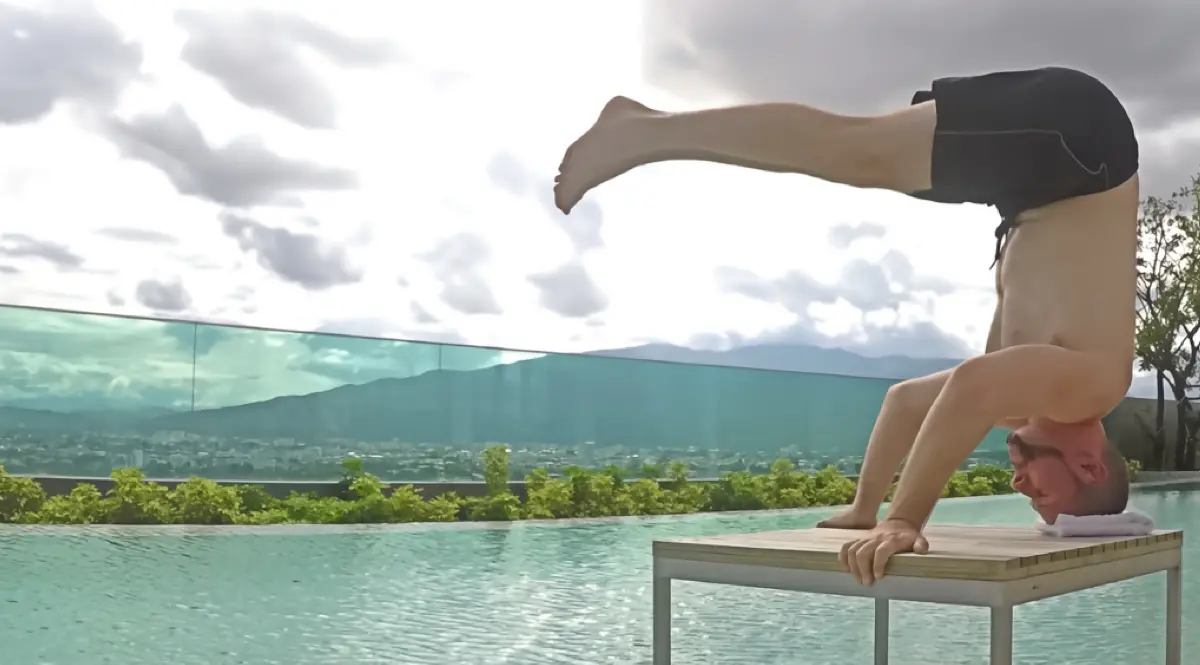
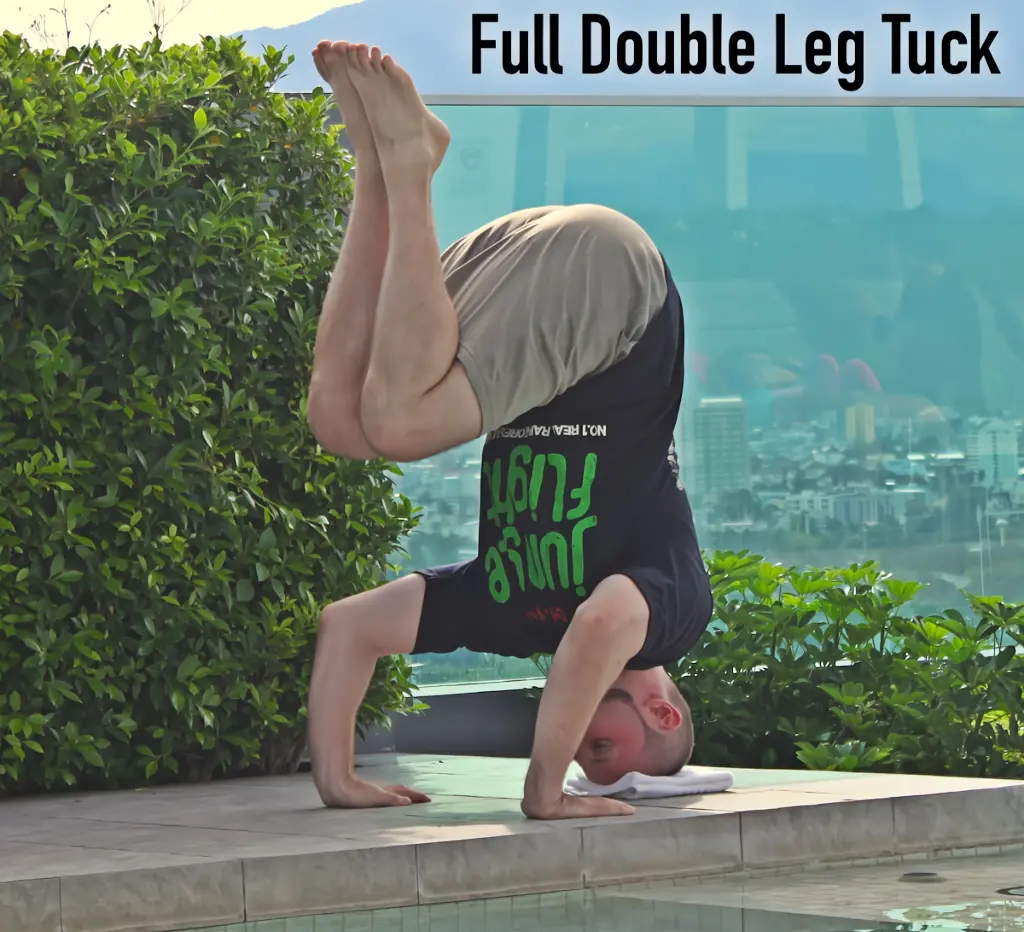
Full Double Leg Tuck
Go back into a full double leg tuck. Once in the full tuck, start shifting the weight off of your head and onto your hands as you simultaneously tip your tucked legs back to the floor. There will be a slight falling feeling to it as you tip your legs towards the ground, but it will be brief and controlled.
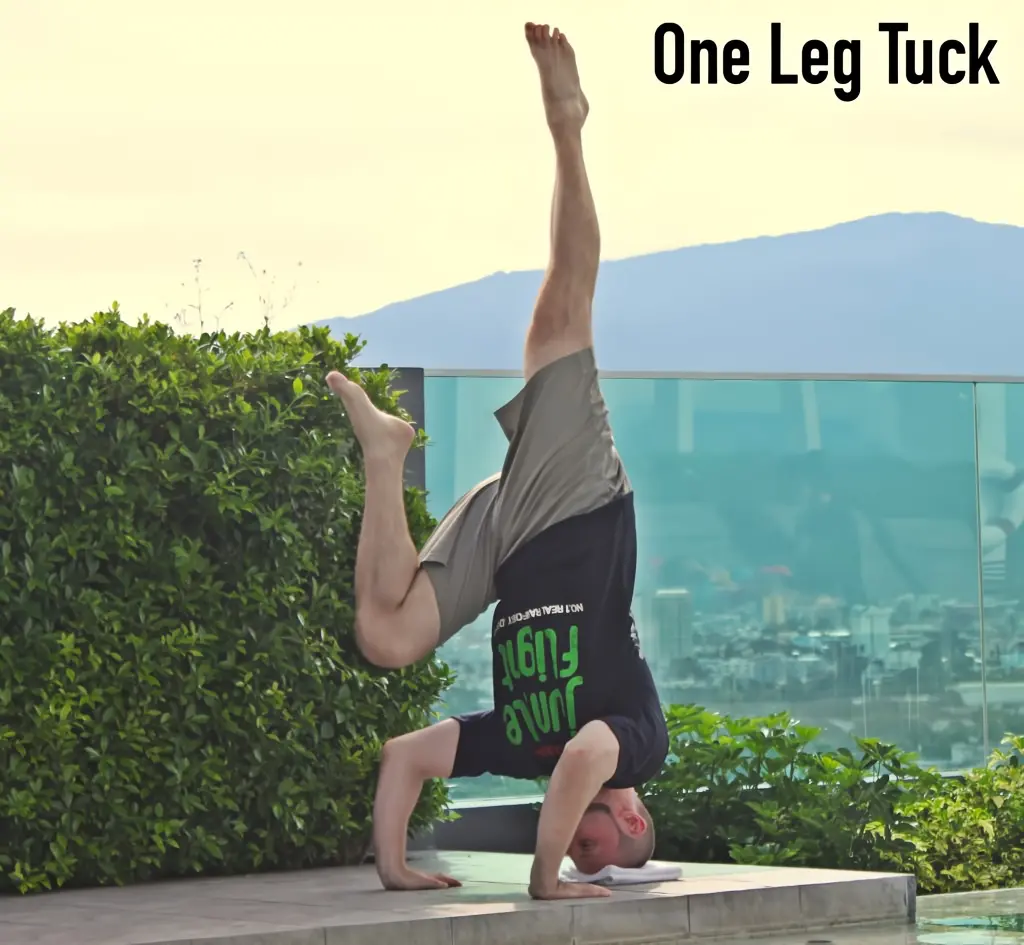
One Leg Tuck at a Time
Tuck one leg at a time. Some people find that this helps them maintain balance compared to the double-leg tuck. The rest of the process is the same. Once you tuck one leg, you’ll follow with the other leg, and then you’ll shift your weight onto your hands as described earlier.
Straight Legs Down
For those of you who have solid hamstring flexibility, you can keep your legs straight and bend down at the hips. Slowly lower your straight legs down towards the floor as you shift your body’s weight onto your hands.
If you are exceptionally flexible, then you can move your legs through the entire range of motion without ever moving your torso from the headstand position. For most of you, though (myself included), you will only bring them down so far before doing a short tipping down / lifting your torso up.
Final Thoughts
Thanks for taking time out of your day to read this guide. I hope it provided you with some insights that you’ll put to use sooner rather than later. Although it might not feel like it when you’re first starting with it, the headstand is actually a fairly easy move to unlock because of the tripod setup I covered earlier. The fact that you have three points of balance that you can distribute your bodyweight around is what makes it mechanically fairly easy (especially compared to the handstand). Once you get over the self-preservation feeling you’ll have it in no time.
If you end up using this guide to achieve your first unassisted headstand, please tag @kalisthenics_nomad and #CalisthenicsNomad in your success post on Instagram. I may even repost it to feature you!