
Bodyweight dips are familiar to most people who exercise. I’ve been to many gyms over the course of my lifetime and whether it was a small facility in a Tokyo suburb or a mega-gym in downtown Manhattan, every single one I’ve ever been to always had at least one dip bar station.
They are a staple exercise for a reason.
They work and they work well.
Much like pullups, they are also used by individuals from a variety of training disciplines. This means that quite a few variations and approaches to doing them have popped up over the years. I will explore many of those variations in subsequent guides, but for now we will go over the fundamentals of the main three – parallel bar dips, straight bar dips, and tricep dips.
If you aren’t able to do a dip yet, I will have a dedicated tutorial to teaching you how to get your first dip soon – so keep an eye out for it.
⚠️ Prerequisites
You should be able to do at least 20 clean pushups, and have healthy shoulders with minimal mobility issues.
Table of Contents
Classic Parallel Bar Dips
The setup for a bodyweight parallel bar dip is fairly simple. There are just a few important points to keep in mind.
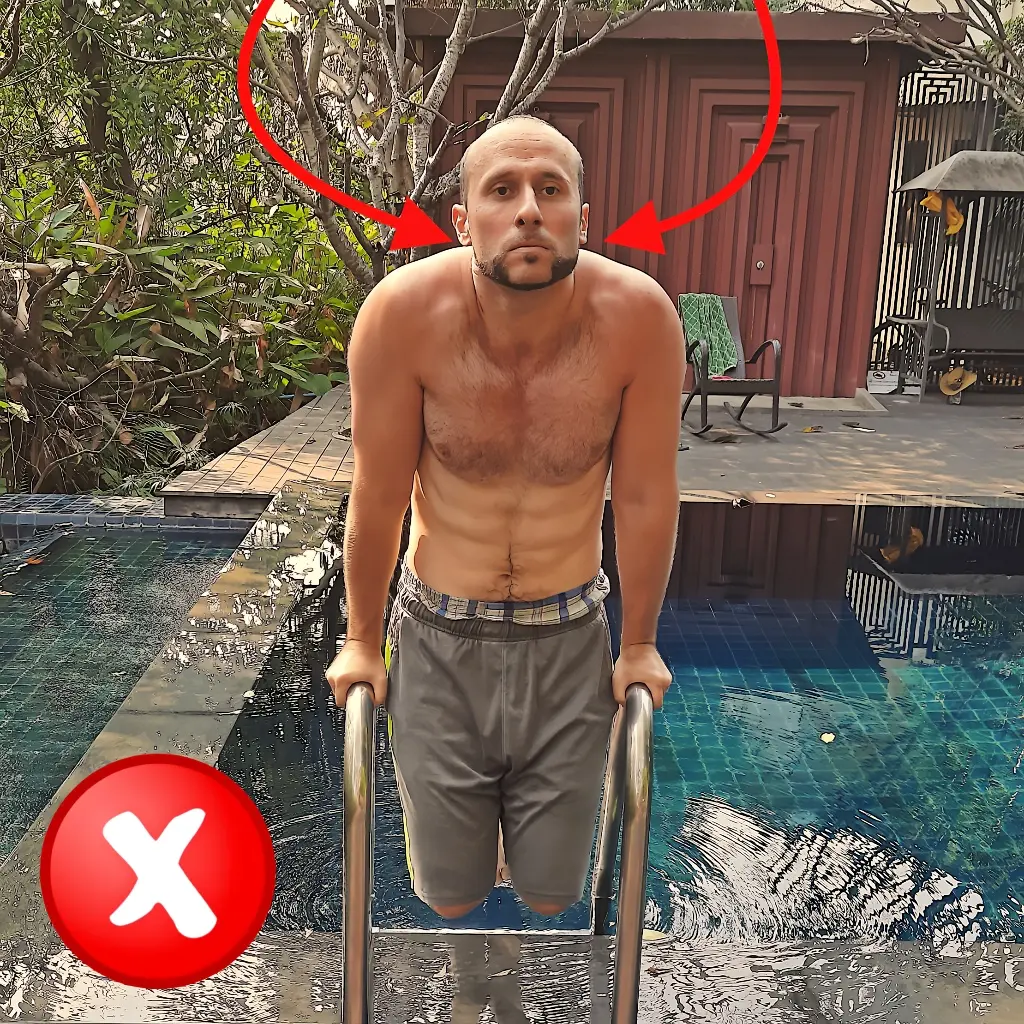
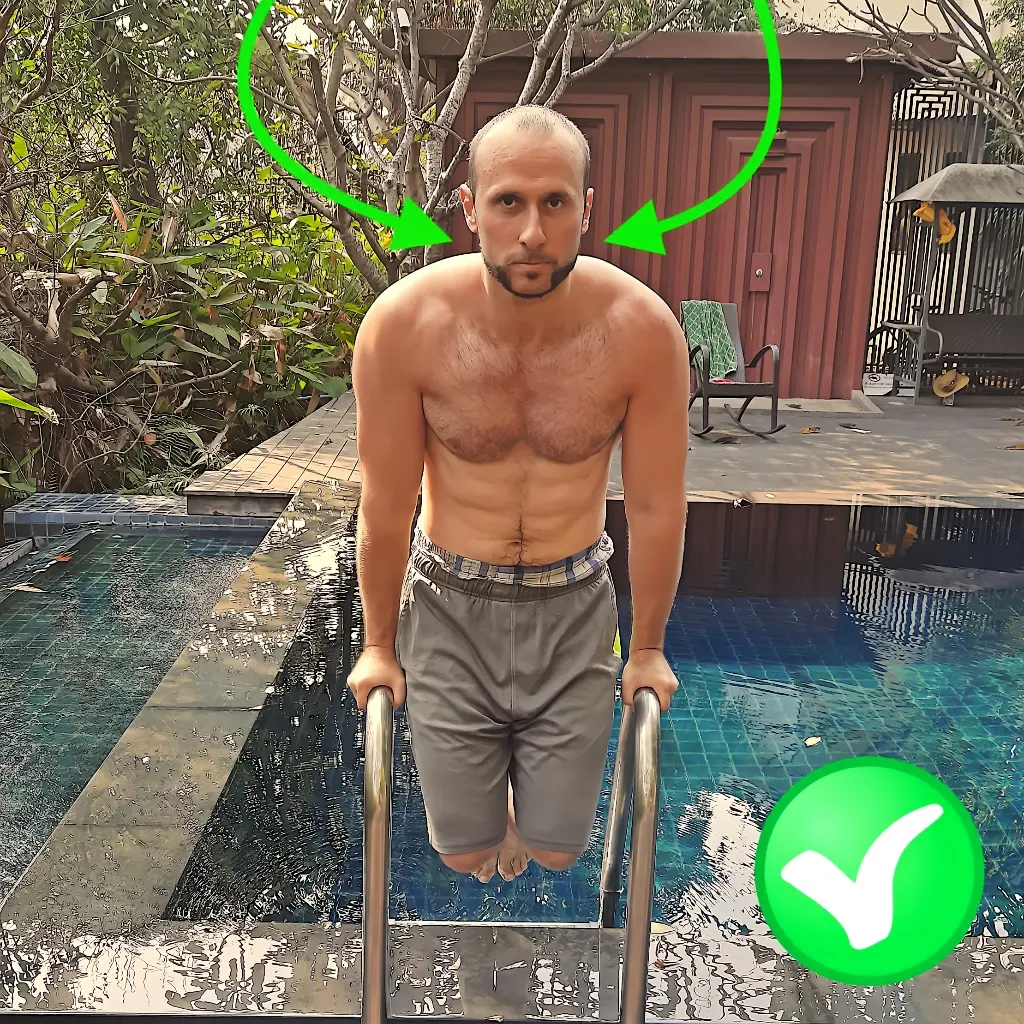
Traps and Shoulders
Don’t let your body sink towards the ground. You can tell this is happening if your shoulders start rising and approach your ears. You’ll also feel it in your traps a little bit (as if you were doing shrugs). Avoid this and keep a nice firm hold on the bars. No sinking.
Elbows
Similar to pushups, you’ll want to avoid excessive flaring of the elbows. They don’t need to be touching your torso either, although as a beginner you would likely have a hard time keeping them that close to your body anyways. The ideal angle isn’t set in stone, but roughly 45 degrees is good. We will cover how much you should bend them in the next section below.
Lower Body
This is probably the most flexible aspect of doing dips, but ideally you’ll want to have your legs straight and fully extended. However, it’s quite possible that many of you will be using either parallel bars or a dip bar station that does not allow for that. Don’t panic! It’s not that serious if you bend your knees and tuck your legs behind you. The main thing to keep in mind is that they need to be still and preferably together. As long as you are avoiding excessive kicking or jerking movements then you will be okay.
90 Degrees or Lower
’Correct’ range of motion is one of the most hotly debated topics when it comes to performing dips. Some trainers will tell you to just break 90 degrees by a hair and then come back up. Anything lower than that and you put your shoulder at risk they say. Some will even argue that simply going to 90 degrees is adequate.
My opinion is that it depends on the individual.
There are a few factors at play here, namely shoulder mobility, width of the parallel bars, and general comfort level.
If you have poor shoulder mobility and/or if the bars are very narrow then it will be more challenging (and risky) to do deep dips. Let’s say that neither of those things are a factor but you have a gut feeling that something just doesn’t feel right when you try to go low. Well that gut feeling is your body telling you something.
Listen to it!
Personally, I’ve been going ultra low on dips for over 20 years and my shoulders are as sound as a whistle.
I love going deep because it gives me a nice pec stretch at the bottom and the full range of motion just feels better. I feel like I’m cheating if I pause just after breaking 90 degrees.
However, I’ve also worked with plenty of clients that are better suited to going just below 90 before pressing back up. As I said, it’s really an individual thing.
Ultimately, you should at the very least make it to a 90 degree bend as a bare minimum.
I prefer going deep on dips – way past 90 degrees.
Also, if you can’t go any lower than that due to discomfort and you aren’t working on your shoulder mobility then perhaps it’s time to do that. Loosen up those shoulders with bar or band pullovers – and if you have the ability to – with skin-the-cat drills.
Do it for a few weeks and then gently and slowly re-test your depth. Hopefully you’ll be able to go a little bit lower. You don’t have to go as low as me, but breaking 90 would be nice.
To Lean or Not to Lean (Forward)
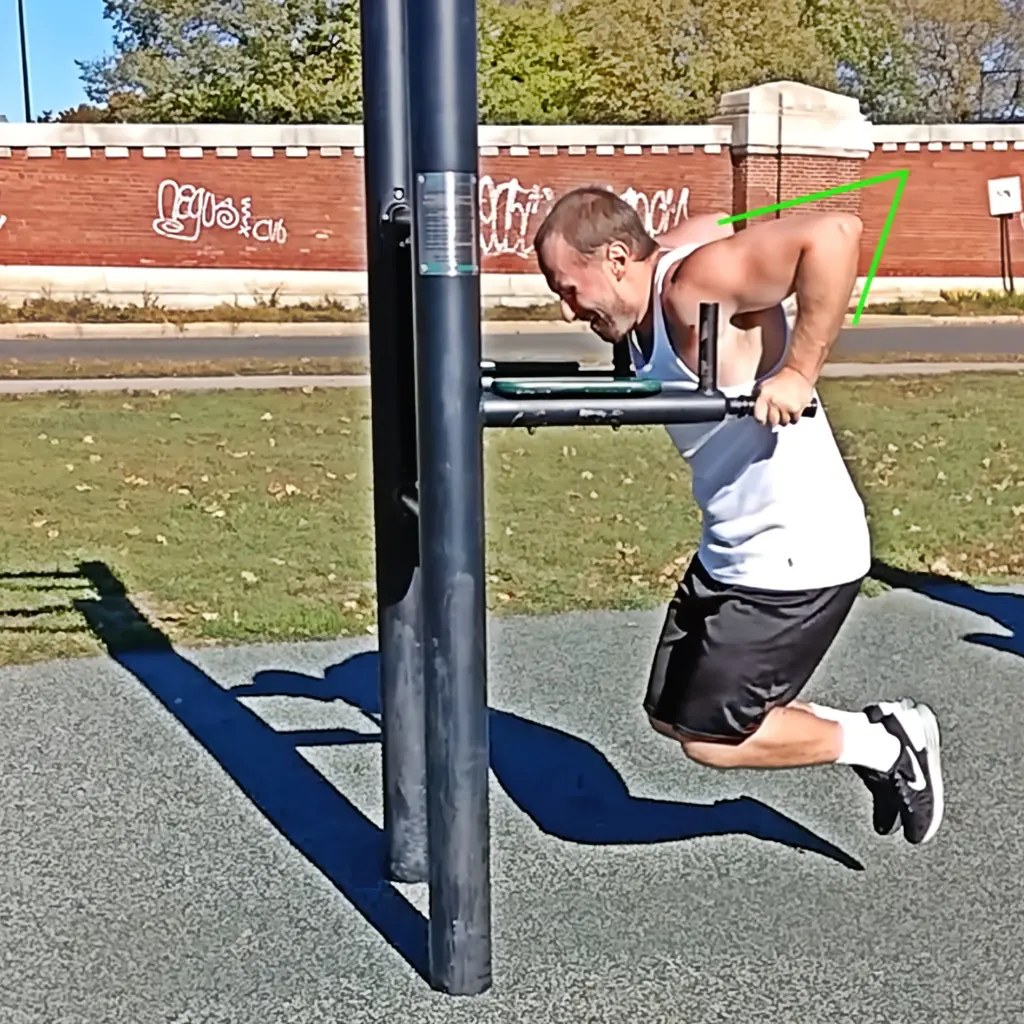
When performing dips, the function of the lean is to alter the load distribution of the working muscles. The more you lean forward while doing the exercise, the more your pectoralis (chest) and front deltoid (shoulder) take over. The more you lean back, the harder your triceps have to work.
Depending on what you want to emphasize that day will determine your lean.
The one thing you want to avoid is trying to keep completely vertical. Maintain at least a slight lean forward. It will feel natural to do this anyways.
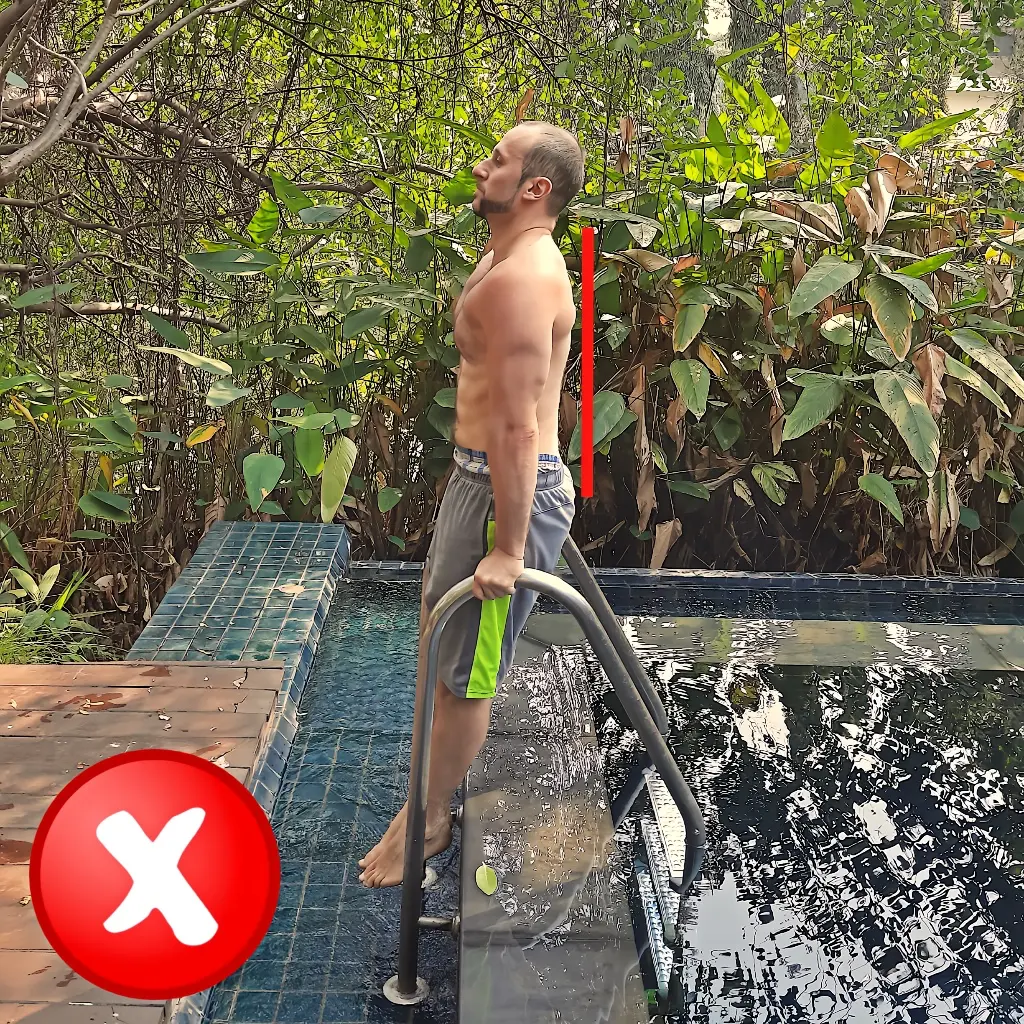
Incorrect - too vertical
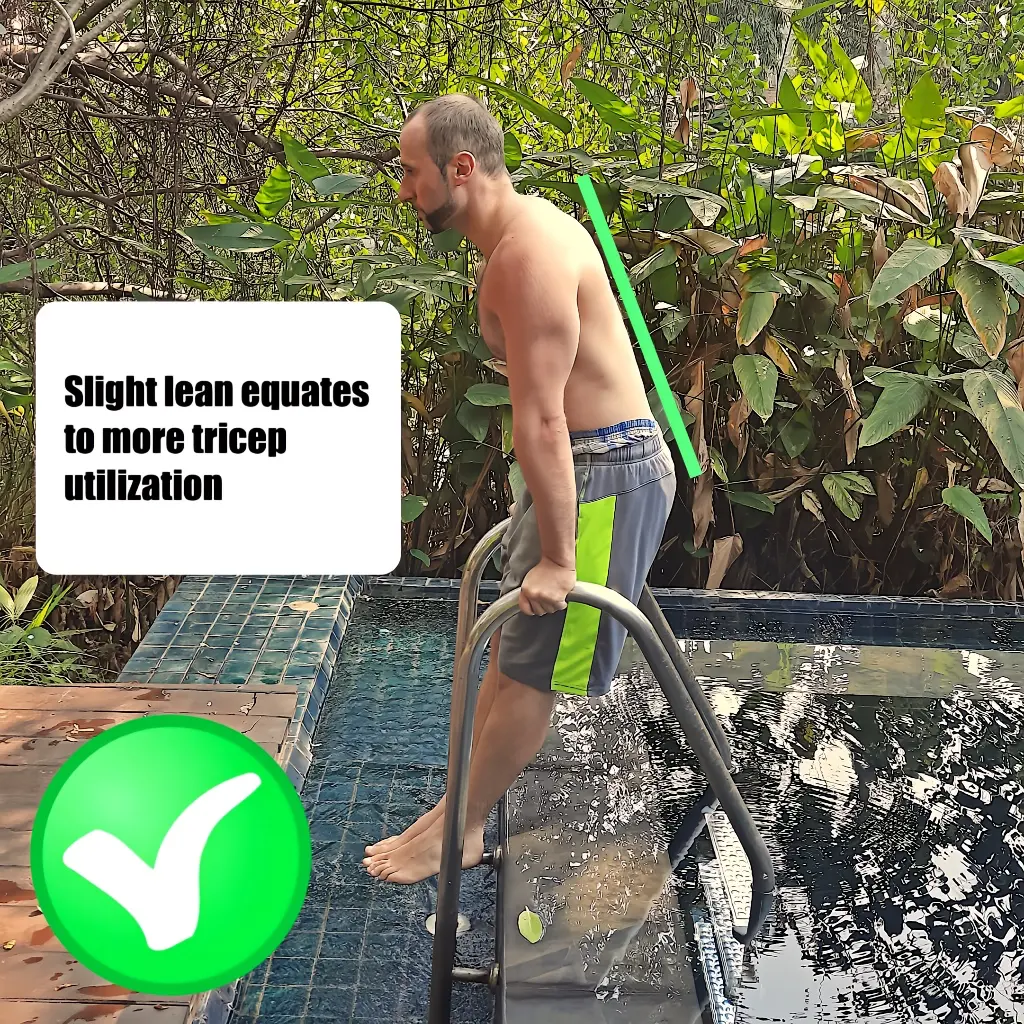
Correct - slight forward lean
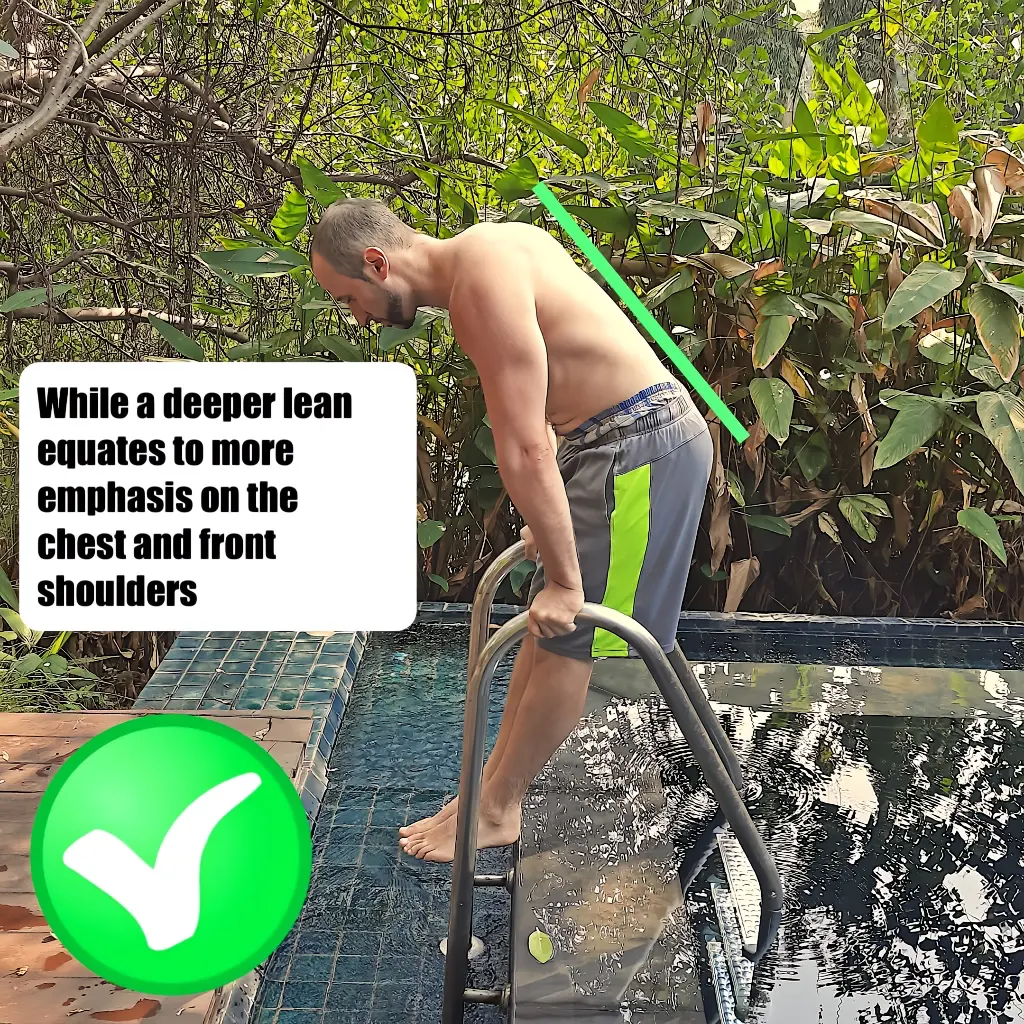
Correct - deeper forward lean
How to Do Straight Bar Dips
Straight bar dips are a unique dip variation that is well-known in the calisthenics fitness culture, but outside of that they aren’t quite as mainstream as their parallel bar dip cousins. They will challenge you in a unique way that is more similar to a decline bench press than a parallel bar dip.
While they are an excellent exercise on their own, they are absolutely essential if you plan on working towards a bar muscleup. This is because the second half of the muscleup is basically a straight bar dip. Getting really good at it will build the strength for that segment of the move.
For the full muscleup tutorial, I recommend checking out the comprehensive muscleup guide section (coming soon) of this bodyweight exercise library. For now, let’s take a look at the straight bar dip setup.
First of all, the technique on these will feel a bit awkward for many of you at first.
In contrast to parallel bar dips where there is a nice open space in front of you, with straight bar dips, the bar is kind of in your way.
This means you’ll need to maneuver your torso by leaning over the bar as you lower yourself.
At the same time, you’ll want to raise your hips slightly so that you aren’t smashing your vital parts against the bar (this is mainly relevant to guys).
The leaning over will force your front deltoids (shoulders) to work harder, while raising your hips will activate your core to a greater degree than a parallel bar dip.
The other things to watch out for are your elbow position and your traps.
Just like with classic p-bar dips, you’ll want to avoid excessive flaring of the elbows and be mindful of shrugging. You don’t want your shoulders to shrug at any point. Keep a nice, solid hold.
As for the legs, there’s much less room for creativity with the straight bar dip. With parallel bar dips you can get away with crossing your legs behind you (although I don’t recommend it) or with bending your knees. In contrast, with straight bar dips you have to keep your legs straight, together, and out in front of you. The mechanics of the movement would be thrown off if you tried to do something else.
How to Do Tricep Dips (Bench Dips)
Tricep dips are a ‘controversial exercise’. Like so many other supposed ‘controversial exercises’, it really depends on the individual doing them. With tricep dips, if you have someone with poor shoulder mobility and pre-existing rotator cuff issues then tricep dips are a bad idea. If neither of those things are a factor then there isn’t any reason not to incorporate tricep dips into a routine – especially if they will help that person achieve their goals. If one of those goals is to achieve a parallel bar dip, then tricep dips are certainly a great option to work towards that. In fact, I mention them for just that purpose in the next chapter on how to get your first dip.
In terms of technique, tricep dips can be done in a few different ways. The modifications you can make will allow you to scale them to your ability level.
Let’s start with the full expression of the classic tricep dip.
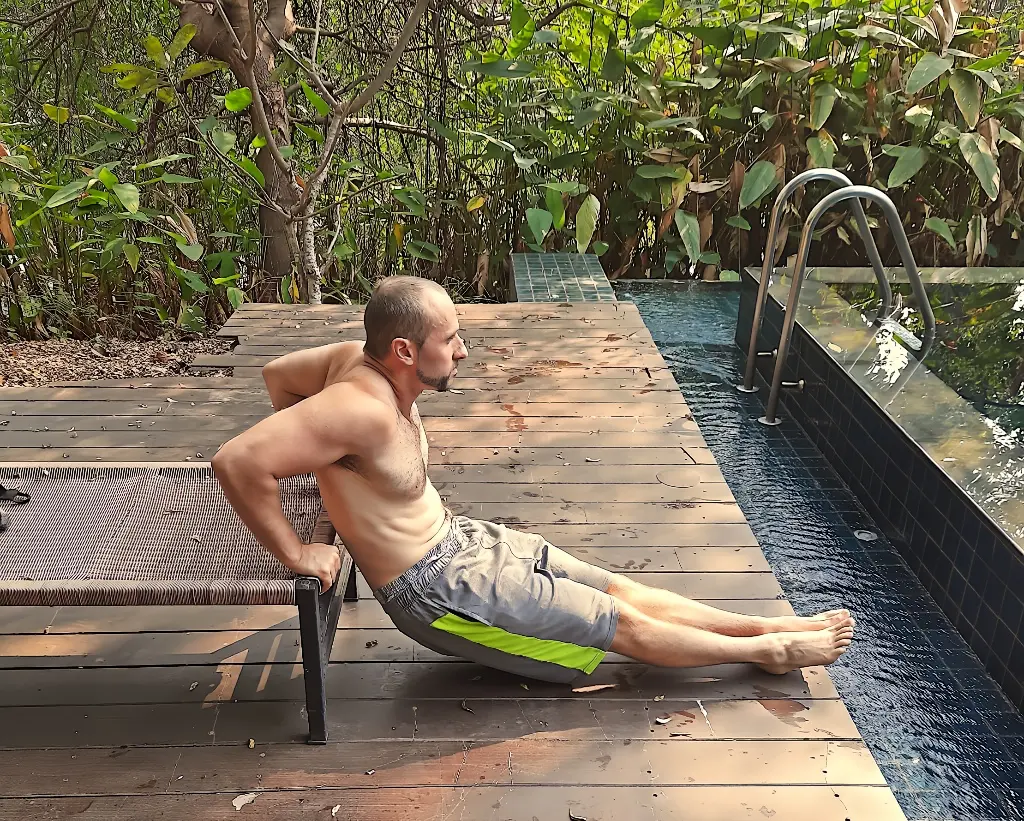
Tricep (Bench) Dips Technique
Begin by finding a sturdy bench (or even a couch will work if you’re doing them at home). It should be tall enough that when you perform the dips, your butt will hover above the ground rather than touch it. You also don’t want it to be excessively high either.
Then do the following:
- Sit on the edge of the bench and place your hands so they touch your hips on each side, but with the fingers grasping the ledge.
- Extend your legs out in front of to create an angled line with your body. It should look almost like a tipped over number 7.
- Lift your butt off of the edge of the bench. Your weight should now be distributed between your hands and the heels of your feet.
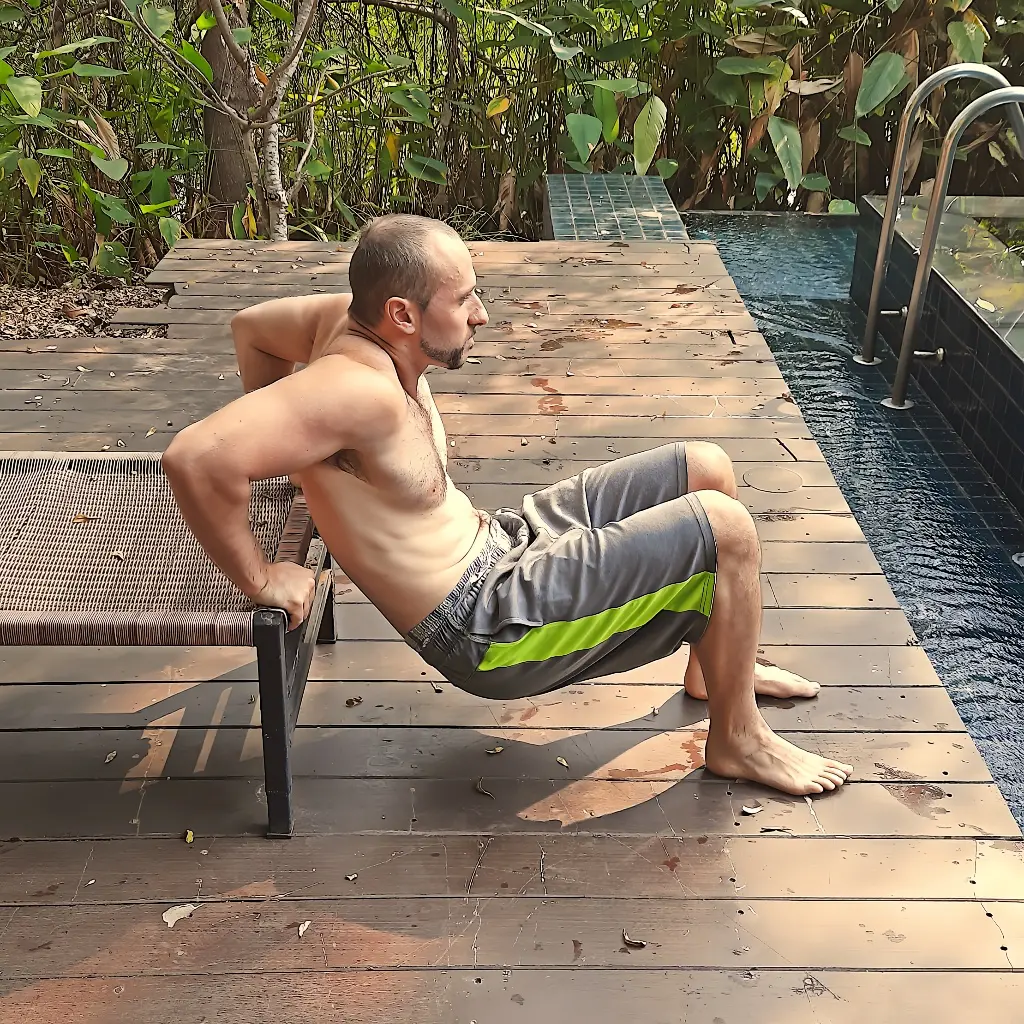
- Lower your body down until your elbows reach about 90 degrees and then press back up. The depth of your dip will be determined by a number of factors including your mobility, natural body mechanics, previous injuries, and more. Try not to overthink it. The general rule of thumb is to go as low as you comfortably can. You shouldn’t feel pain or feel like your shoulder is going to pop out of its socket.
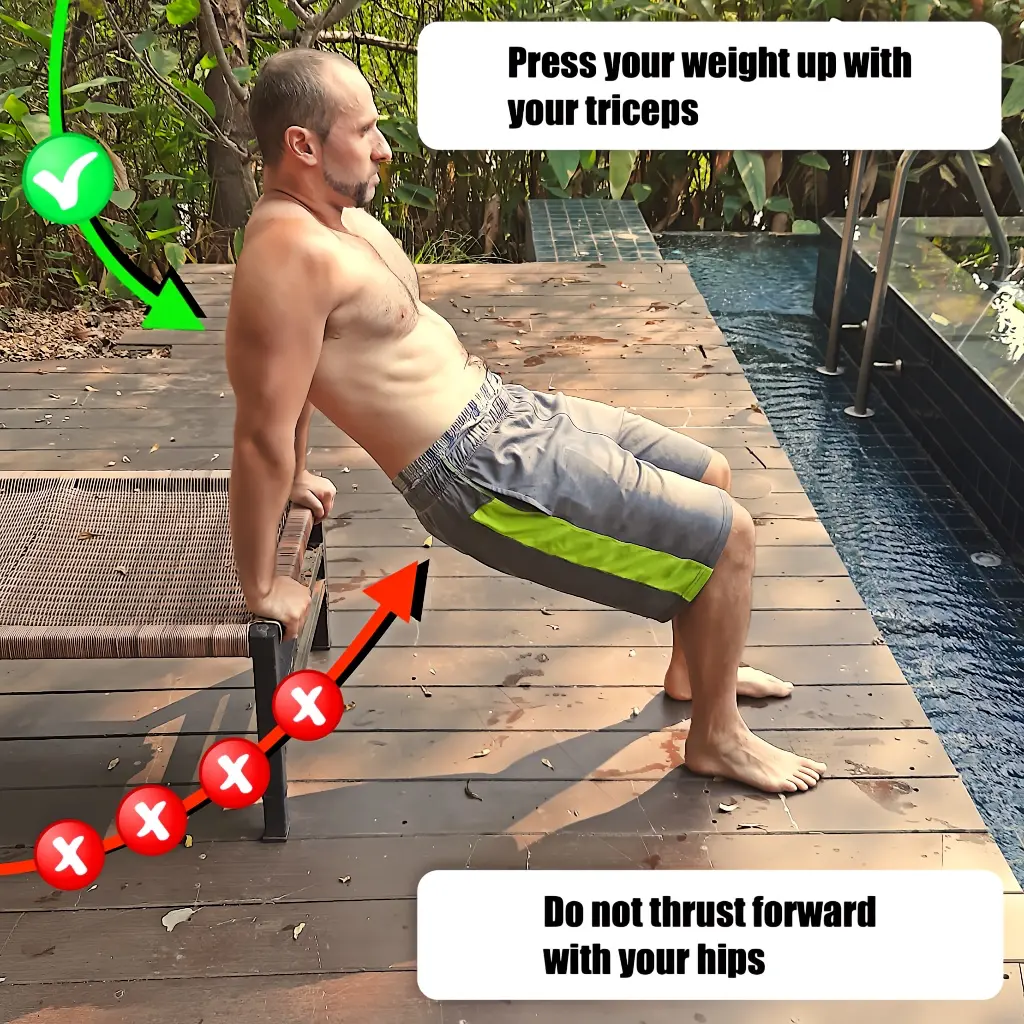
A few other things to keep in mind include not flaring the elbows and not turning the exercise into a hip thrust. The up and down movement should be coming from your arms – primarily your triceps – and not your hips thrusting you upward.

As mentioned earlier, tricep dips can be modified to scale their difficulty level. Let’s take a look at (1) regression for beginners and (2) progressions for those of you who are more advanced.
Tricep (Bench) Dips for Beginners
The trick to making tricep dips easier is to adjust the position of your feet. By bending your knees and drawing your feet closer to your body, you effectively lessen the weight burden on the triceps. In simpler terms, you make the exercise easier. The challenging aspect of this variation for beginners is to avoid using their hips to elevate their body. While the tendency to hip thrust for assistance appears in the standard tricep dip as well, it’s even more prevalent in the beginner’s version.
There are two reasons for this:
- Beginners generally lack body awareness and don’t have a developed mind-muscle connection. In other words they are just trying to complete a given exercise in whatever way that they can. They aren’t paying much attention to how they’re getting from point (a) to point (b). They just want to get to point (b).
- Compounding the above is the fact that when using the hips in the standard tricep dip, the attempt to do so requires a much more (noticeable) thrust. Enough so that even if you have at least some body awareness, you’ll notice that you are doing it – especially if you are cued beforehand. With the beginner’s tricep dip, it doesn’t take much effort to involve the hips. In other words, it’s likely that it will go unnoticed unless pointed out. If you are a beginner and you plan on doing these by yourself, pay close to attention to the demonstration below so that you avoid involving your hips.
Advanced Tricep Bench Dip Variations
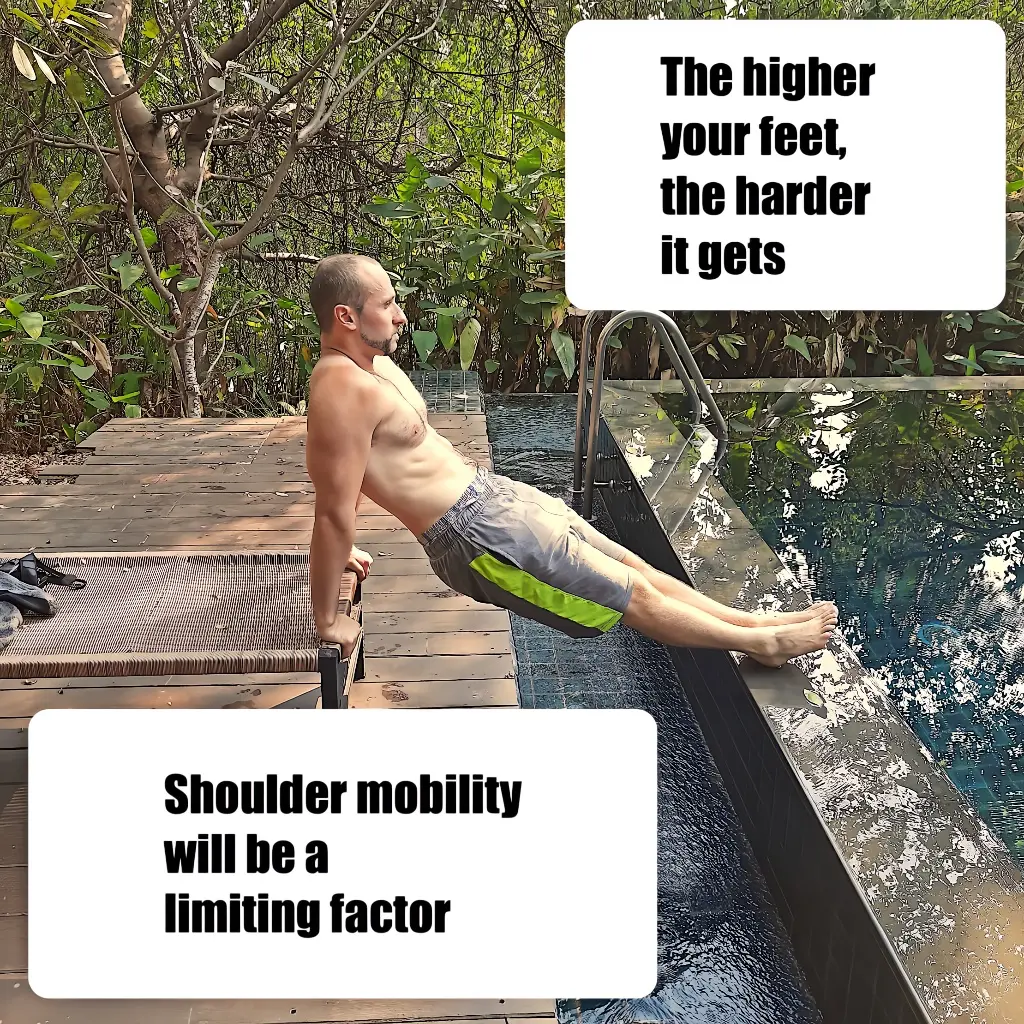
Advancing the difficulty of tricep dips also involves a slight foot adjustment.
All you need to do is place your feet on an elevated surface.
The higher they go, the greater the difficulty. With that being said, be careful not to go too high. Ideally, you’ll want them to be no more than slightly higher than your hands.

To take the above variation up an additional notch, you can have a training partner place a weight on your thighs after you get into position. Weight plates work best for this but you can substitute other options if you don’t have plates available to you.
Final Thoughts
As you just saw, bodyweight dips can be approached in a number of different ways. The three main types are parallel bar drips, straight bar dips, and tricep dips. Each variety has its own unique challenges and benefits.
Assuming you have no contraindications and that you can do at least a few reps, then incorporating parallel bar dips into your training routine is a wise move.
Straight bar dips are also excellent, but are more niche. If you hope to achieve a muscleup someday then they should be a staple in your training program.
Finally, tricep dips are very optional. I don’t personally enjoy doing them that much and there are some studies on dips that say you should skip them entirely. Ultimately, that’s a call that you or your trainer will need to make.
If you have any questions, just shoot me an email.