The most basic form of a deficit pushup involves positioning your hands on something elevated, but that also has a gap wide enough for your body to fit through.
Most commercial pushup handles easily serve this purpose, but you could even do a homemade version by stacking a few books underneath each of your hands. The idea is to increase the natural range of motion beyond what the classic pushup can offer.
In a standard pushup the floor ends the range of movement. Once your chest touches it you can’t go any further so you press back up.
BUT!
If you are able to elevate your hands so that the floor is further down, you can go even deeper. This allows for more muscle activation and of course a longer range of motion, which makes it more challenging.
The thing you have to watch out for is that if you elevate too much without also elevating your feet to match the height of your hands, you will run into a situation where you will be doing a strange mix of pushup regression and progression at the same time.
You’ll be extending your range of motion, yes, but by elevating your hands you will decrease the load that gravity is placing on your upper body. The height of standard pushup handles is fine, but if you try to use something like a pair of parallettes (depending on how tall they are), you might run into some issues if you don’t elevate your feet too.
Table of Contents
Deficit Pushups on Parallel Bars
A simple way to get around the height issue is to perform deficit pushups on some parallel bars. The one disadvantage here is that while parallettes allow you to adjust the width between your hands, p-bars don’t.
What you see is what you get, and sometimes what you get is some narrow ones. Deficit pushups are better suited for a slightly wider than normal width between hands. This makes narrow p-bars a bad option.
On the other hand, if you happen to have access to some normal width ones or slightly wide ones, then you are good to go. Give them a shot. They should look like the below example.
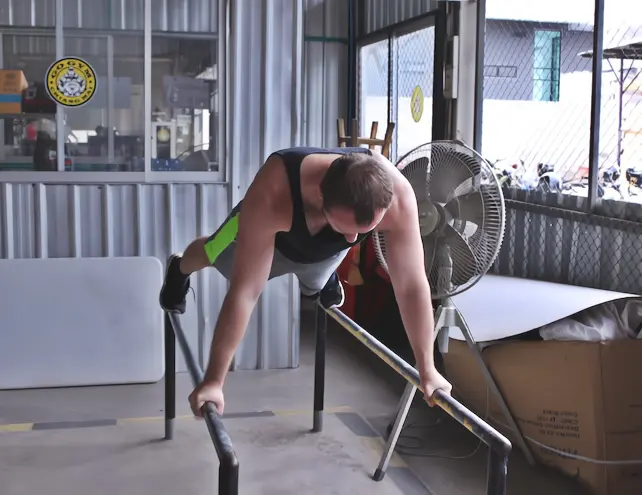
Starting position on parallel bars
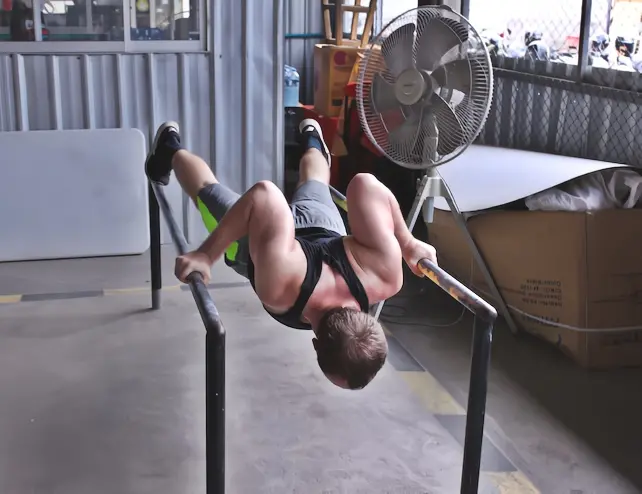
Bottom position showing extended range
Deficit Pushups with Gymnastics Rings
Another variation you can try – perhaps the most challenging one – is doing deficit pushups on rings. If done correctly, these can be a great step towards building up to the coveted ‘hefesto’ move.
Before attempting the ring variation you should have a really solid level of strength in both your muscles and in your elbow tendons. Ring work places a lot of demand on your elbows. If you have any sort of tendinitis or tennis elbow then you you’ll want to avoid these.
You should also be familiar and comfortable with the ‘false grip’ on rings. If you think you are ready to give them a try, take a look at the steps below.
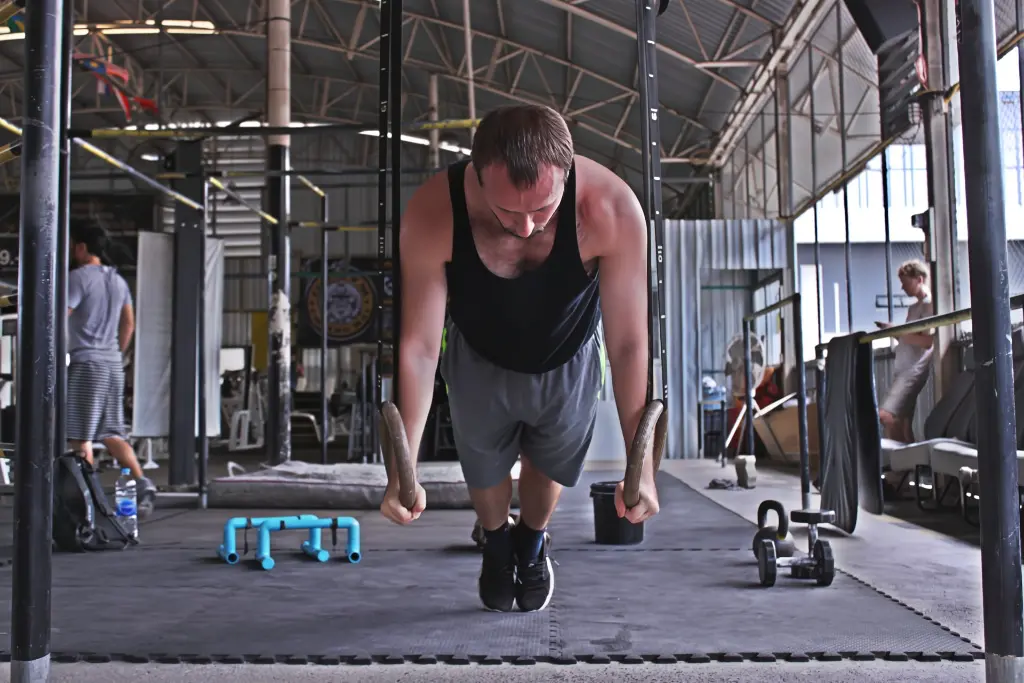
Step 1: Starting position on rings
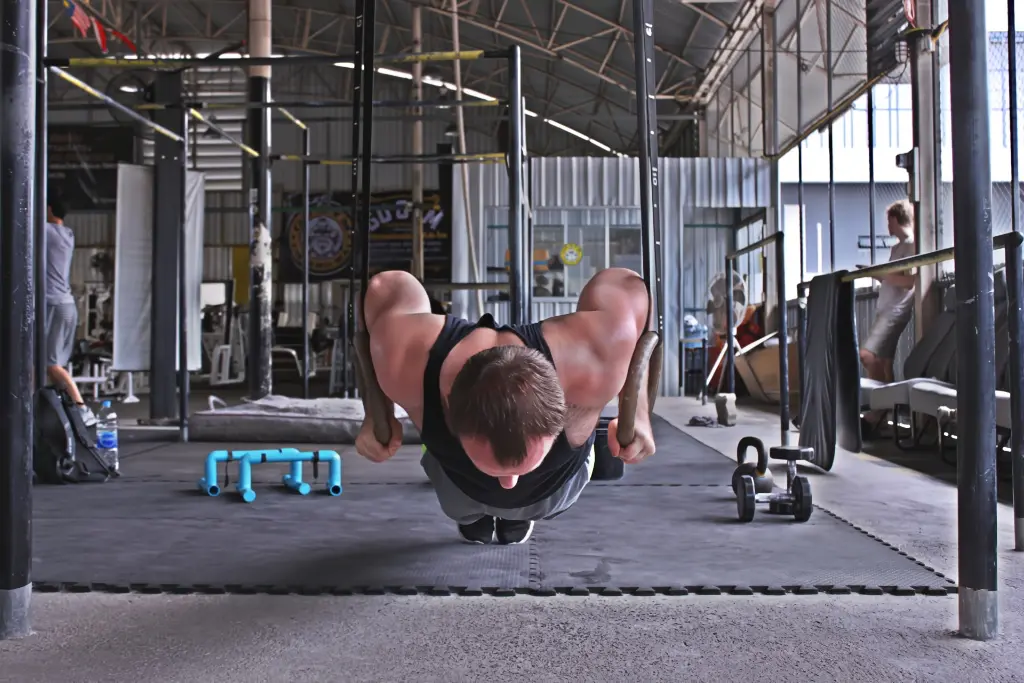
Step 2: Descending down
The transition from the first image to the second image is similar to doing a neutral grip pushup using pushup bars – only you are doing it on gymnastics rings. Like any ringwork, it recruits more stabilizer muscles than its pushup bar counterpart.
If you’ve never used rings before, you’ll feel really shaky the first time you attempt this. However, if you’re decently strong – or at least strong enough that you should be attempting deficit pushups in the first place – then you’ll get the hang of it.
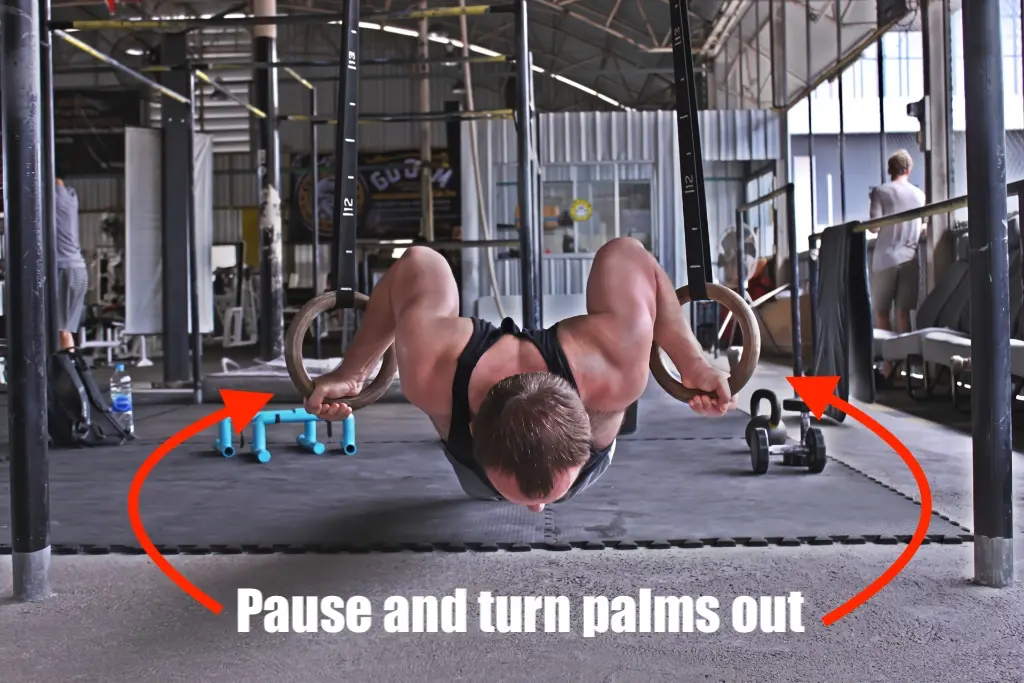
Step 3: Turn palms outward
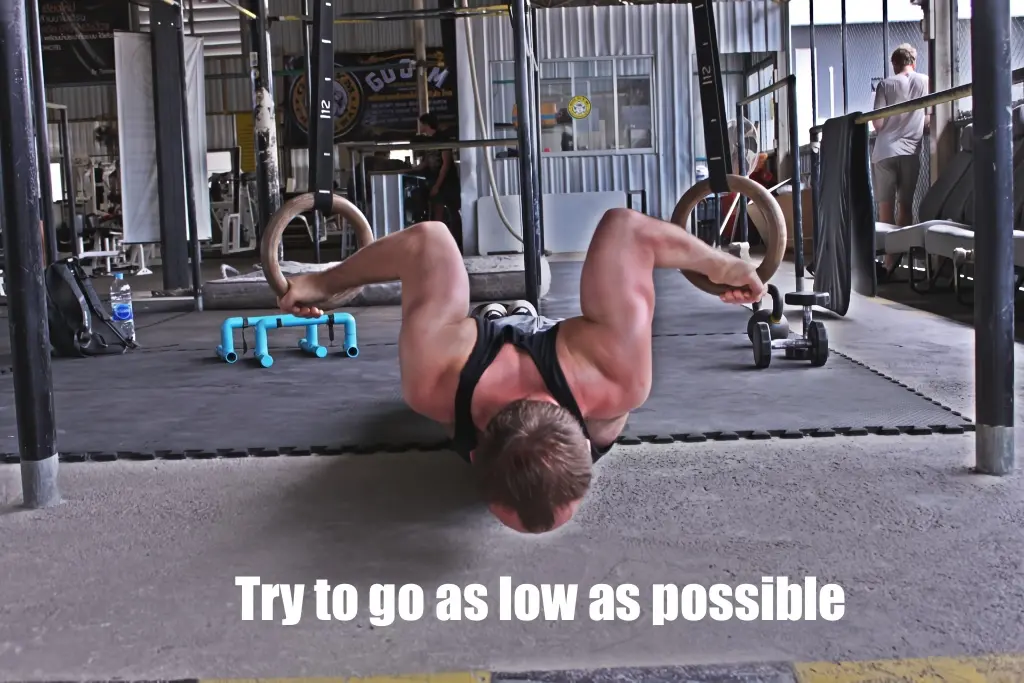
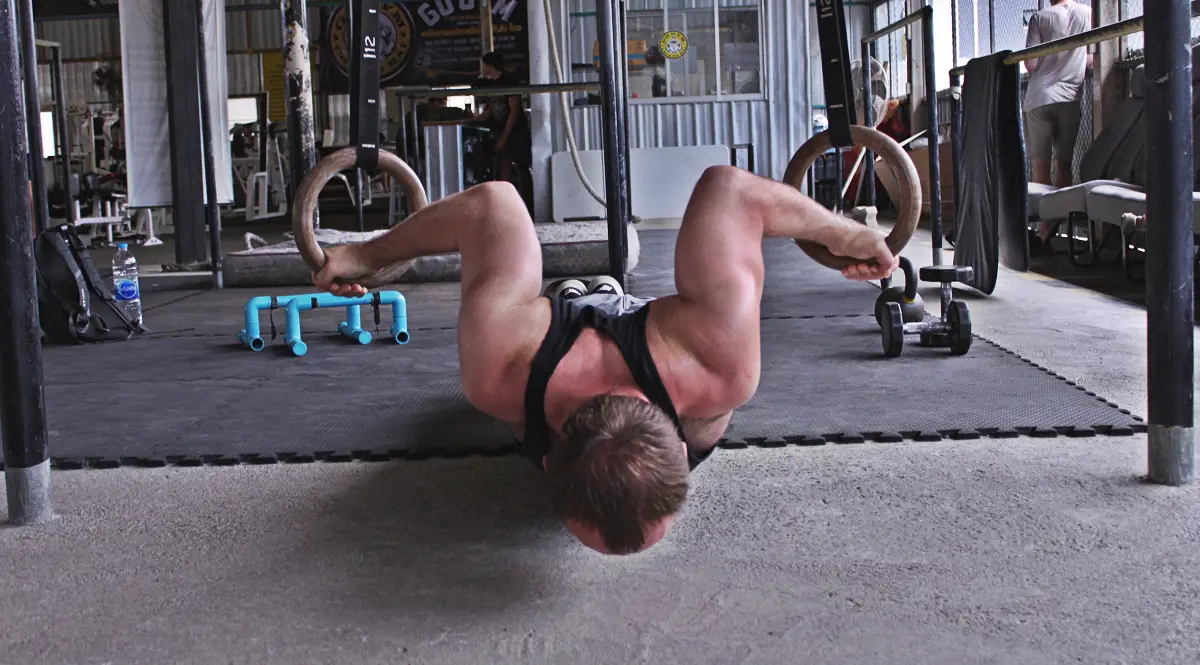
Step 4: Lower down as far as possible
Once you get to the bottom of the range of motion of what would be a neutral grip pushup on rings, pause for a moment, then turn your palms out so that your thumbs move away from your body.
From here, descend down to as low as you can go while maintaining control.
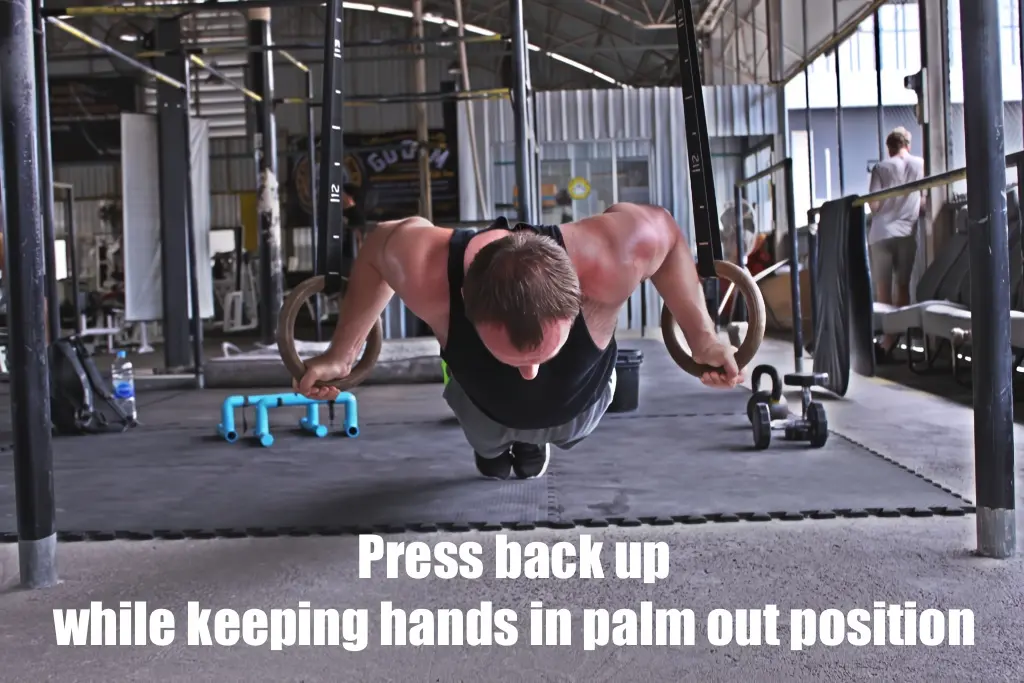
Step 5: Press back up from bottom
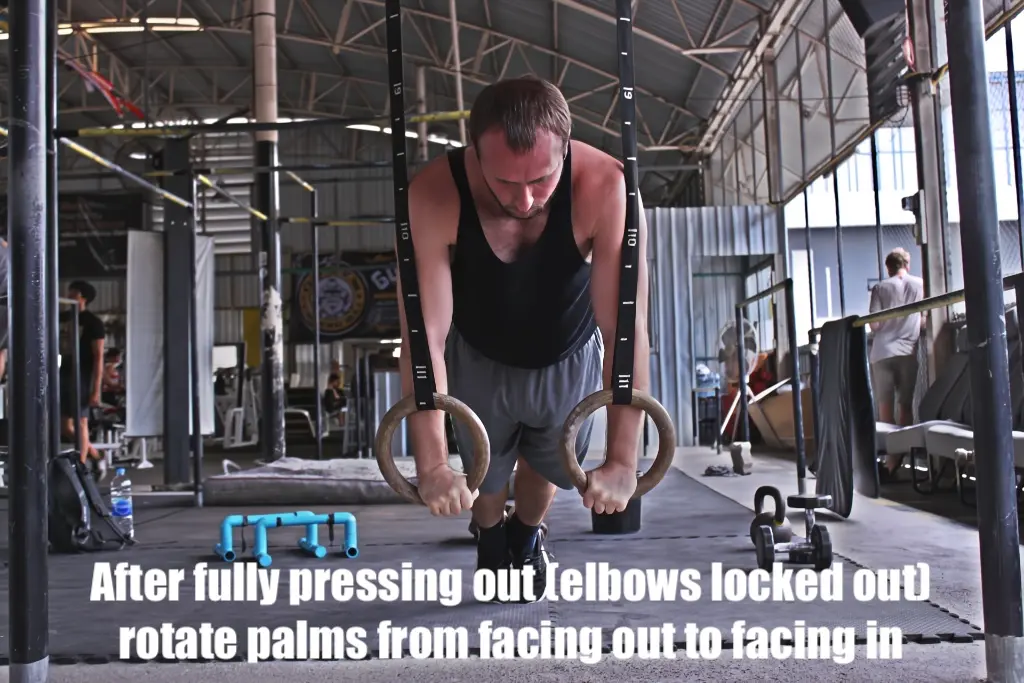
Step 6: Complete lockout at top
When you reach the point at which you feel that you will no longer be able to press yourself back out from, start pressing back up. Depending on how strong you are and how low you are able to go, this may even transform from a press to a pull (initially).
Press your body all the way up with palms facing out until you get to the top of the range of motion (i.e. – your elbows are locked out).
From there you can rotate your arms inward so that your palms face each other (as in the starting position). Alternatively, you can rotate even further so that your palms face your body (as in a standard floor pushup).
If you want to do another rep, simply pause for a moment, and then rotate the arms one more time to bring them back into the starting position you see in the first picture.
Scaling The Deficit Pushup
You can scale the difficulty of deficit pushups by elevating your feet on something to match the height of your upper body.
Remember what I said earlier about if your upper body is too elevated compared to your feet?
The same thing applies here.
The deficit aspect is challenging but by having your upper body elevated, it offsets the difficulty to a certain degree. It might be a good starting point for some of you though.
Then when you are ready, you can elevate your feet as well and try to get really deep on the rings. I mentioned this already, but keep in mind that at some point when you get really deep, the press back up isn’t just a press anymore but also a pull from the forearms and biceps. It becomes a nice combo exercise.
Final Thoughts
Deficit pushups are an excellent strength building exercise that challenge you beyond the standard range of motion of a regular pushup. You can perform them on a wide variety of equipment, ranging from basic pushup bars to parallel bars to gymnastic rings.
They are also scalable. If you want to increase the difficulty, simply elevate your feet so that they are higher than ground level. The higher they go, the more challenging the deficit pushup becomes.
Give them a shot on your next push day and record it. Post it on Instagram and tag @kalisthenics_nomad with #CalisthenicsNomad and I might just repost it. Good luck and have fun!