Hindu pushups, also known as ‘divebomber pushups’ by some, are essentially borrowed from the yoga practice of flowing from up-dog to down-dog when moving through vinyasa. This is probably where the name is derived from, since yoga comes from India. They are much more dynamic than the classic pushup and expose your body to angles that place greater demand on your shoulders while also challenging your hamstring and Achilles tendon flexibility.
In this tutorial, I will break down how to do the hindu pushup so that you can follow along and be able to do it too.
The Hindu Pushup Explained
There are roughly four phases to the hindu pushup.
Please keep in mind that I am NOT a yogi and although similar, hindu pushups aren’t exactly the same as doing up-dog/down-dog. I say that because a true yoga practitioner will probably cringe at my demonstration images below.
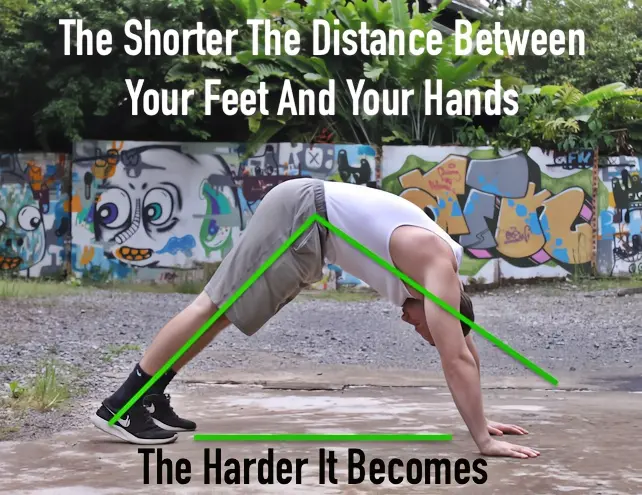
I have fairly poor thoracic spine mobility. As a result, my starting triangle picture shows somewhat poor form compared to what a good yogi would do in down-dog. But even if you are like me, you can still get a lot out of doing these hindu pushups.
Step-by-Step Hindu Pushup Tutorial
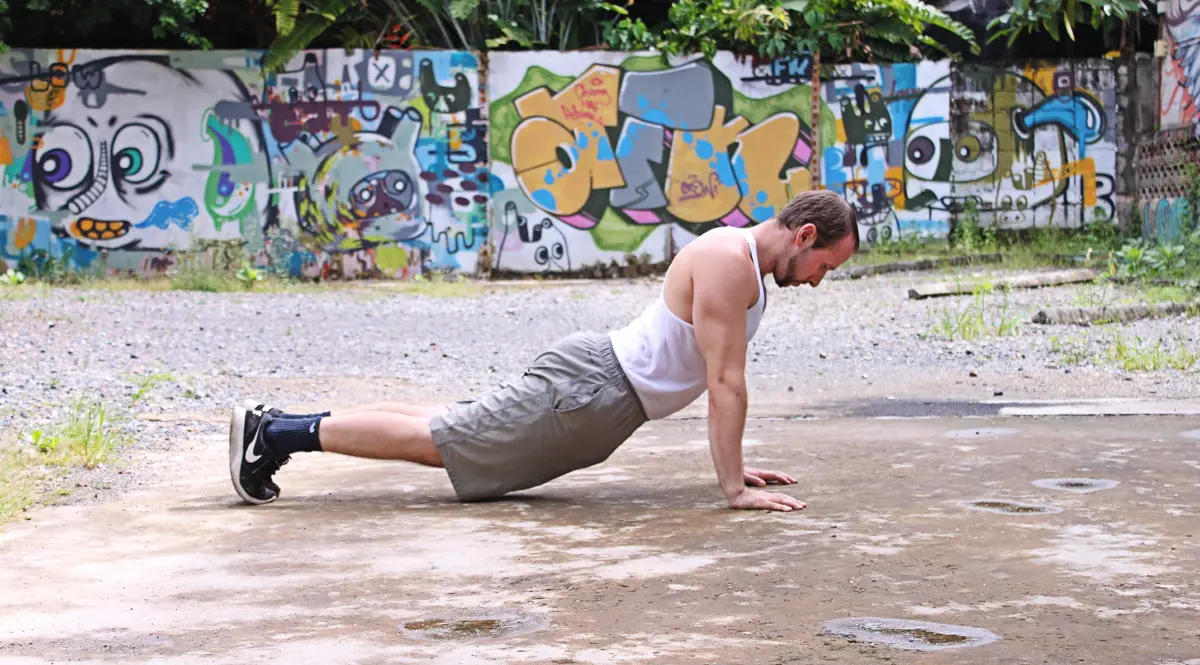
Step One: Starting Position
Get your body into the triangle shape you see in image one below. If you can get it even cleaner than me, then awesome! If you can’t, don’t be hard on yourself. As I just said, you can still get a lot out of the exercise.
Starting triangle position - hips high, looking back at feet
Beginning the descent while maintaining triangle shape
Key Points for Step One:
- Form a triangle shape with your body
- Keep your hips elevated high
- Look back at your feet to maintain proper head position
- Place hands shoulder-width apart with fingers spread for stability
- Engage your core and keep legs relatively straight
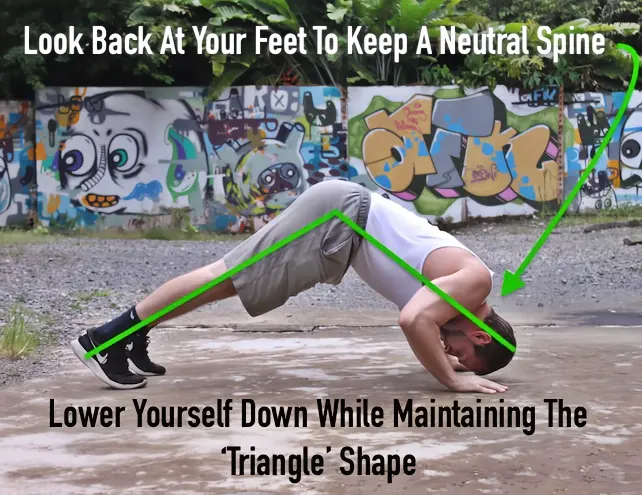
Step Two: The Descent
Make sure you are looking back at your feet and when you are ready, start lowering your head in a controlled manner towards the ground. Try as hard as you can to follow the path of the triangle shape.
The easiest way to do that is by focusing on keeping your hips high and maintaining eye contact with your feet behind you. Also do your best to not let your elbows flare out into the ‘capital T’ shape discussed in the classic pushups tutorial.
Key Points for Step Two:
- Lower your head in a controlled manner toward the ground
- Keep your hips elevated throughout the descent
- Maintain the triangle shape as much as possible
- Keep elbows close to your body, not flared out
- Continue looking back at your feet for proper alignment
Step Three: The Transition
Once your head reaches to just shy of the floor, you’ll want to drop your hips down and lift your head up slightly. This should feel familiar. It’s almost like being in the bottom of a regular pushup.
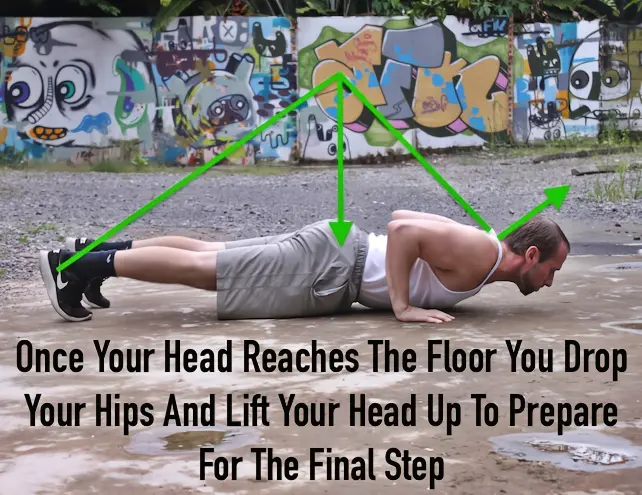
Transition phase - hips dropping, head lifting
Final position - up-dog pose with arched back
Key Points for Step Three:
- Drop your hips toward the floor as your head approaches the ground
- Lift your head slightly as you transition
- This position should feel similar to the bottom of a regular pushup
- Keep the movement controlled and smooth
- Prepare for the push-up phase
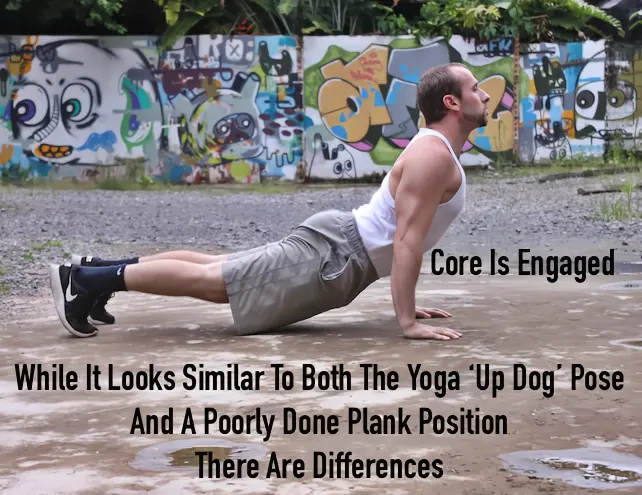
Step Four: The Up-Dog Push
Don’t spend too much time at the bottom.
Try to immediately flow through into the up-dog looking pushup. Keep your core engaged but while pressing up, try to push your belly button forward. This will create an arch in your back. Unlike a sloppy plank though, this is intentional and requires you to keep your core tight, while at the same time allowing it to stretch.
A sloppy plank where the hips start to sag is caused by fatigued core muscles that can no longer support the spine in the plank position. As a result, the hips fall and put pressure on the lower back.
That’s not what’s happening here. This is a deliberate, controlled protrusion of the belly. It sounds almost counterintuitive but when you try it, you’ll see how good it feels.
Key Points for Step Four:
- Flow immediately from the bottom position into the up-dog
- Push your belly button forward to create a controlled arch
- Keep your core engaged while allowing the stretch
- This is NOT a sloppy plank - it’s an intentional, controlled movement
- Press through your hands to lift your chest and shoulders
Step Five: Return to Starting Position
You can hold that position for a few seconds to get a nice stretch. When you are ready, glide your hips back up and press up into the triangle shape you started in.
Key Points for Step Five:
- Hold the up-dog position briefly to enjoy the stretch
- Smoothly transition back to the starting triangle position
- Push your hips back up and return to looking at your feet
- Complete the cycle and prepare for the next repetition
Closing Thoughts
Hindu pushups are more dynamic compared to standard pushups. They not only challenge your pushing and core strength, but they also help improve your hamstring and Achilles flexibility.
From a strength standpoint, if you can perform at least 15 to 20 clean regular pushup reps, then you should be able to do a couple of hindu pushups. The thing that might hold you back is the flexibility, but by simply doing the movement – even if it’s ‘ugly’ – you will help loosen up those hamstrings.
So get to it!
If you follow these progressions and manage to unlock the hindu pushup, post it on Instagram. Tag @kalisthenics_nomad and #CalisthenicsNomad for a possible repost.