The classic plank is a really great core strengthening exercise and is traditionally performed resting on the forearms but can also be done with the body supported on the hands (i.e. – the pushup starting position or ‘high plank’ in yoga). The on-your-forearms version tends to be more demanding on your core and less demanding on your shoulders and triceps, while the high plank version is the opposite.
Beyond that, it is an excellent stepping stone towards more challenging exercises, including more difficult versions of itself. In this plank tutorial we will cover the mechanics of the classic plank, as well as some of those more advanced variations. I hope it helps you on your fitness journey.
Table of Contents
- Standard Plank Positions
- Increasing Plank Difficulty
- Side Planks
- How to Advance the Side Plank
- Gymnast Plank
Standard Plank Positions
The images below display the two most common forearm plank variations and also the high plank.
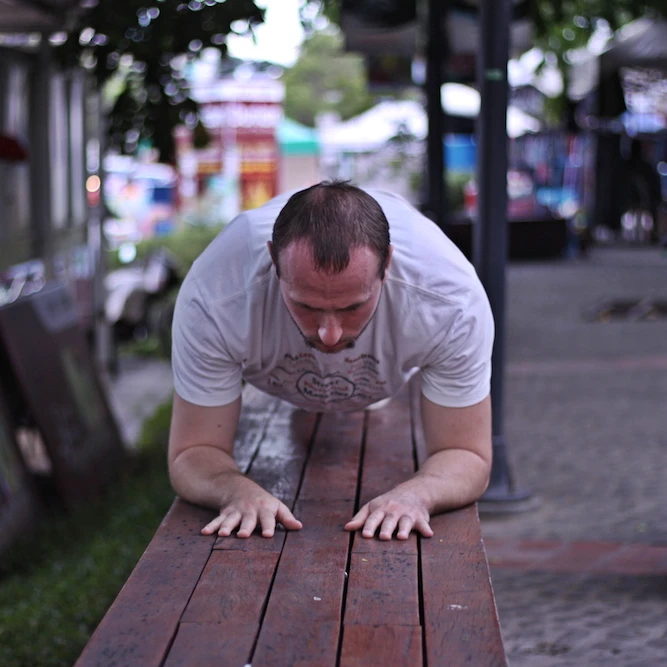
Forearm plank with palms facing down
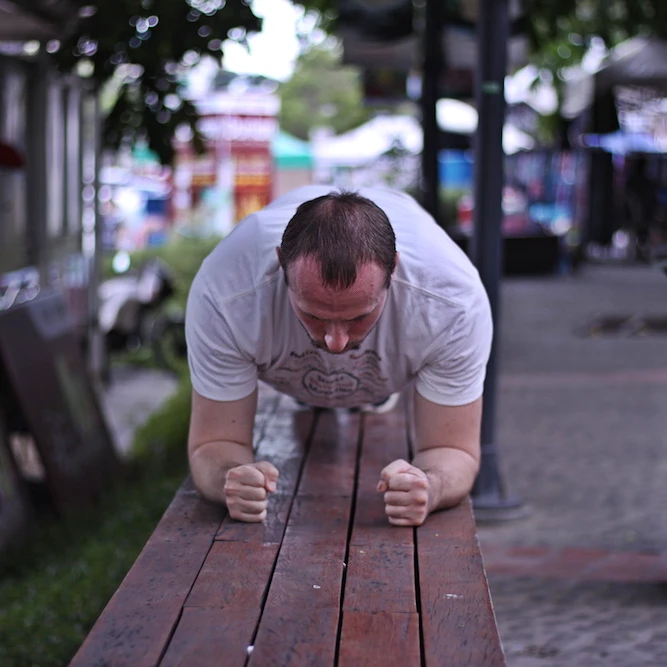
Forearm plank with palms facing each other
High plank position
Whichever version you choose to employ in your next training session, there are a few key pointers that remain the same.
To begin, although the plank is considered a ‘core exercise’, you are actually using all of the muscles in your body to create a straight line of tension from your feet to your shoulders. You should not only keep your abdominals tight, but also remember to engage your glutes, quads and back.
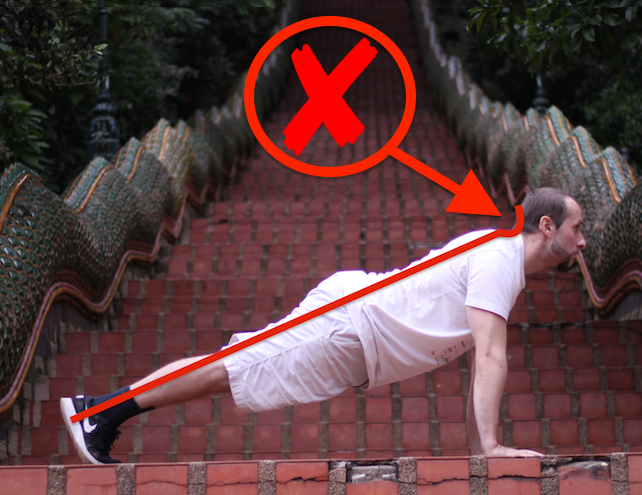
Don’t let your hips sag and never let your lower back arch. This usually happens in sequential order when your core starts getting fatigued.
First your hips start to sag and this in turn causes your lower back to start forming a ‘U’ shaped curve. If you feel this happening and you don’t have enough juice in the tank to ‘reset’, then it is wise to end that particular set to both protect your back, and to get the most out of the exercise.
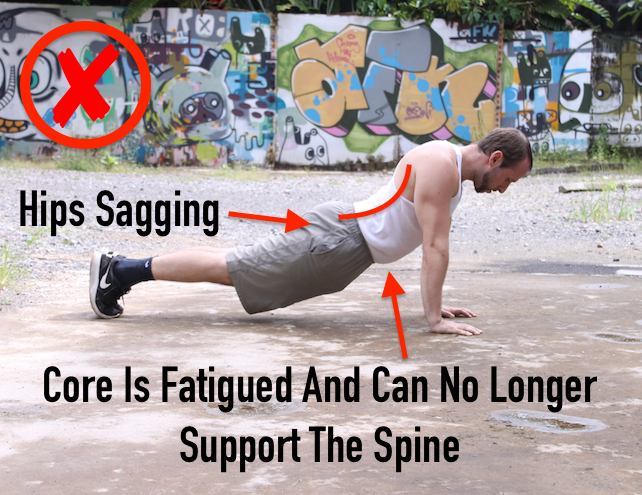
❌ Incorrect: Hips sagging
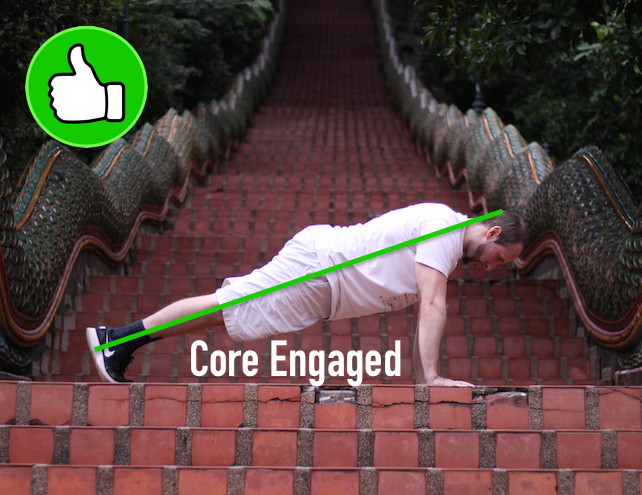
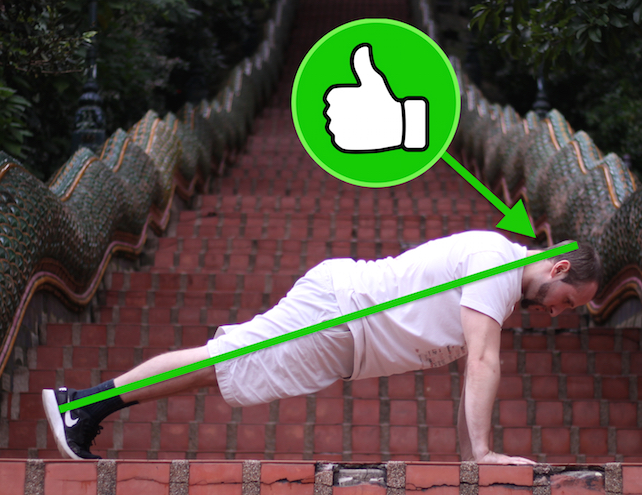
✅ Correct: Straight line from head to heels
Another common mistake to avoid is looking up by tilting backwards at the neck. When you look up, it naturally starts curving your spine and creates tension in your neck and traps.
You want to keep a neutral spine and the easiest way to do that is to look down at the floor. It’s actually quite a common but simple error that even experienced fitness practitioners make – myself included.
You’ll even see me making this faux pas in one of the other demo pictures as you continue through this tutorial. It’s not the biggest mistake you can make, but over time it can have a negative effect on your upper back / neck.
❌ Incorrect: Looking up strains the neck
✅ Correct: Neutral spine and neck
Lastly, if you want to get even more strength gains out of the plank, you should consider activating your scapula for the duration of your set (or as long as you are able to maintain the muscle contraction).
If you don’t understand what that means, please see the difference below. The easiest way to describe it is that it should feel like you are pushing the ground away from you so that your shoulder blades spread apart. Depending on how much muscle development you have, a secondary feeling would also be that the outer parts of your lats (back) will feel like they are trying to wrap around the upper sides of your body (underneath the armpit area).
If you choose to omit this, at the very least, keep your shoulder blades neutral. If you feel them coming together (as if you were pinching a pencil in your upper mid-back) and your torso sinking down, then you are doing it wrong. The picture on the left demonstrates this.
The picture on the right is a full protraction, which again is optional, but recommended. It will help you develop a strong mind-muscle connection, which will eventually be needed to unlock more advanced moves later in your calisthenics practice.
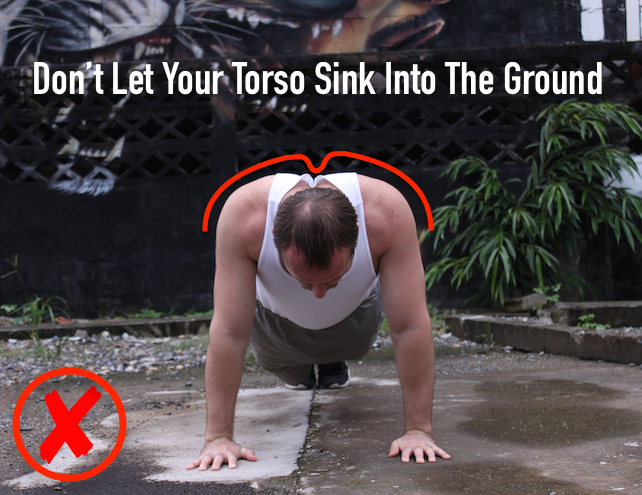
❌ Incorrect: Shoulder blades pinched together
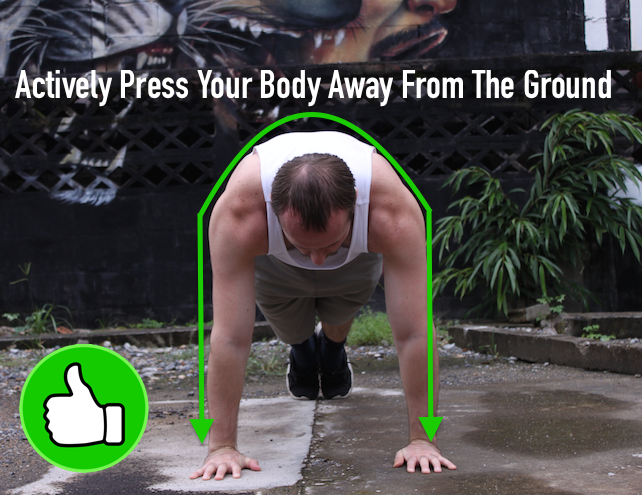
✅ Correct: Scapulae protracted (pushing away)
Increasing Plank Difficulty
The most common way you’ll see people make the plank more challenging is by adding weight on their back or by wearing a weight-vest.
While this certainly does increase the difficulty level of the exercise overall, the increased load on your core is marginal. I would argue that the brunt of the added load is absorbed by the shoulders and chest when most people utilize this method. The working assumption here is that you are performing the plank to increase core strength and not chest / shoulder strength. If that describes you, then keep reading.
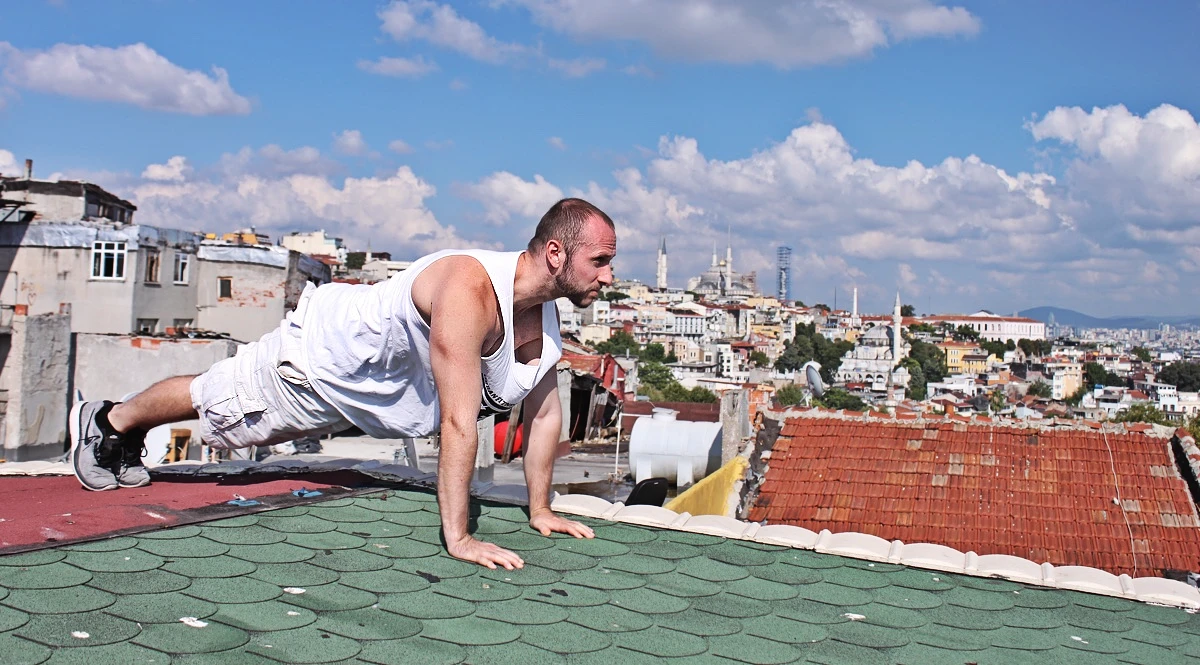
Rather than making yourself heavier, all you need to do is make a minor adjustment to your body position and the increased difficulty of the target muscle group (i.e. – the core) will be immediately felt. That minor adjustment is a backwards body shift. The regular plank position stacks your upper body onto either your elbow (in the classic, on-your-forearms plank) or your wrist (in the starting pushup position version).
Because you are stacked, a large part of the weight-bearing that’s happening is being absorbed by the elbow/wrist and the shoulder (because it’s directly above the respective joints in each variation). This makes it easier for your core to keep your spine stable (which is its functional purpose when performing a plank).
However, if you purposely un-stack your upper body by shifting backwards, your core is no longer in a mechanically advantageous position and now has to work that much harder to protect your spine. This small adjustment works so much better than just staying stacked and adding weight on your back.
See the pictures below and give it a shot when you are ready. I’m willing to bet that you will feel your core working much harder compared to just adding a 45lb plate on your back.
The left picture is the classic stacked position and the right photo is the progression. Notice the position of the elbows relative to the shoulder.
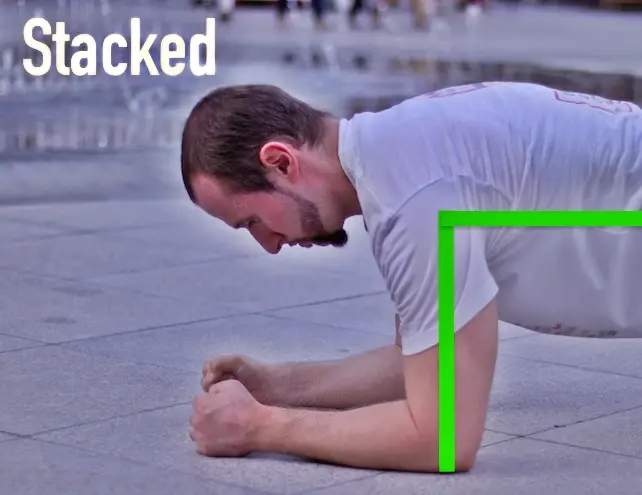
Standard plank with stacked shoulders
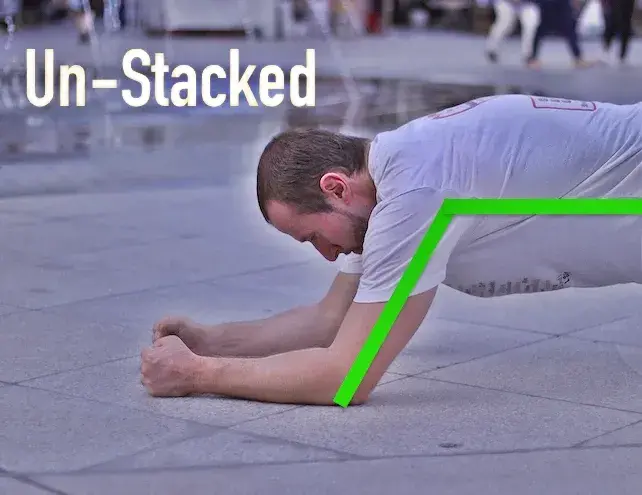
Advanced plank with elbows forward
Side Planks
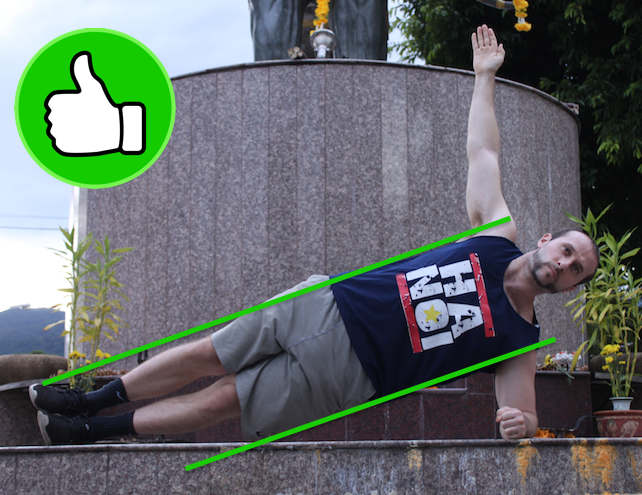
Another common plank variation we often see being performed (especially by Yoga practitioners) is the side plank. The side plank is an excellent static hold that challenges your lateral chain and is also one of the first progressions you can use to build toward a human flag.
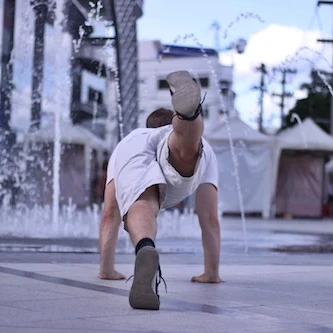
The most common way to get into a side plank is by starting out in the top part of the pushup position, and then rotating your body to one side while slowly shifting your weight from two hands onto the one supporting hand. A good visual cue is to think about your chest / torso moving from a position where it’s facing the ground, to a position where it’s facing out into the world.
Two things to keep in mind and watch out for is to maintain a straight line of tension so that your hips don’t sag, and to make sure your feet are stacked on top of one another.
If you put your feet side by side, it’s not necessarily wrong, but it’s a significant regression from the actual move. If you absolutely have to start this way then by all means do so, but try your best to avoid not stacking your feet.
Much like the regular plank, this version can also be performed by resting your body on the forearms, rather than your hands. Either way is correct.
Side plank on extended arm
Side plank on forearm
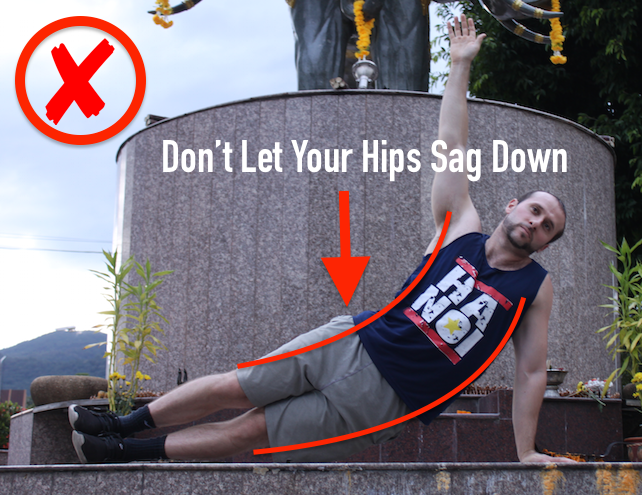
❌ Incorrect: Hips sagging
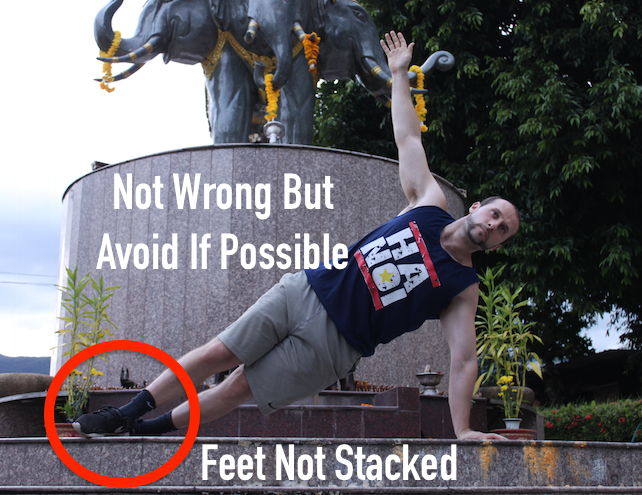
⚠️ Easier variation: Feet not stacked
How to Advance the Side Plank
You can advance the side plank all the way to the human flag, but of course there are many steps in between the flag and the regular side plank.
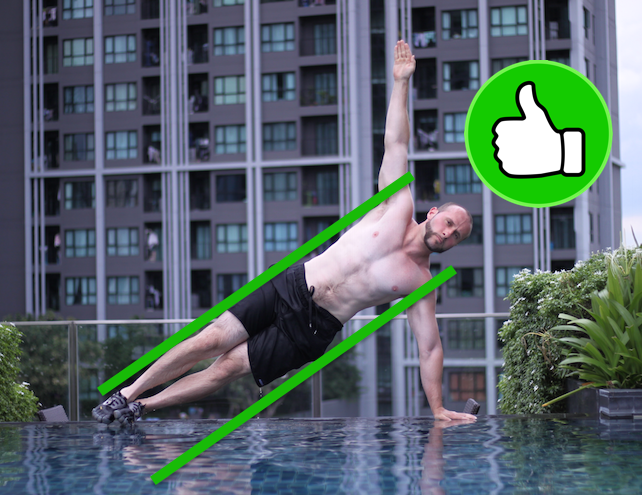
Two great ways to step up the difficulty are to place your feet on an elevated surface or to lift up the top leg to make a pseudo-starfish looking shape with your body. The former will place a greater load onto the shoulder of the support arm, while the latter will place an additional demand on your balance, core stabilizers, and the hip abductors of both legs.
With the feet elevated side plank, the higher you elevate your feet, the more you load up the shoulder of the bottom arm. Ideally, you’ll want to elevate them only to the point where your body is parallel to the ground. If you go higher than that, you start changing the nature of the exercise. It becomes less core and more of that bottom shoulder. See below.
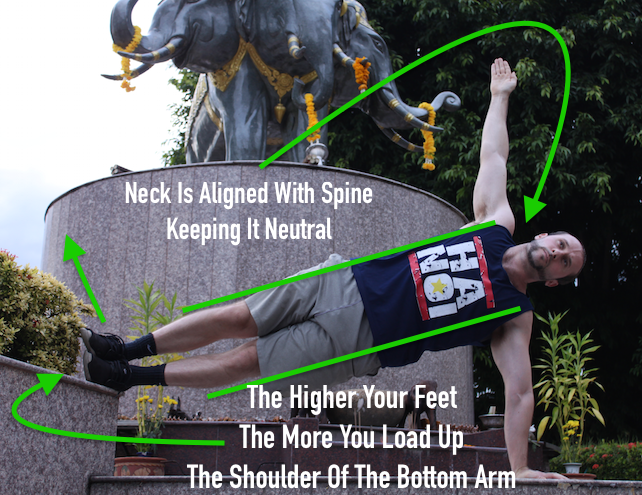
Side plank with feet elevated
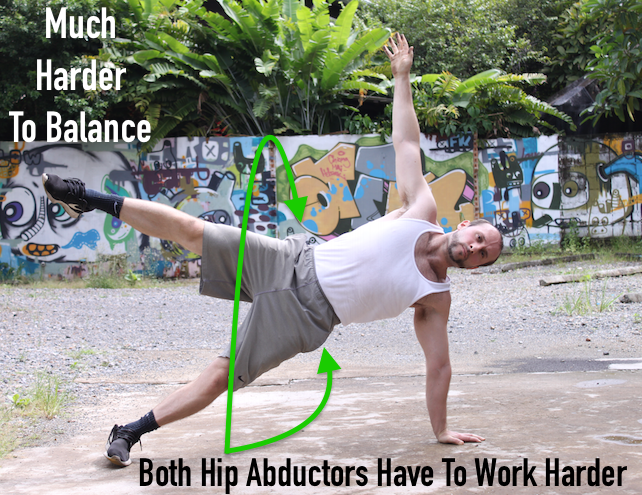
Starfish side plank variation
Limb Adjustments
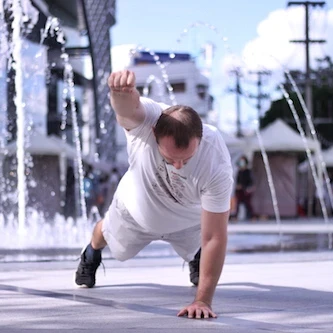
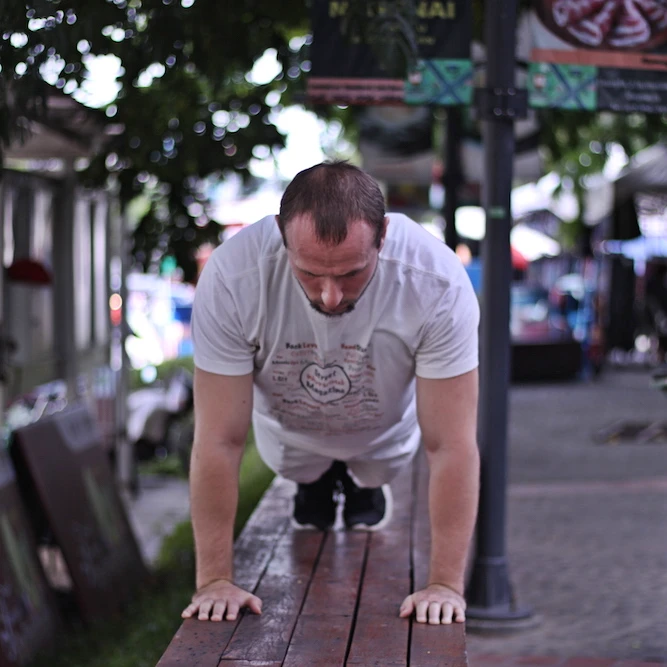
One Arm Plank
The one arm plank is a nice beginner step toward working to the one arm pushup. By removing one point of contact with the ground, you are now less balanced and your stabilizers have to work harder to maintain the plank position.
Notice the slight straddle. If you really want to make it challenging, try bringing your feet even closer together than you see in the picture – but without tilting to the side. Only bring them in to the point where you can still maintain the plank as is. You can also put your free hand behind your back if you’d like.
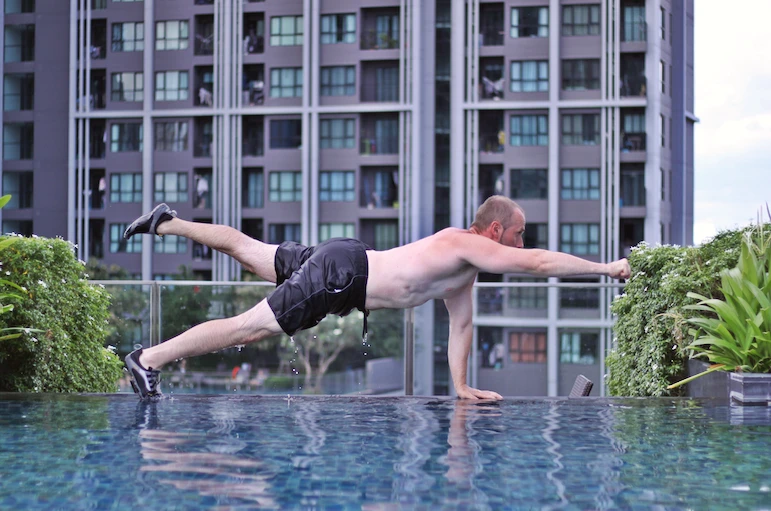
One Leg Plank
The one leg plank is a similar variation to above but brings on its own set of unique challenges. You are still working with three points of contact instead of four, but now your glutes and hamstrings will be working hard to keep that leg parallel to the ground.
If you start hiking your butt higher into the air when attempting this variation it means you aren’t ready for it yet.
Just like with the one arm plank above, you need to be able to maintain the plank position ‘as is’, with the only change being the raised leg.
One Arm + One Leg Plank
A combination of the two above, it is still a unique beast all its own due to the way it challenges your balance. You may be able to do both variations above but don’t be fooled into thinking that you can automatically do this one. Some of you might, but some of you may be pleasantly surprised.
Aside from the balance aspect, your body now has to not only engage all those glute and hamstring muscles to keep the leg lifted, but it also has to use the deltoid (shoulder) to keep the arm parallel too.
Plus now the remaining points of contact have to brace for even more weight because they no longer have that support from the lifted leg / arm. There is definitely a synergistic difficulty with the one arm / one leg plank. Give it a shot!
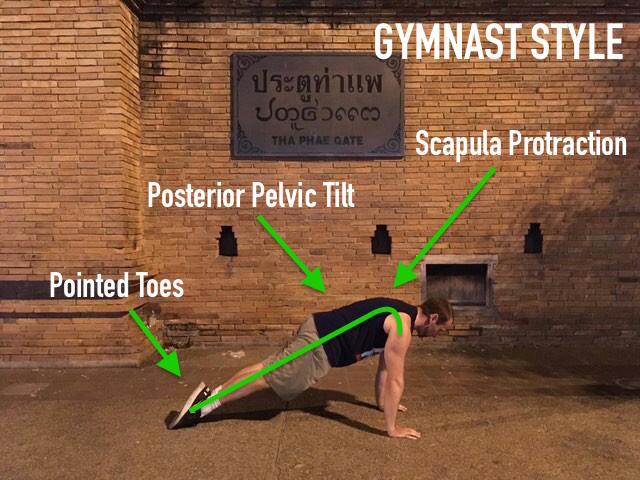
Gymnast Plank
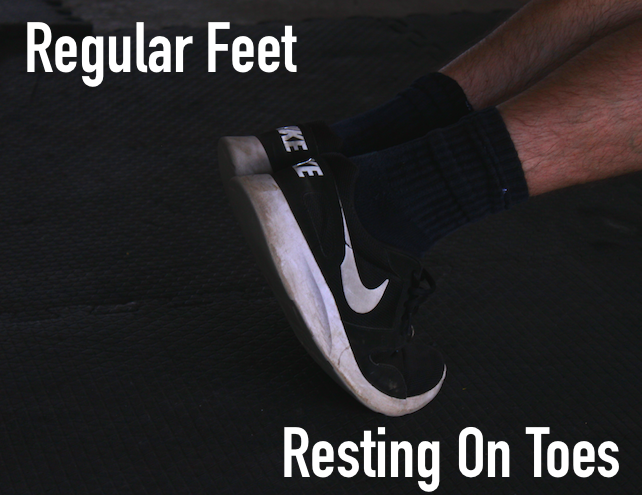
Regular foot position (on toes)
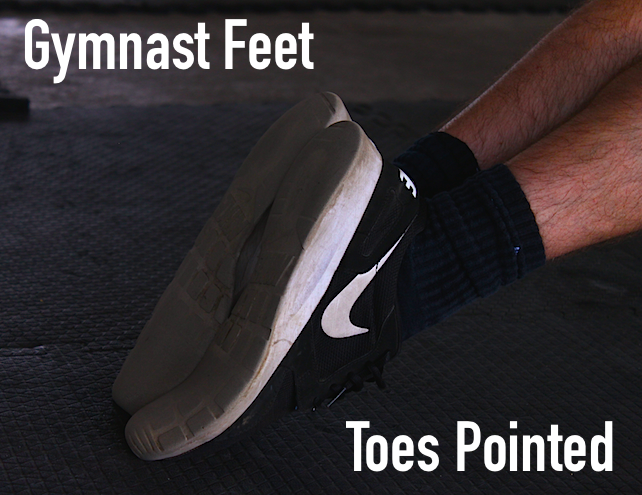
Gymnast foot position (pointed toes)
The gymnast plank is a unique variation that is purposely designed to build a foundation towards more advanced movements later on. It is typically performed using straight arms (so not resting on the forearms), but looks a little bit different than just the standard resting-on-your-hands plank we’ve been talking about.
We already discussed one aspect of it – the protracted scapula – but there are two more missing pieces. They are the posterior pelvic tilt and foot position. Let’s start with the feet / toes.
If you don’t know already, gymnasts love to point their toes. Some people argue that it’s purely for artistic reasons but speaking from experience, I would say that there is a practical advantage to pointing your toes that goes beyond just ‘looking nicer’. That advantage is tension.
When you point your toes, it automatically causes your calves to flex and you are in effect generating tension in that part of your body. When it comes to handstands and any of the lever moves, the more tension you can create, the stronger is your hold – so learning to point your toes is good!
Another thing about pointing your toes and resting your weight on the top part of your feet rather than on your tippy toes as is done in the classic plank, is that it increases the load on your entire body. It’s because when you stay on your toes, a large amount of your bodyweight is absorbed by them. When you rest your weight on the top part of your foot, because the toes are no longer a point of contact, the weight has to be absorbed by the rest of your body since it can’t just sink into the rigid support of the toe joints anymore.
Two other things happen as well.
Number one, it forces you to engage your leg muscles a lot more to maintain a straight line of tension. When you rest your weight on your toes, you can choose to somewhat relax your glutes, quads, etc, but as soon as you go gymnast style, if you don’t start activating those bigger leg muscles then your legs will start sinking into the floor. Either that or your body will start to curl at the toes and slide backward to try to shift the weight back onto the toe joints.
Don’t let it do that!
Instead activate those glutes and quadricep muscles in your legs and generate tension.
The other thing that will usually happen is that your body will naturally shift forward slightly and more of your bodyweight will be loaded onto your upper body. This is a good segue to the ‘planche lean’ which you’ll need later when you begin working on the planche.
Aside from the feet, the gymnast-style plank also incorporates an active posterior pelvic tilt.
If you are going to go further down the calisthenics road towards more advanced exercises – you should attempt to hold a posterior pelvic tilt during your planks at least some of the time.
By default, your body will go into an anterior pelvic tilt and this is by far the most common way you see a plank performed. It’s not necessarily wrong, but it doesn’t prep your body for other work like handstands, planche, etc. See the difference below.
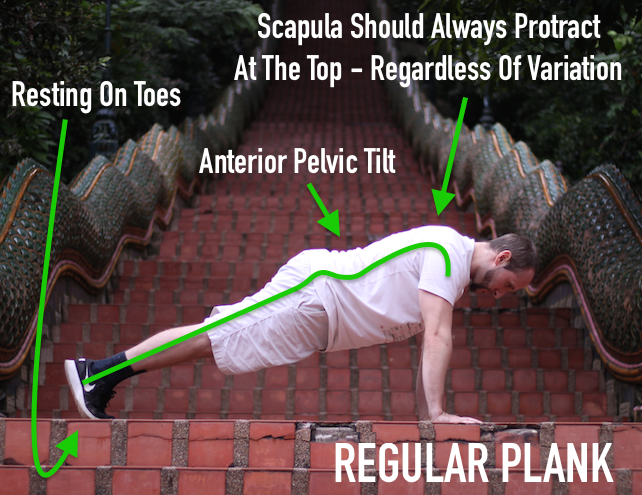
Regular plank (anterior pelvic tilt)
Gymnast plank (posterior pelvic tilt)
Parting Thoughts
The plank is a wonderful exercise that can be manipulated to build a strong foundation for other more challenging movements. I will refer back to it often in other sections of the bodyweight exercise library because it is that useful. Whether you are trying to learn wrist pushups, the human flag, or the front lever, many roads lead back to utilizing the plank somehow. Become familiar with it and use it appropriately to reach your goals.