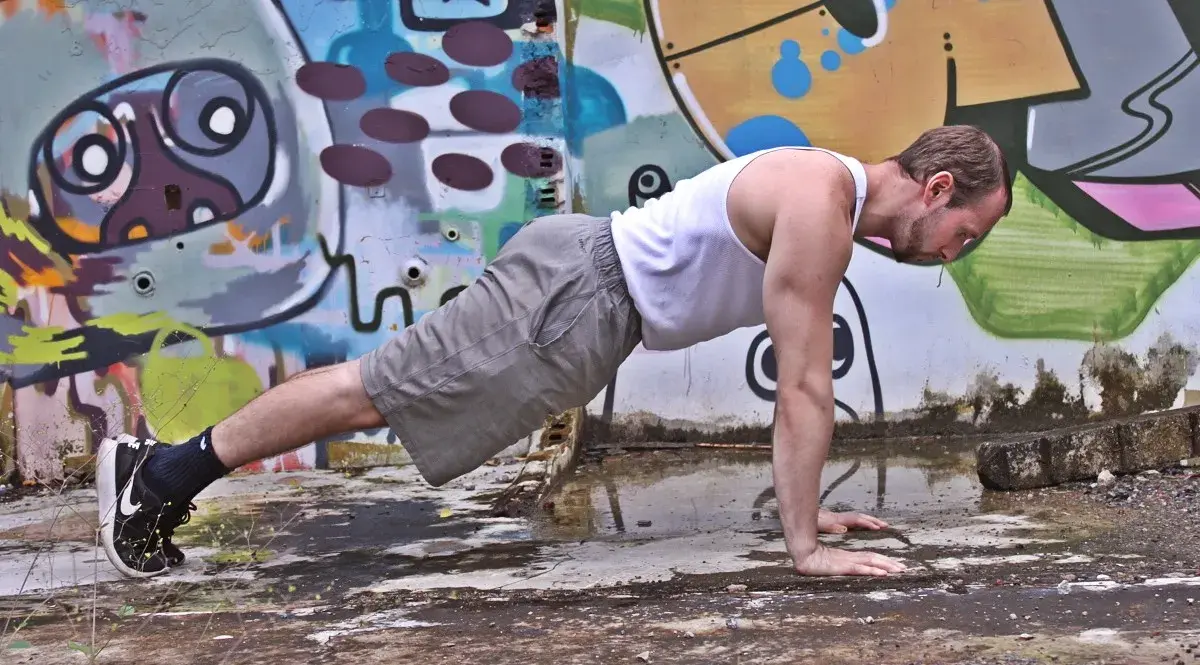
The mighty pushup. Perhaps the most recognizable calisthenics exercise there is. Utilized by everyone from the military to your high school gym teacher, it’s a staple exercise in any bodyweight enthusiast’s training regimen, but plenty of other fitness disciplines can benefit from it as well.
Below I break down the proper form and dive into some common mistakes that people make when performing this classic movement. In addition, I suggest some other tweaks you can play with if you are seeking to pursue your calisthenics practice further.
Before we begin, I’d like to make a note about training pushups for strength versus training pushups for endurance. To the untrained eye they probably look the same. However, there is quite a bit of difference between the two. The most noticeable is speed.
As you probably guessed, when done for endurance, pushups are performed quickly. They are usually a breath-to-movement exercise where each rep matches an equivalent in-and-out air exchange.
Pushups for strength are done slower. They often emphasize the eccentric (lowering down) phase as much as the concentric (pressing up) one.
In contrast, when done for endurance, most practitioners either let themselves free-fall to conserve energy, or if performed on a low bar, they yank themselves back down to increase speed.
I mention all of this because some of the guidance below pertains to all situations, whereas some wouldn’t make sense if you were performing pushups for endurance. I’ll make a note next to each section that says something like ‘optional’ or ‘semi-optional’ so you know how to use it.
Table of Contents
- Head and Neck Position
- Arm Position
- Hand Position
- Back, Torso, and Scapulae
- Glutes
- Legs and Feet
- Range of Motion
- Classic Pushup vs Gymnast Pushup
Head and Neck Position
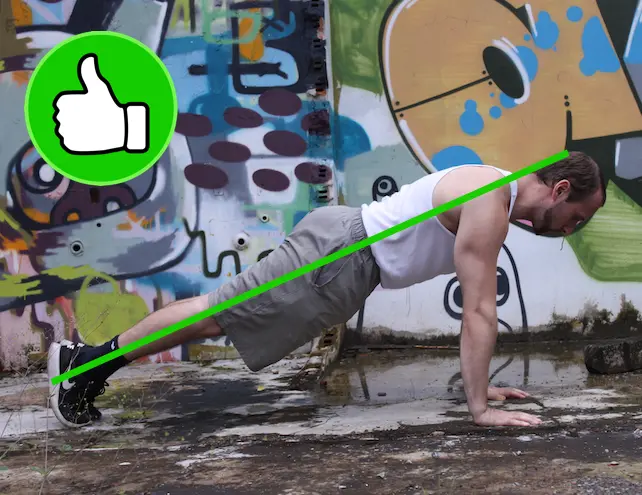
In order to keep as close to a neutral spine as possible, you should begin face down, looking at the ground in front of you. As you descend towards the floor and get to the very bottom of the range of motion, try to maintain the same head position as much as you can.
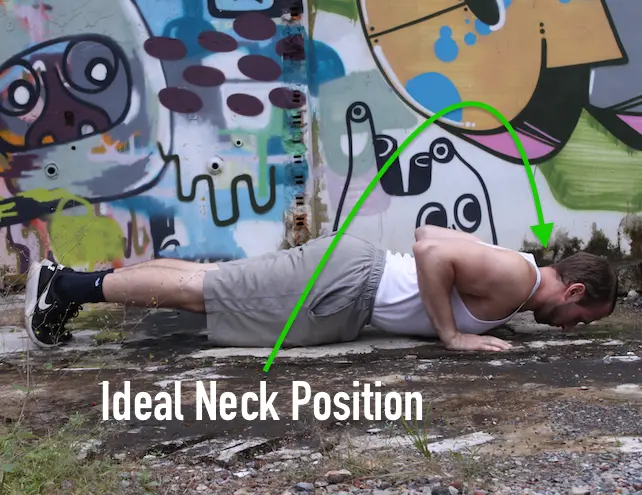
Some people might need to tilt their head up slightly in order to avoid making face contact with the ground. If this is you, then go ahead and do so. But only do it enough to allow your chest to touch the floor without smashing your nose. There’s no need to crank your neck back all the way to look forward.
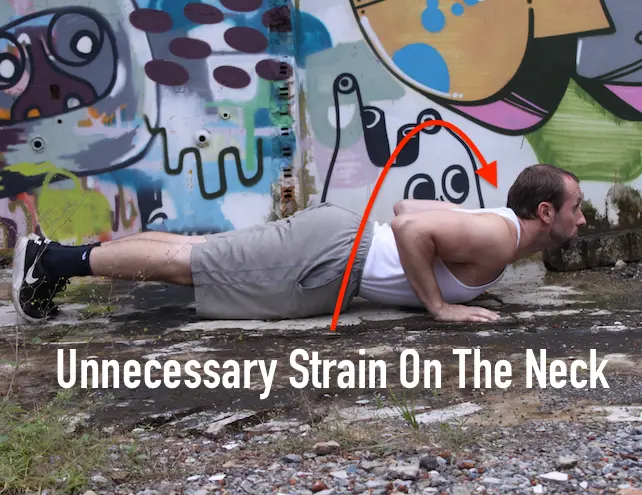
Although looking up isn’t technically ‘wrong,’ if done over and over, it can tighten your neck and trapezius muscles over time. When combined with lots of pullups and muscleups, the end result could be a pulled muscle and/or one of those neck cramps where you can’t turn your head at all. So to lessen your chances of that happening, look down instead of forward.
(Semi-Optional; Highly Recommended)
Correct vs Incorrect Head Position
✓ Correct Head Position
✗ Incorrect Head Position

Arm Position
You should place your hands anywhere from shoulder width to slightly wider than shoulder width. As you descend down towards the ground, your arms + your body should resemble an arrow shape when looked at from above.
Do NOT flare your elbows out. If your body looks more like a capital ‘T’ from overhead then you are doing it wrong.
You can bring your arms even closer to hug your body which is what a lot of yogis do during updog-downdog, but that’s no longer the ‘classic pushup.’ Unlike the capital ‘T’ though, it is a useful pushup variation to have in the arsenal and it’s one of the elements of doing a proper tiger bend pushup.
(NOT Optional)
Incorrect vs Correct Arm Position
✗ Incorrect - “T” Shape
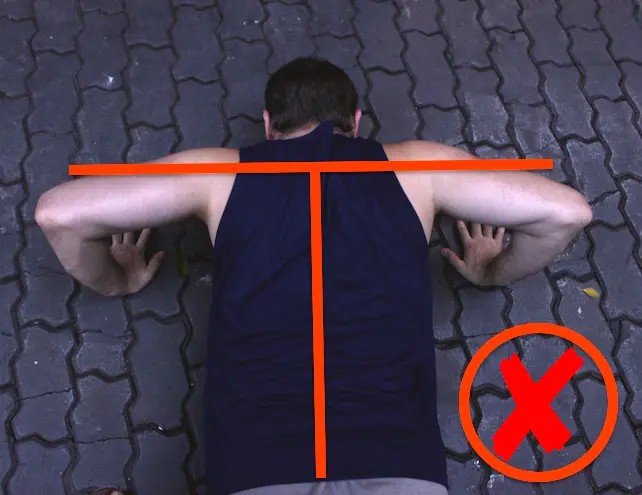
Elbows flared out creating a “T” shape - avoid this!
✓ Correct - Arrow Shape
Elbows close to body creating arrow shape - perfect!
Hand Position
The standard hand position is to simply lay your palms and fingers flat on the floor. Not much thought or mind-muscle-connection goes into it.
While there is nothing wrong with this per se, there is a tactile aspect to training that you miss out on when you do this. The hands and fingers send feedback to the CNS (Central Nervous System). By ignoring them, you aren’t getting the full benefit of the exercise.
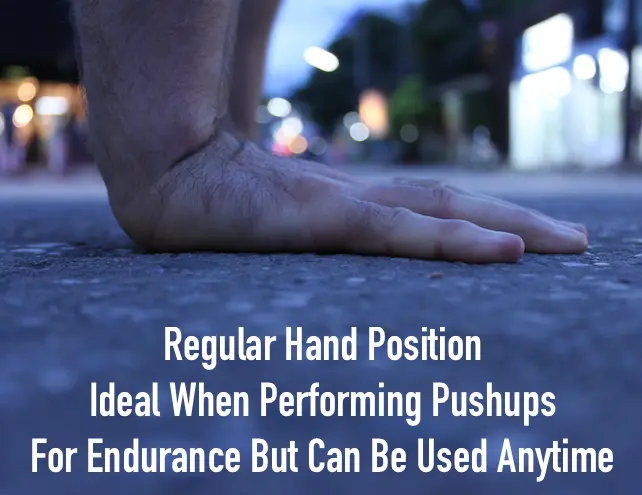
Standard flat hand position
When training pushups for strength, you want to activate the muscles in your fingers and forearms to press down as you are pressing your body back up. If you are attempting a pushup variation that is challenging for you strength wise, trust me that you will feel that extra bit of help from doing this.
If you are simply trying to bang out lots of reps for endurance, then you can just go with the regular hand position.
💡 OPTIONAL: If you plan on working towards a handstand, adjust your fingers slightly so they aren’t completely flat and instead have a little bit of elevation. When pressing your body up for each rep, actively drive your fingertips into the floor as if you were counterbalancing your weight in a handstand. If you start doing it with your pushups, you will build a neuromuscular foundation that will make it easier to balance with your handstands later on when you are ready.
Enhanced Hand Positions for Strength Training
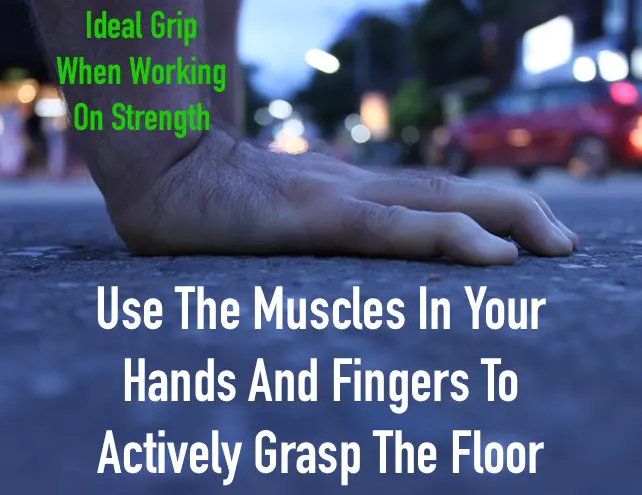
Fingertips engaged for strength training
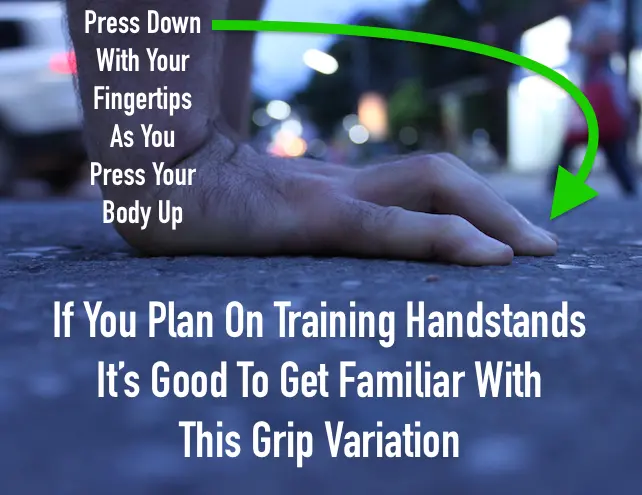
Hand position prep for handstand training
Back, Torso, and Scapulae
You should develop a degree of scapulae awareness and pushups are an excellent way to do that.
This is because you already naturally retract your scapulae on the descent and protract when you press back up off of the floor.
You’re probably just not actively aware of it.
Scapulae protraction at the top
If you’re scratching your head right now because you don’t know what scapulae are or what I’m talking about — the scapulae is fancy talk for your shoulder blades.
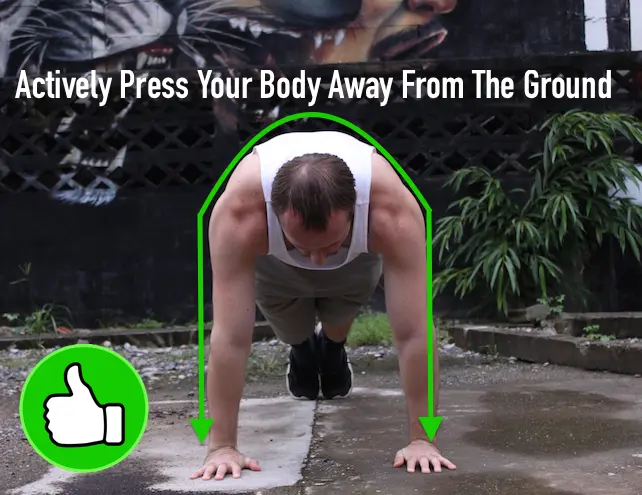
As I mentioned, your shoulder blades naturally retract as you lower down towards the floor. As you press back up, they protract slightly. However, the key is that you should try to make it more than slightly by actively pressing the floor away from you.
If done correctly, you will feel your torso elevate about another extra inch (or higher) beyond what it would normally do if you were just banging out quick reps.
Really try to make that mind muscle connection and think about how your shoulder blades are spreading apart as you are pushing the ground away from your body.
(Optional; Strength-Only)
Glutes
Try to activate your glutes by squeezing your butt cheeks together to create tension. Though keep in mind that maintaining that tension throughout the duration of your set can be particularly challenging. Depending on your natural strengths, your butt might get tired before your upper body muscles do. If that’s the case you can relax your glute muscles until you finish your set.
An alternate method is to squeeze them together on the way up and relax them as you descend towards the floor. Glute activation is somewhat optional during pushups and it isn’t really ‘wrong’ if you don’t do it at all. However, it will start training your body to create total body tension, which you will need for more challenging static holds later on.
(Optional; Strength-Only)
Legs and Feet
As a general rule of thumb, the closer your feet are to each other, the more challenging the pushup. The more you spread your legs into a straddle position, the easier it becomes.
You want to have your feet together, but often times the straddle leg position is useful when you are building towards more challenging pushup variations such as the one arm or even if you just don’t have the strength yet to perform the classic pushup.
As far as the toes, you can either be on your toes (which is the classic pushup), or you can rest your bodyweight on the top part of your foot (which is the gymnast pushup). The gymnast pushup variation is harder but it leads to more strength gains. More on that in a bit.
(Optional; Used For Regressions / Progressions)
Foot Position Variations
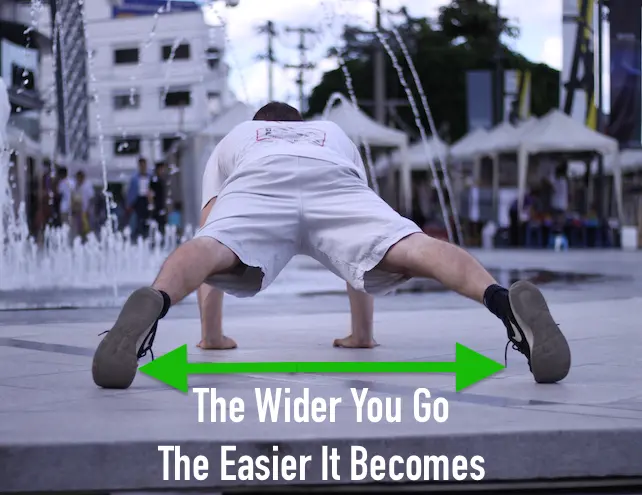
Straddle position - easier variation
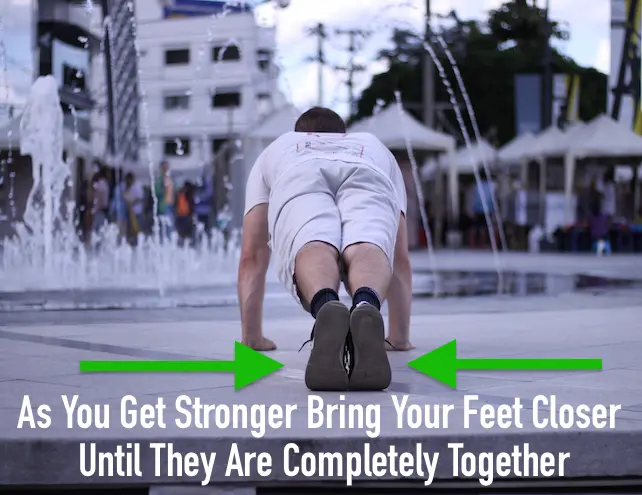
Feet together - standard difficulty
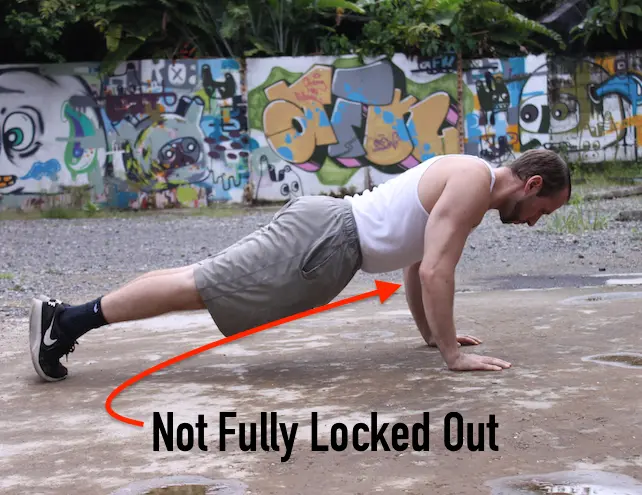
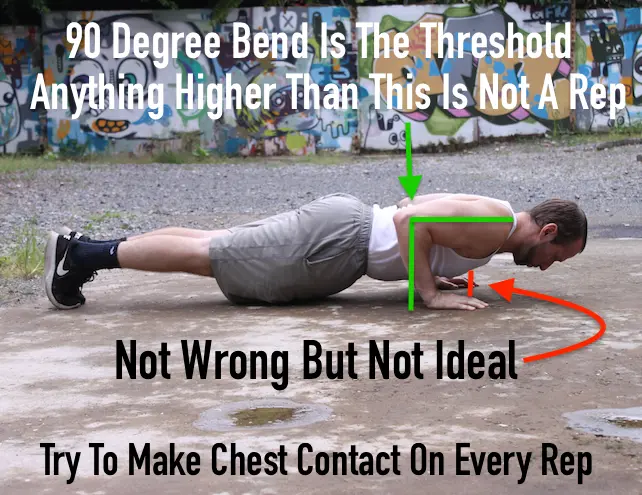
Range of Motion
The classic pushup is chest to floor and full lockout of the elbows at the top. While there are some advanced ‘burnout strategies’ and other techniques that involved doing partial reps or ‘minis’ as we call them, if you are a beginner, you should be doing full range of motion.
Remember that old saying about knowing the rules before you can break them? Well that applies here. You should aim for quality, full range of motion reps.
Some trainers will say that as long as your elbow breaks 90 degrees on the way down that this counts. However, unless you have some sort of injury that’s barring you from going chest to floor, then there’s no reason why you shouldn’t.
If you have poor shoulder mobility preventing you from doing chest to floor then perhaps you need to start spending more time stretching and not just strengthening. If you need guidance on this, feel free to reach out to me or ask another knowledgable trainer for shoulder mobility exercises.
(NOT Optional for Beginners; Optional for Advanced Practitioners)
Classic Pushup vs Gymnast Pushup
What the heck is a gymnast pushup?
If you read the plank tutorial before coming here then you probably already have a good idea.
Simply put, it is a more effective form of the standard classic pushup. It builds a solid foundation for more complex bodyweight strength training work later on.
If you have no desire to go beyond the basic calisthenics movements like pushups, pullups, etc then you don’t necessarily need to familiarize yourself with the gymnast pushup. However, adding it into your training regimen alongside regular pushups will still yield positive benefits in terms of strength gains and body control.
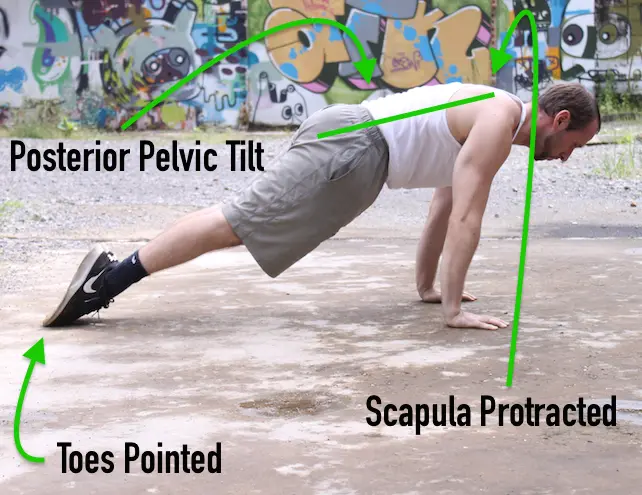
The gymnast style pushup is performed by:
- Holding a hollow body plank with toes pointed out (top of foot resting on floor).
- Maintaining a posterior pelvic tilt.
- Protracting the scapula at the top of the range of motion.
The body also naturally tends to lean slightly forward on these and in fact as you move ahead in difficulty, increasing that lean is actively encouraged. By doing so, you will place a greater load on your shoulders which you will need to strengthen for such things as the planche or a handstand pushup.
Again, these should be a part of your training program if you want to proceed further in your calisthenics journey. If you want to stick with just the basics then these are optional but encouraged anyways.
(Optional; Strength-Only)
Gymnast Style Pushup Demonstration
Top position with posterior pelvic tilt
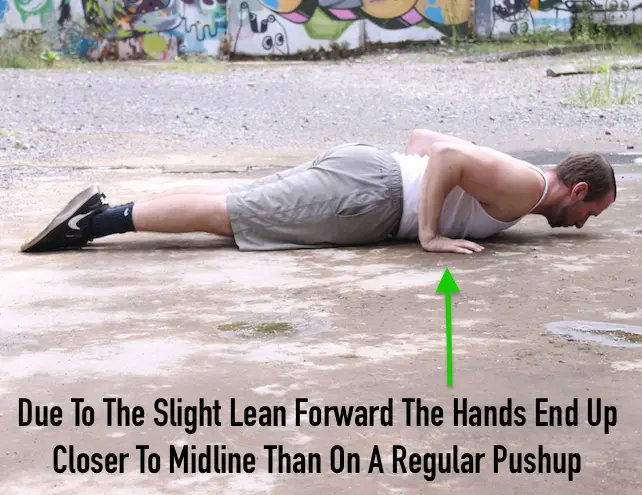
Bottom position with forward lean
Final Thoughts
As I mentioned before, if you’re going to be doing ‘endurance pushups’ for reps where you will try to complete as many as possible (or a certain amount in a limited time period), then you wouldn’t use most of the techniques listed above.
The main mandatory aspect is what was described in the ARMS section. There IS a straight up wrong way to do pushups regardless of whether you are performing them for endurance or strength and your arm position is a key component of that.
The optional stuff includes pressing into the ground with your hands, actively protracting your scapula at the top of your pushup and squeezing your glutes. Semi-optional is the head position, but it is strongly recommended to try to maintain a neutral spine as described in that section.