
Pushups regressions are ideal for beginners. If done correctly, they can help you build enough strength to achieve your first pushup.
The two most common regressions are the upper body elevated pushup and the on-your-knees pushup. I’ll go over both and then talk about some common mistakes and troubleshooting methods.
Feel free to use these as you see fit or work with a trainer to incorporate them into a structured training program.
Table of Contents
Upper Body Elevated Pushups
This pushup regression is great for several reasons with the most obvious being that you can easily and measurably scale it for the novice practitioner.
In extreme cases you can even begin by doing them against a wall, then after some strength has developed, a kitchen counter or some other fairly high surface will suffice. The general idea is that the higher your upper body is elevated, the easier the pushup becomes.
As you keep descending your starting point, you get closer to the floor and eventually to the real pushup itself. If you find an area that has a set of steps like in the demonstration pictures below, you can work on a higher step for a while and then gradually move down a step as you get stronger.
If you train in a commercial gym that has a Smith Machine, you can easily track your progress by remembering what increment you hook the bar on. Just like in the step example, you bring yourself closer to the ground as you progress.
A good rule of thumb is if you can perform 5 sets of 15 reps with about a minute rest in between, and the last set isn’t really that challenging, then it’s time to move the body closer to the floor.
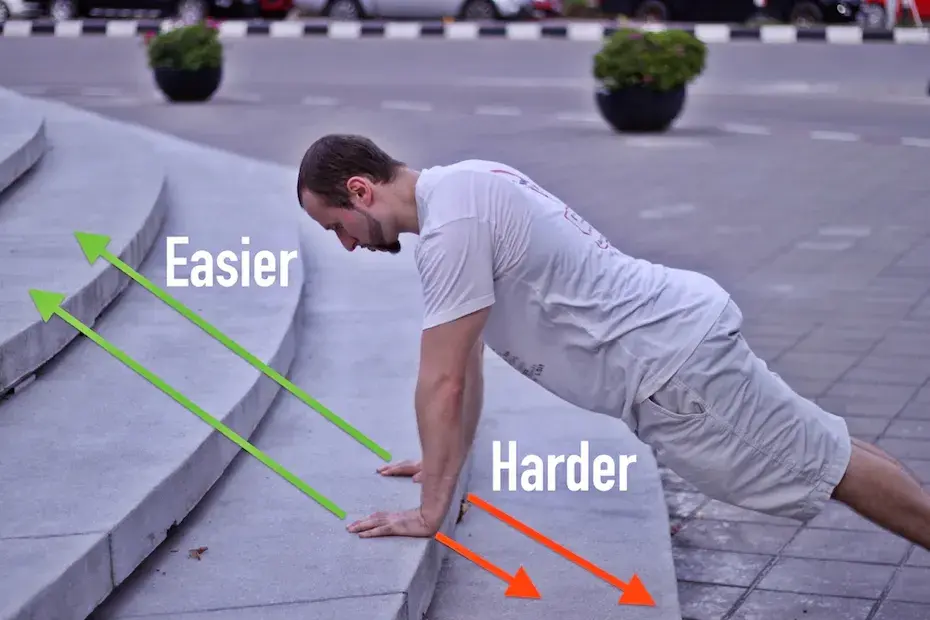
Top position: Body elevated on steps
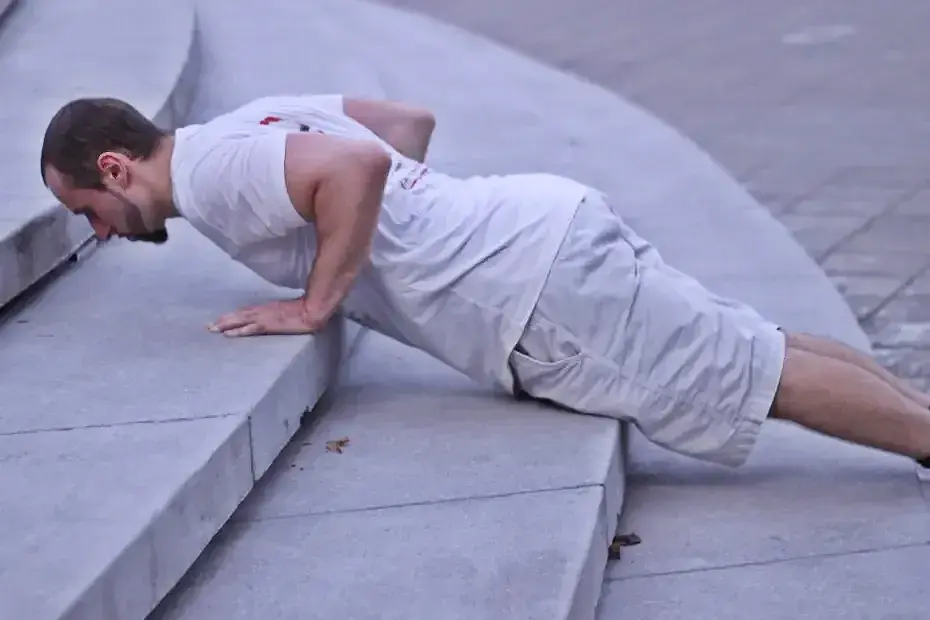
Bottom position: Maintaining straight line
On-Your-Knees Pushups
This particular pushup regression is the one that most people default to and you’ll probably see the most often.
It makes sense and it does work – if performed properly – but you can’t really scale it the same way as the upper-body-elevated pushup.
It offers very little in the way of progressing towards the real pushup, but if you do want to utilize it, please at least make sure that you are keeping your form correct.
A common mistake that many beginner trainees make is to hike their hips up and/or back in an attempt to de-load the working muscles (chest, front delts, triceps). See below.
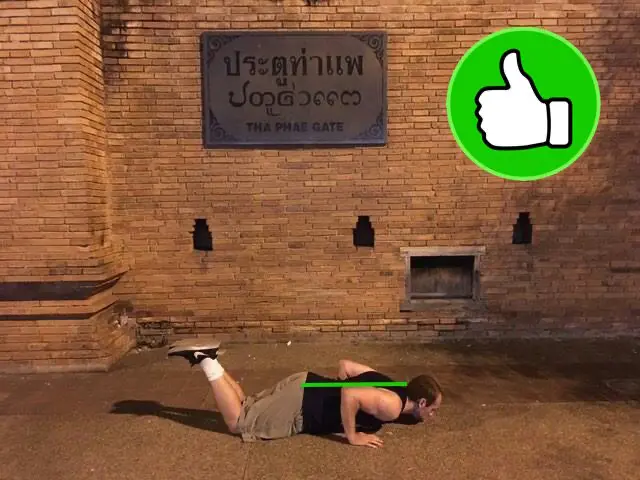
✅ Correct: Bottom position
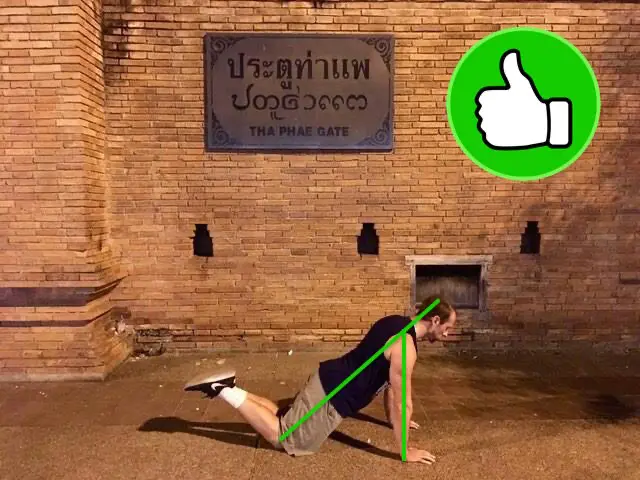
✅ Correct: Top position
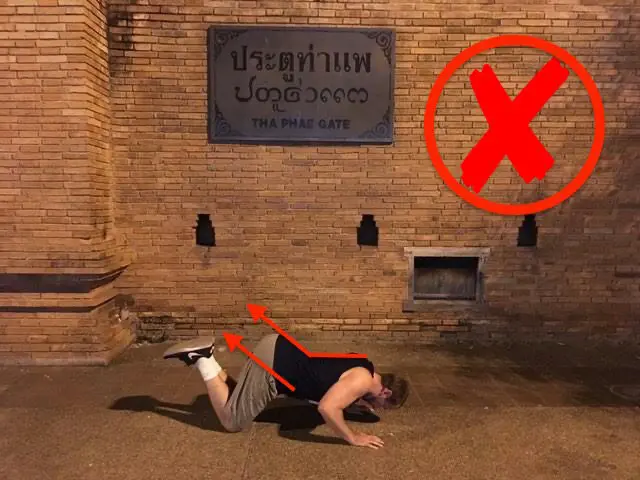
❌ Wrong: Hips hiked up
As you might have guessed by now, of the two regressions, I strongly recommend doing the upper body elevated pushup rather than the on-your-knees version.
💪 The elevated pushup forces your body into the same plank position that you would do in a classic pushup and the movement pattern is virtually identical.
😰 With the kneeling version, if a beginner trainee hikes their hips ‘up and back’ as shown above, it really kills the benefit of the exercise and it can be tough to correct.
If you do use this regression either on your own or with a client and they begin to exhibit the hip hiking, it’s recommended to get a broomstick or any relatively lightweight stick for correction.
No, you’re not going to beat them with it.
You will place it across the center of their back so it runs from the top of their head down their spine. You can let them try to balance it but this is usually awkward so instead hold it lightly for balance.
Now any time they try to hike their hips they will knock the stick off their body, but more importantly they will start to feel it happening which will hopefully promote the counter response of staying in the proper position.
Elbow Position
✅ Correct: Arrow shape (45° elbows)
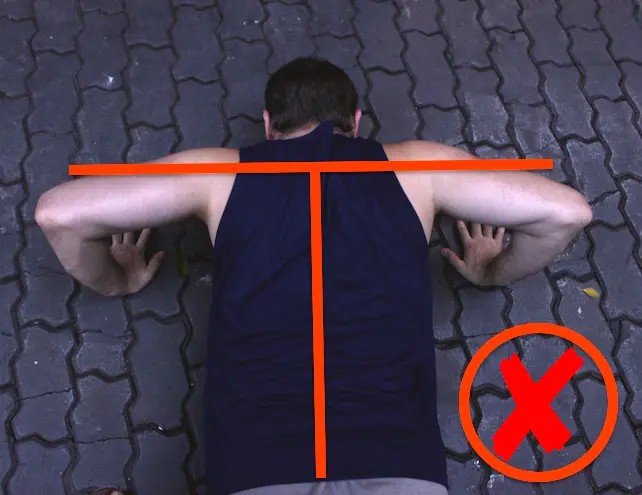
❌ Wrong: T shape (90° elbows)
Another common mistake that can happen with both variations is the flaring of the elbows. The culprit here is usually weak triceps seeking to get out from underneath the weight (i.e. – your upper body).
If you notice this happening when trying the full pushup and you can’t correct it, then it’s time to try elevating your body and building the required strength first. This was also discussed in detail in the classic pushup tutorial.
Feel free to play around with either the elevated or the on-your-knees pushups, and if you find yourself being at a point where you can ‘almost’ do a full pushup, then perhaps it’s time to employ the straddle foot position below.
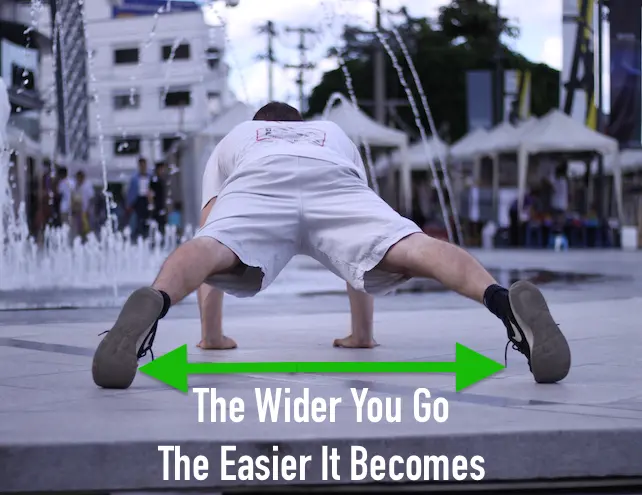
Easier: Wide straddle position
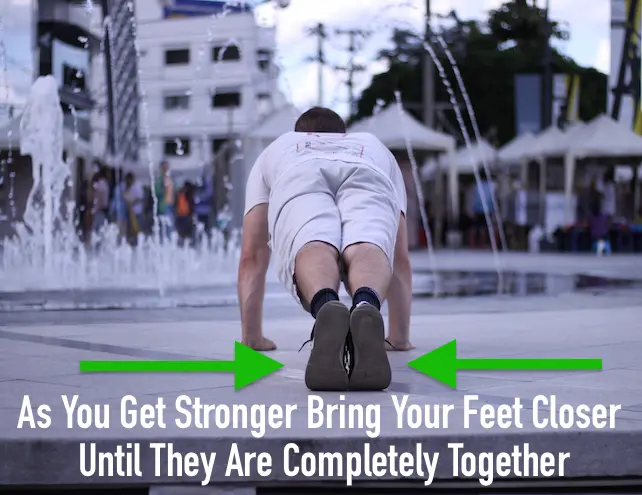
Harder: Feet together (full pushup)
By spreading your feet apart, you accomplish two things that make the pushup easier. You decrease the length of your body slightly and you spread out your points of contact so that your bodyweight becomes more evenly distributed onto your muscles.
When your feet are completely together, all of your weight is coming down on that one point. When you spread them wide, your weight now shifts and becomes more spread out, making it more manageable for your muscles to handle.
The straddle is a useful tool that has many applications for other more advanced movements as well. Keep it in your arsenal and use as appropriate.