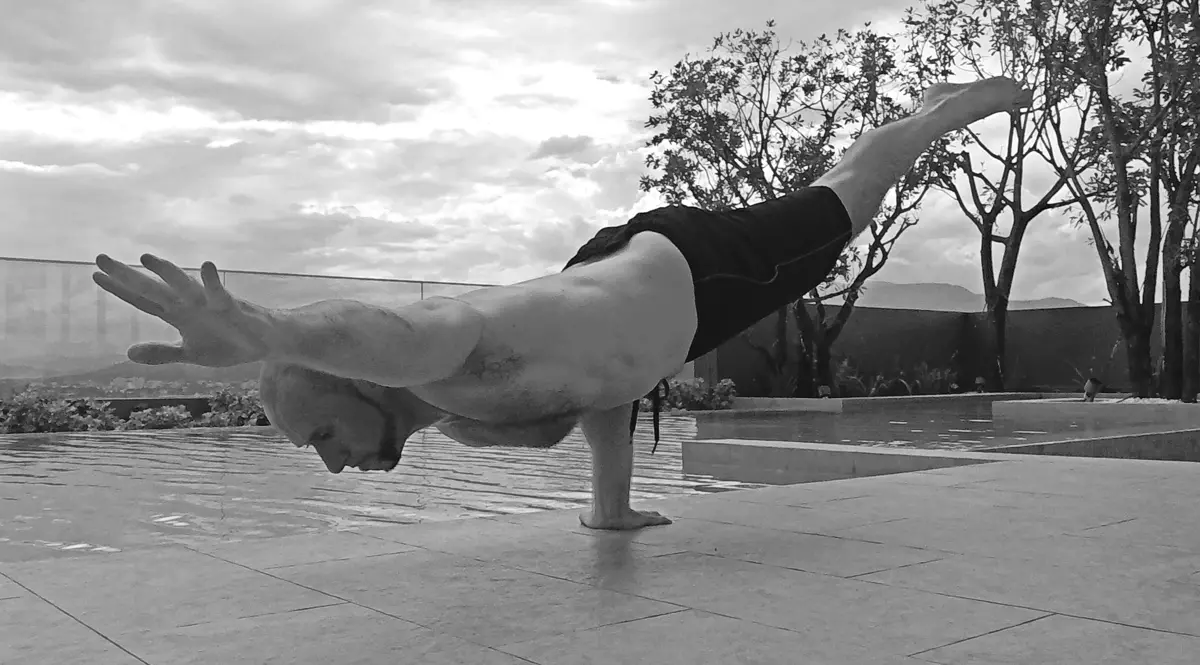
Although it can be quite difficult for the layperson to achieve, the elbow lever is actually an entry-level move when it comes to static holds. If you have a decent level of baseline strength, then you can learn it fairly quickly. However, if you’re just getting into calisthenics or exercise in general, then it’ll require extra effort to accomplish.
The move is also sometimes referred to as the ‘bent-elbow-planche’ due to the fact that the body is parallel to the ground in the same way that it is when performing a planche. Despite that one visible similarity though, the planche is on the opposite spectrum of difficulty and requires a lot more work than the elbow lever.
That’s good news if you’re here though! It means that with some solid effort, you will hopefully unlock the elbow lever sooner rather than later. The progressions in this guide will get you there.
Before we get started, I want to mention that even though I use the term ‘elbow lever’ as if it were one single exercise, there are actually multiple variations of it. The two most common ones can be divided up based on what is needed to achieve them. The first relies heavily on balance – this is the easier one – while the second is more reliant on strength. We’ll cover both of them below.
Table of Contents
- Balance Elbow Lever: Technique Explained
- Strength Elbow Lever: Technique Explained
- Reverse Engineering the Elbow Lever
- Final Thoughts
Balance Elbow Lever: Technique Explained
While I refer to this as the balance elbow lever, it should be noted that it still requires quite a bit of strength to pull off – just less of it than the strength variation. Balance plays a large role, but you can’t discount strength from the equation.
So where does the balance come from?
It comes from your elbows.
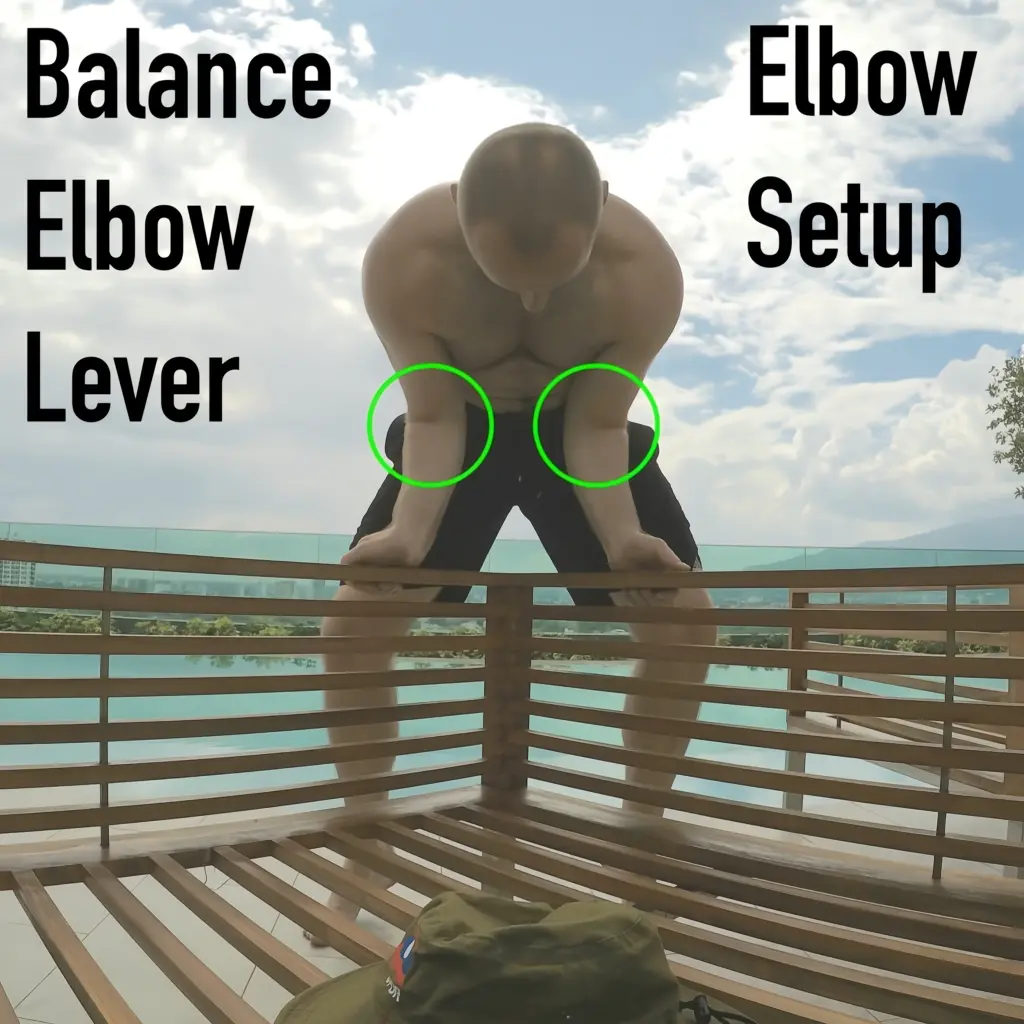
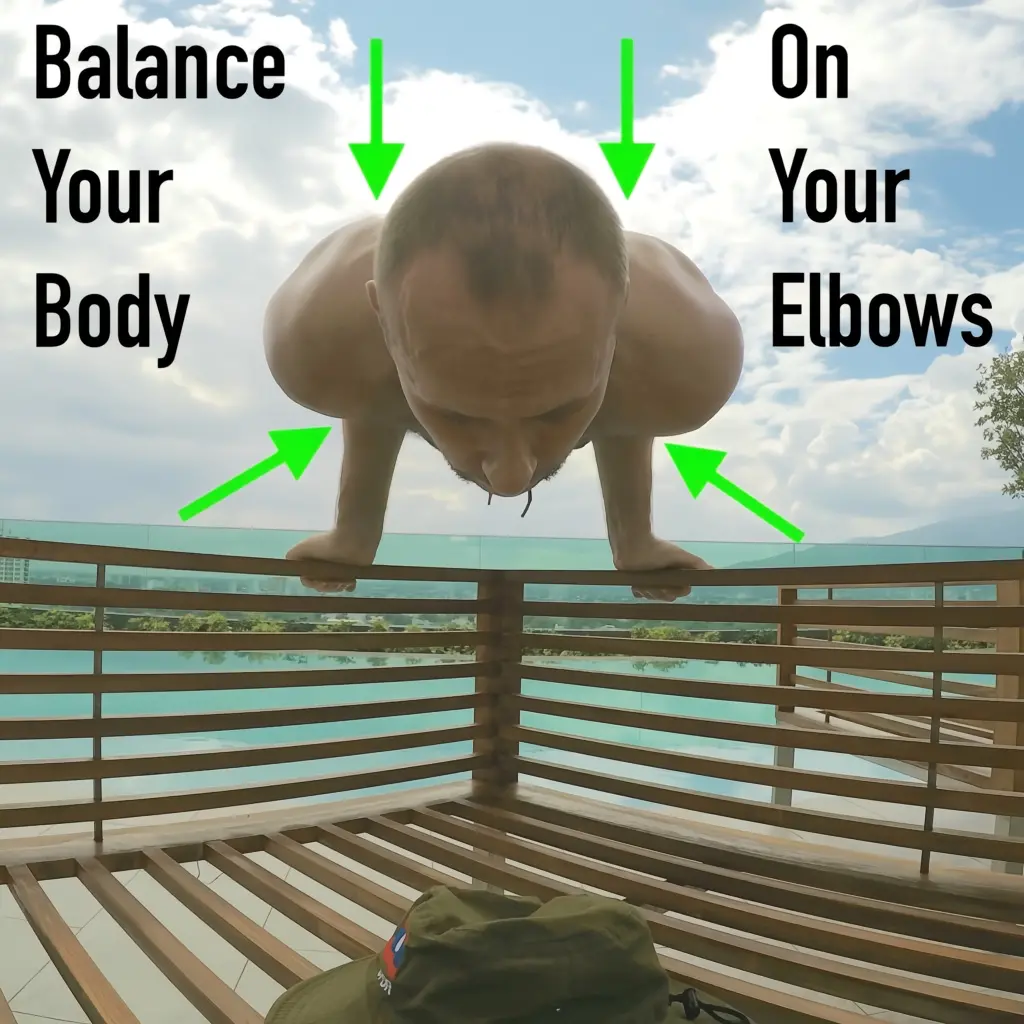
The trick is to dig your elbows into the crevices of your hip bones. You then lift your legs off of the floor and balance your straightened body on your elbows. For most people, that hip bone area will be about midline, which means you’ll end up looking like a balanced see-saw from the side.
The strength comes from pretty much your entire body because you’ll need to maintain total body tension to keep your body in a straight plank.
In this case I don’t mean plank like the exercise, but plank as in resembling a solid piece of wood. Having said that, the key areas that will be working harder than others include your front delts (shoulders), lower back, glutes (butt) and abs.
To pull it off, you’ll want to follow the steps below:
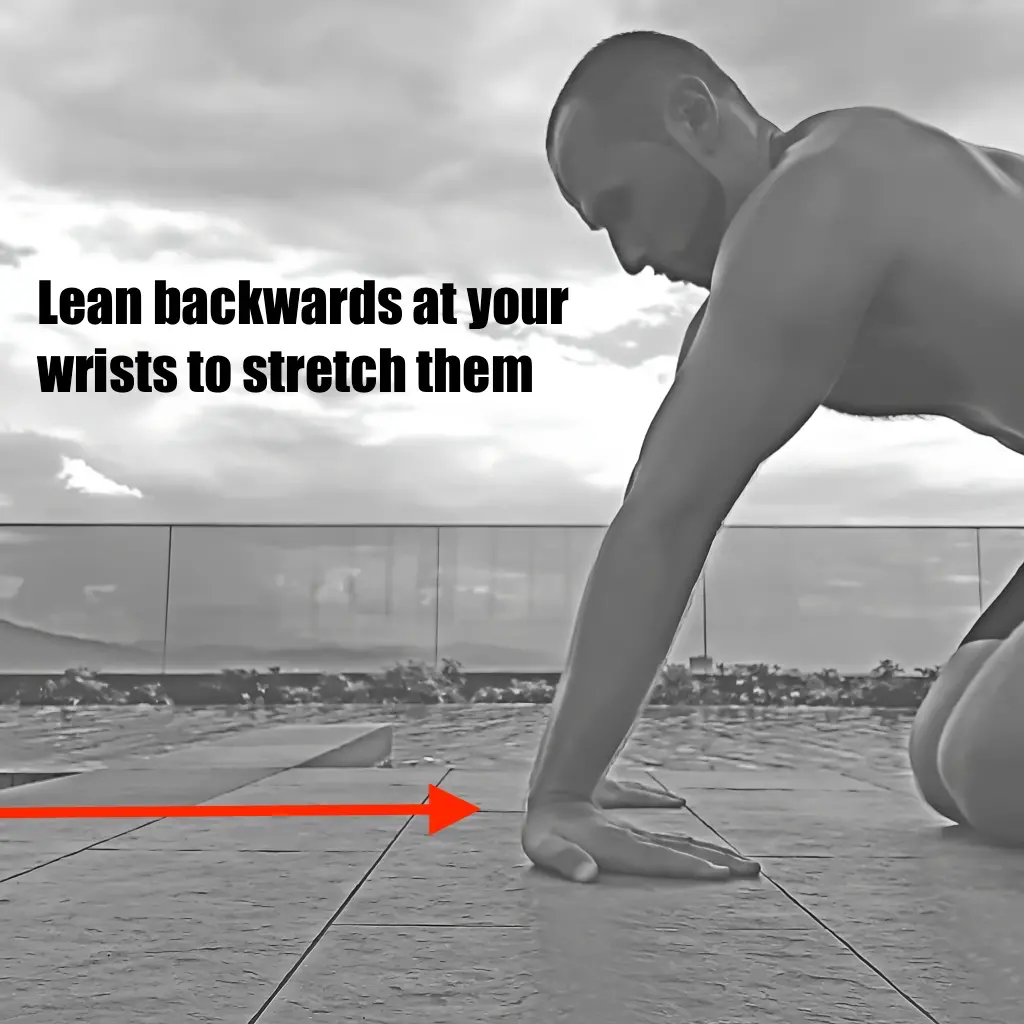
The elbow lever can place considerable strain onto your wrists so you want to ensure that they are adequately warmed up and loose.
Therefore, the very first step is to warm up your wrists with some light back and forth stretches.
Place your hands on the floor in front of you so that your fingers point inward, towards your body.
Then gently lean back at the wrists until you feel a stretch.
Hold it for a few seconds, lean forward when you’re ready, and repeat this several times.
Once you feel like your wrists are adequately loosened up, you can start the actual elbow lever work.
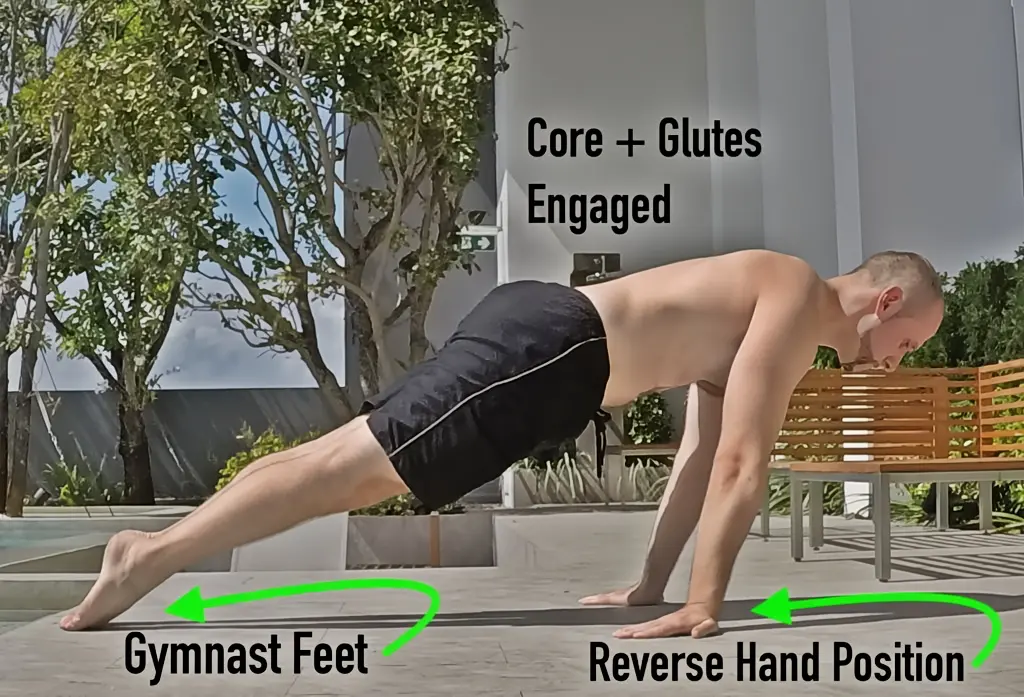
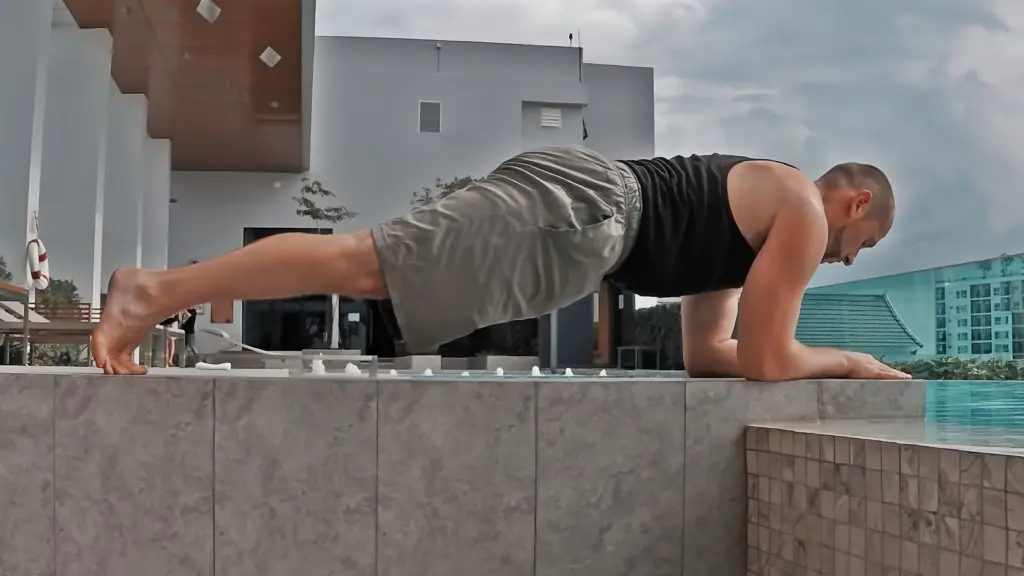
From a kneeling position, place your hands on the ground in front of you – just like you did for the wrist warmup. In other words your fingers should be pointing in the direction of your feet behind you.
Your hands should be spaced at the approximate width that is between your two hip bones.
It helps to find that distance a few times while still kneeling. This way you can see it and replicate it as you position your hands on the floor.
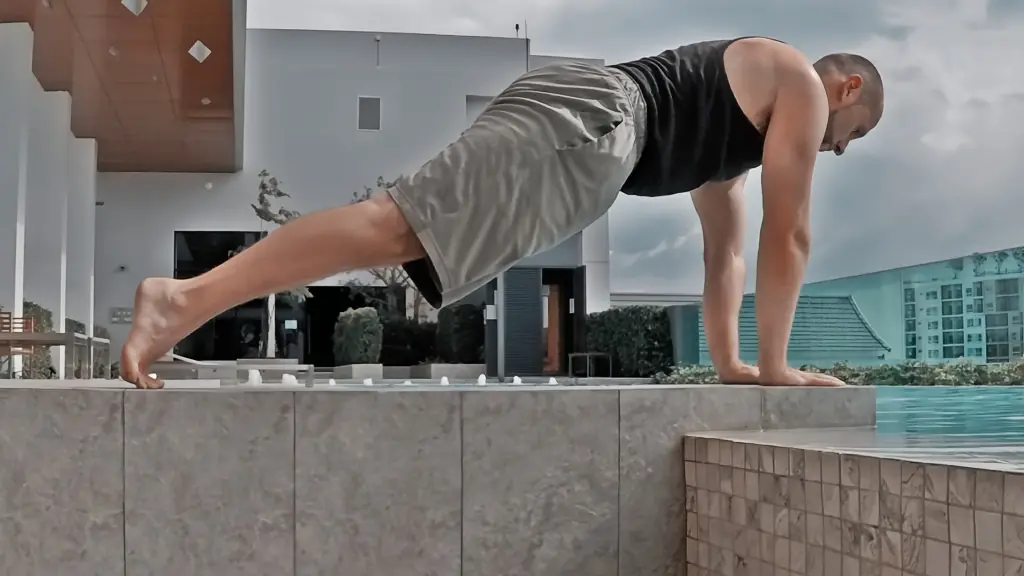
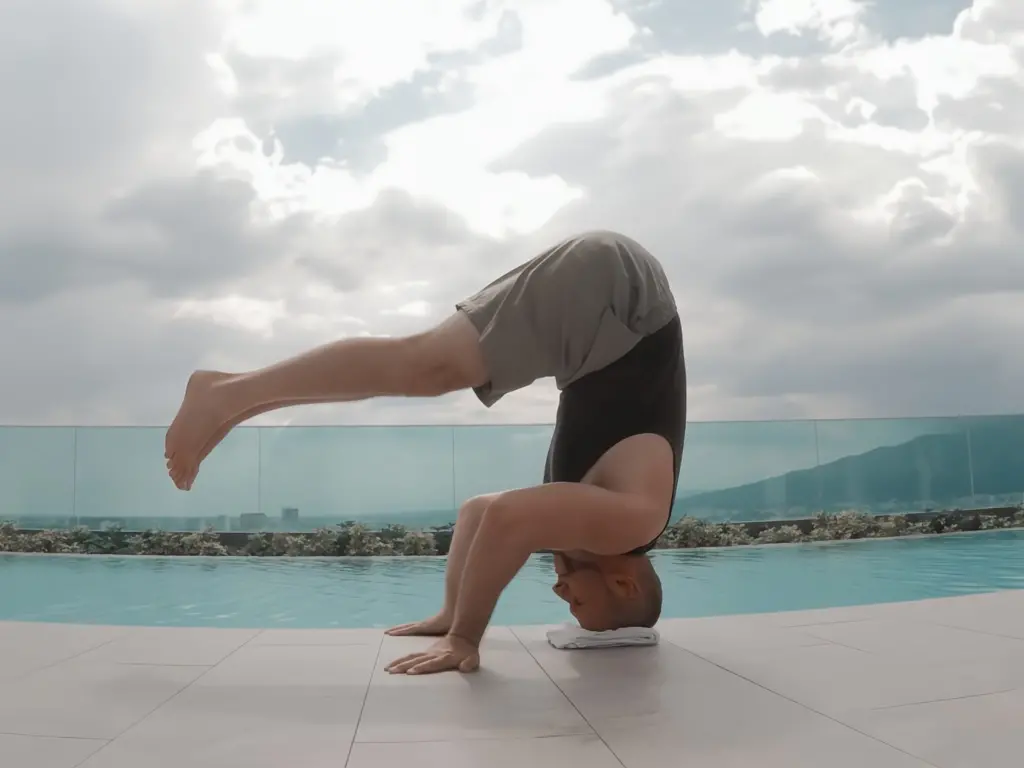
Alternatively, you can also follow this same process on some kind of an elevated surface like a bench. Believe it or not this can make it easier from a strength standpoint. Although some people may find it more psychologically challenging due to the fact that if you lose balance, the fall to the ground is longer and potentially more painful.
With hands and arms in place, bring your body down and allow your elbows to dig into those hip bone crevices.
Then elevate your torso (upper body) and legs off of the floor. If done correctly, you’ll be in an elbow lever.
And that’s all there is to it.
I know: easier said than done. But just keep practicing until you get it.
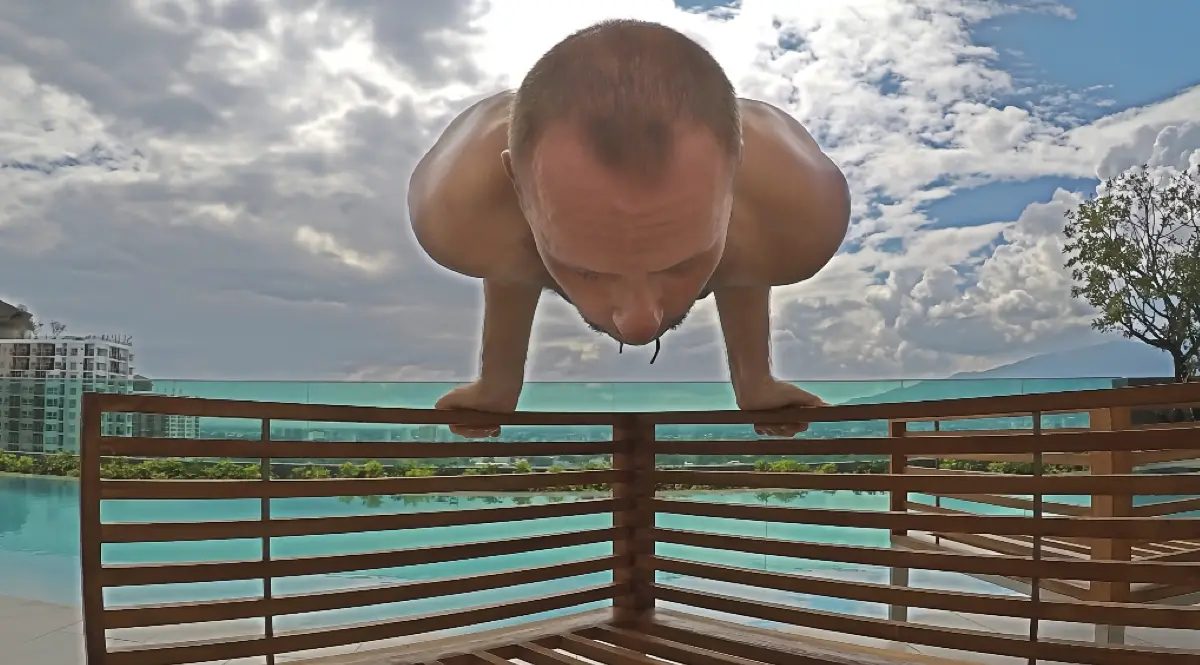
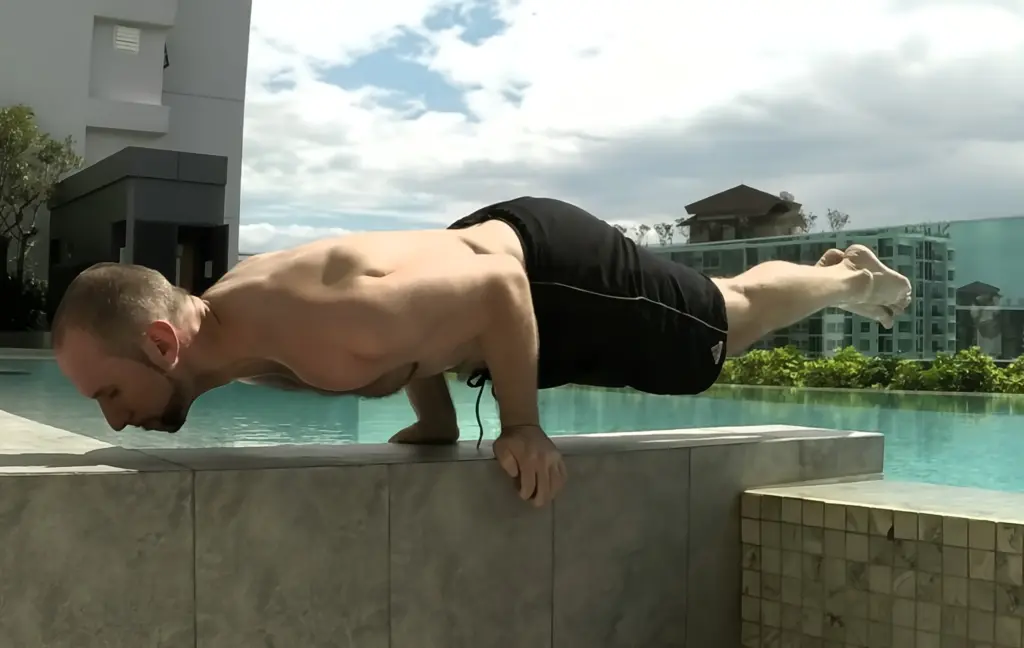
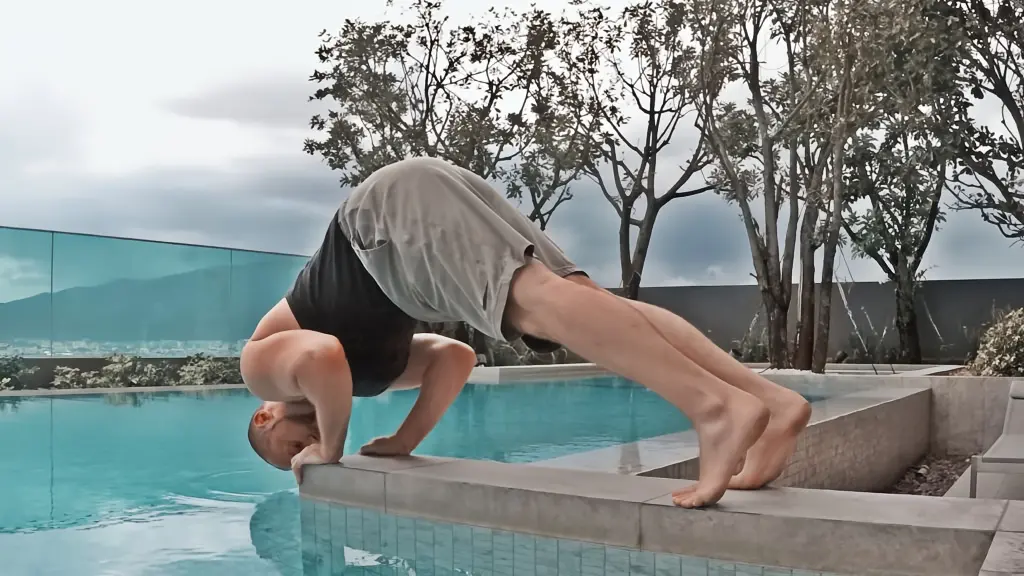
On a personal level, because I have a really wide back, the balance elbow lever variation is borderline impossible for me to do as intended. It is extremely difficult for me to position both of my elbows into the crevices of my hip bones because my lats get in the way.
In fact, the demonstration picture above was only possible because of the upside down triangle position of the bench. It somehow allowed me to pull it off, but I can’t actually do it on either the floor or off of any surface where my hands are in a normal reverse-hand position.
I mention this for three reasons.
The first is transparency. I never fake the funk. I really just can’t do the pure balance elbow lever.
The second is to tell you that “it’s okay” that I can’t do this variation, because I can do the strength one – which we’ll cover next. The same may hold true for you. The point being that you need to figure out what works best for you.
The third and final reason is because I wanted you to see the correct technique. By using the bench, I was able to pull off the elbow-hip crevice positioning so that you could see what it’s supposed to look like.
You can try to do it yourself and if you find that you also have a hard time with the elbow position aspect, then give the strength elbow lever a shot instead.
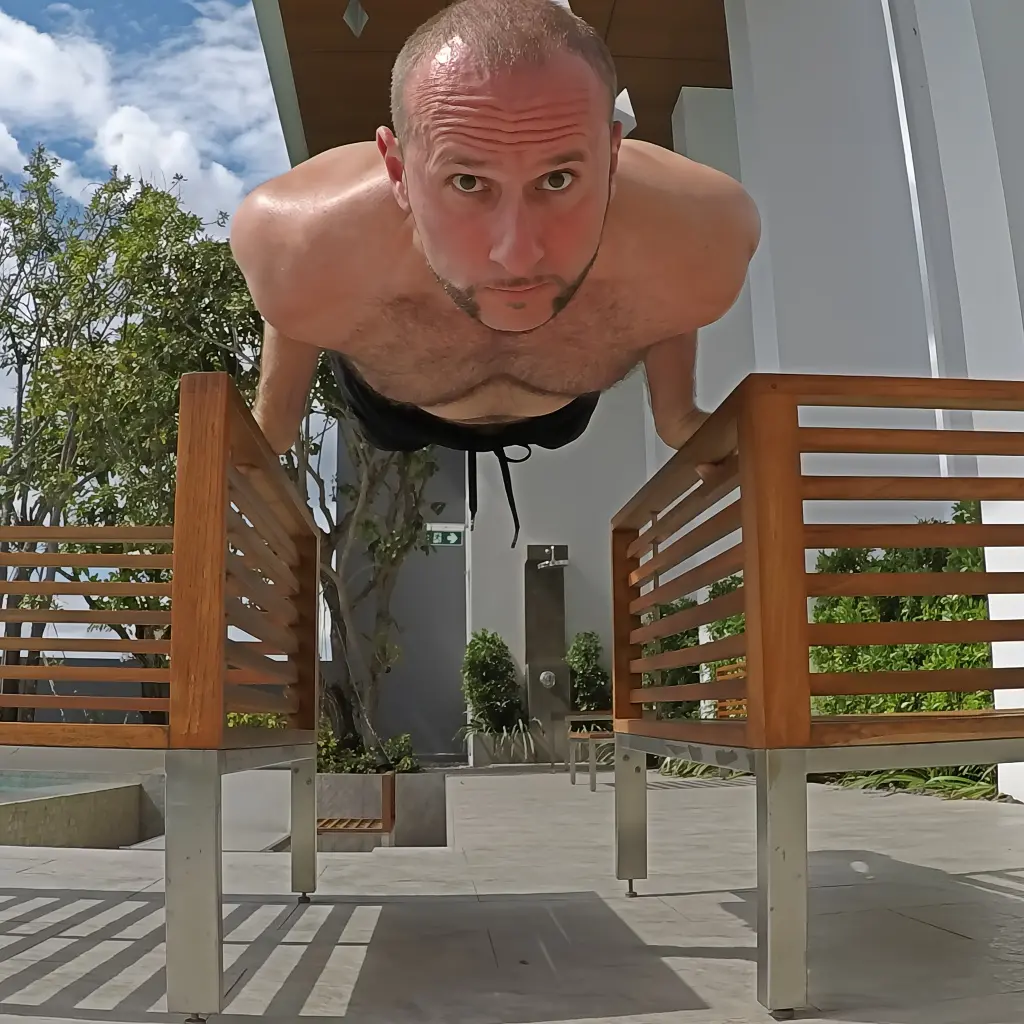
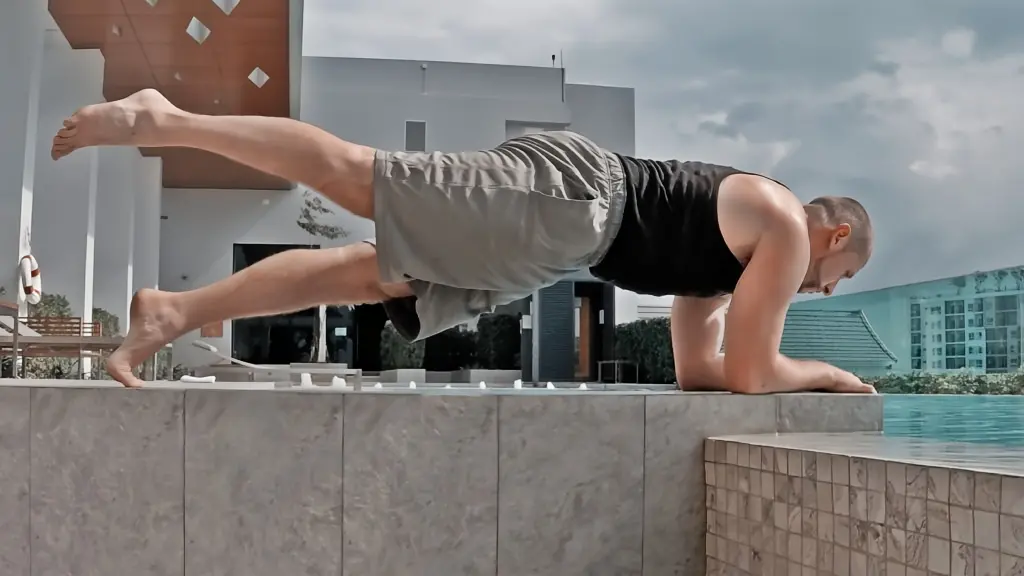
Strength Elbow Lever: Technique Explained
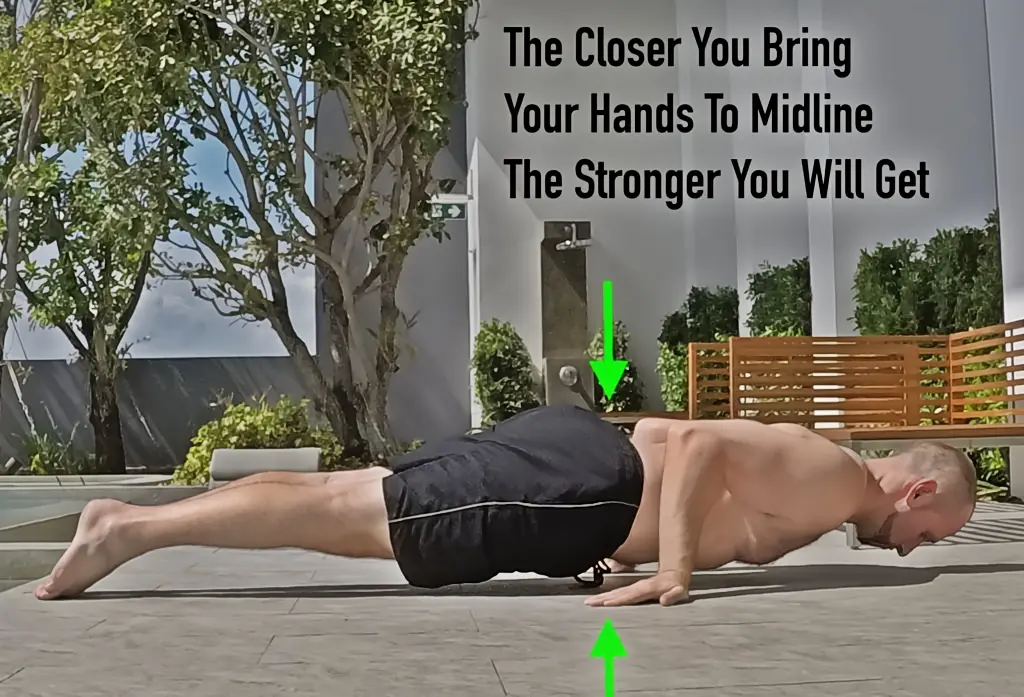
There is only one major difference between the balance elbow lever and its strength counterpart.
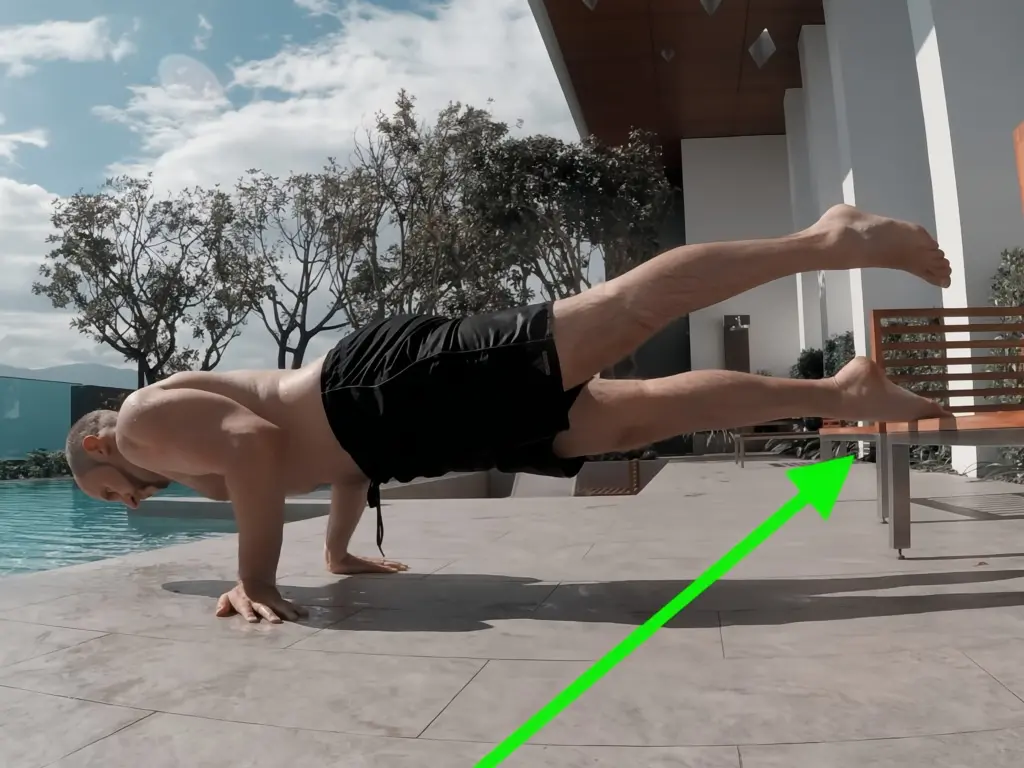
It’s that instead of positioning the elbows on the inside of the body, you place them directly on the outside of the body.
This means that you will need to use more strength to maintain your body in an elevated position because it won’t be able to rest on the elbows.
The majority of this extra strength will come from your triceps and front delts (shoulders).
Besides being easier to perform for those of us who have wide backs, there is one other big advantage to placing your hands on the outside of your body and that is that you can line them up wherever you want.
What I mean by that is that when you are relying on the elbow / hip crevice point as your balance point, then you are kind of stuck there.
Depending on how your body is built, this may not be completely at mid-line. For example, if you have long legs relative to your torso, then balancing your body in this way can be awkward.
This is because a larger portion of your body is shifted towards one side.
With the strength elbow lever, you can adjust your hand position further along your body so that your weight is more evenly distributed on either side of your hand position.
Keep in mind that this will also increase the load onto your shoulders so you’ll need more strength to pull it off.
However, as long as you have that strength or you are willing to work for it, then the strength elbow lever offers more freedom of movement and comfort than the balance elbow lever.
Reverse Engineering the Elbow Lever
As mentioned earlier, regardless of which elbow lever variation you will be working on, they will both require total body tension to pull off.
This means you need to strengthen all areas of your body, but particularly the ones that will take up the majority of the load during the elbow lever. It also helps to work movements and holds that mechanically resemble the elbow lever to some degree. This way you will strengthen movement patterns and positions that can shift and apply themselves to what it is you are trying to do.
Below are my suggestions on the exercises you should do.
- Reverse Grip Pushups
- Reverse Grip Hollow Body Pushups
- Superman Static Holds
- Planks
- Pike Pushups
- Reverse Hyperextensions
- Reverse Hyperextensions in a Headstand Position
- De-Loaded (Spotted) Elbow Levers
We’ll explore these in detail in the next section on progressions.
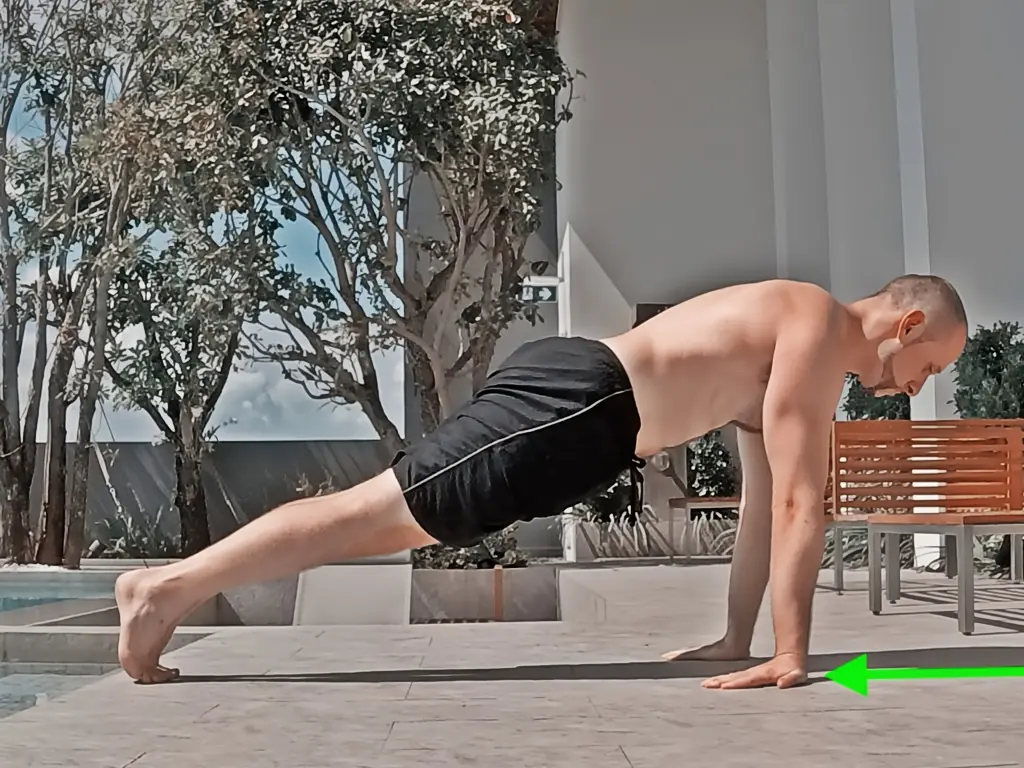
Reverse Grip Pushups
Reverse grip pushups will help you build the necessary upper body strength to hold the elbow lever.
Mechanically, your arms will be placed in a similar position. So, if you strengthen your support there, then it will translate over into the elbow lever.
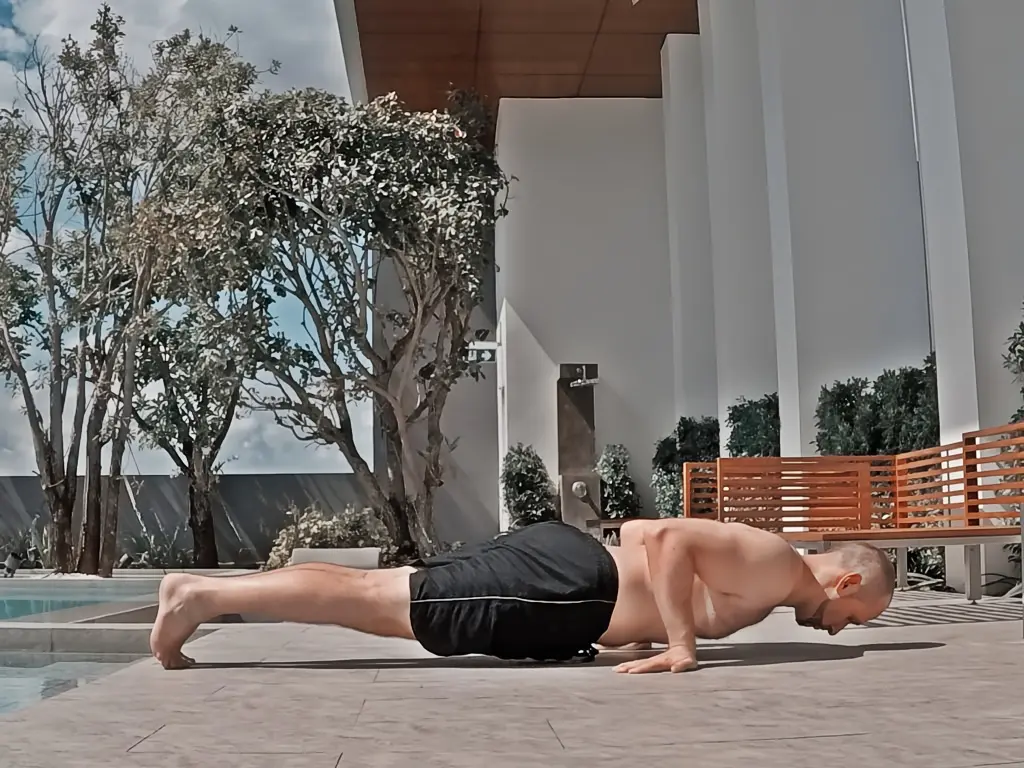
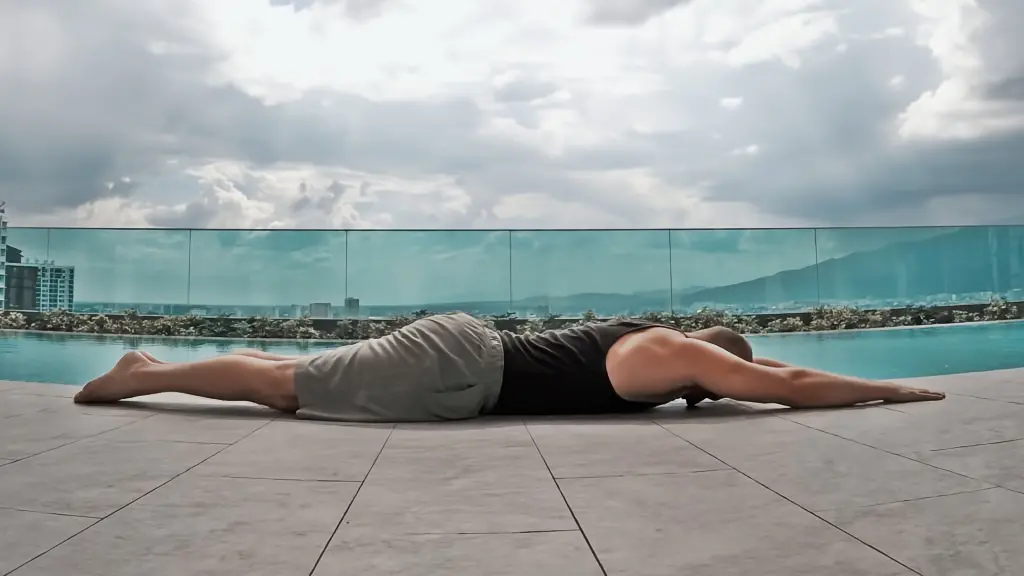
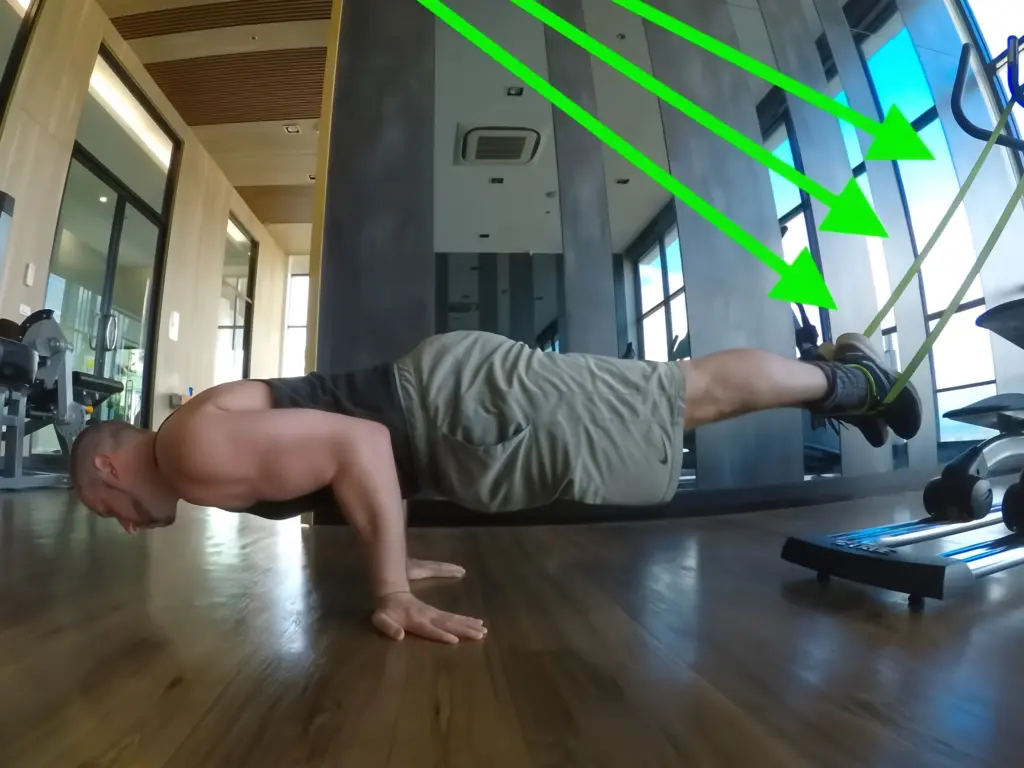
Reverse Grip Hollow Body Pushups
These are a more challenging version of reverse grip pushups where your upper body muscles will take on even more of the weight-bearing load of your bodyweight.
Remember that in an actual elbow lever, you will be completely “floating”. The more you can simulate what that feels like beforehand, the stronger you’ll grow.
For the hollow body position don’t forget to keep everything tight while still maintaining a normal breathing pattern.
Also, take particular note of the gymnast feet (toes pointed).
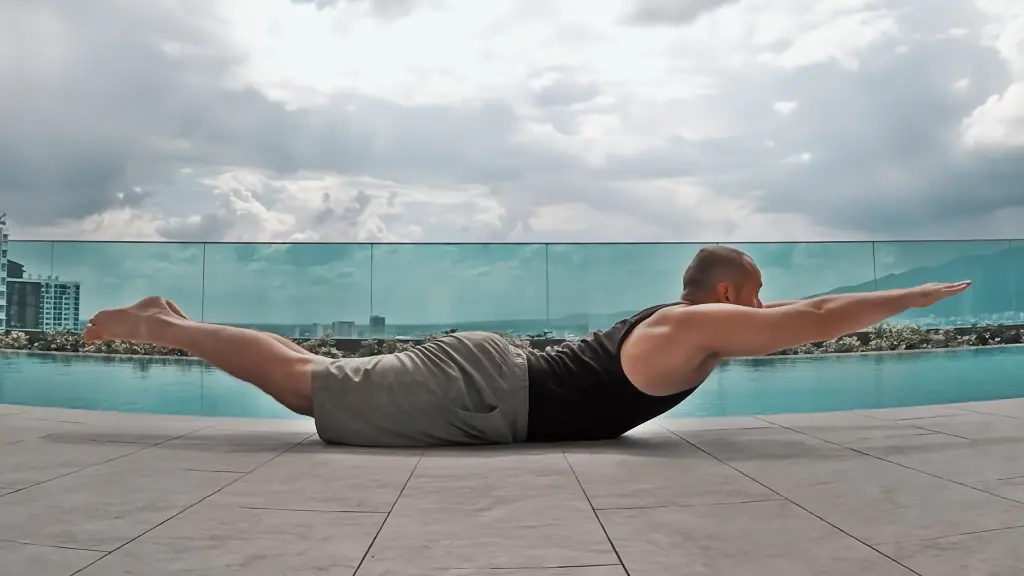
Superman Static Holds
Superman holds are crucial for developing the glute and lower back strength to execute the elbow lever. While the previous two exercises worked on the upper body strength you need, the Supermans target the lower body in a very similar way to how it will work when performing the elbow lever.
You can do them as either repetitions or as a static hold. I prefer to do them as a static hold, but you can also mix-and-match.
Take note that you should aim to lift as much of your body off of the ground as possible. Visualize trying to balance yourself only on your belly button. This obviously won’t happen, but by trying to make it happen, you will strengthen your lower back, glutes and shoulders.
Planks
For a full description of everything you could possible want to know about planks, please visit the planks chapter of the bodyweight exercise library.
In reference to the elbow lever and its relationship to planks, the connection is straightforward.
As I mentioned before, you need to maintain total body tension, which includes keeping a tight core. Working the plank and its variations will help you with that.
In particular, I recommend doing the gymnast plank and the one leg plank variations, as these will have more direct overlap with the strength needed for the elbow lever.
Again, it would be helpful for you to check out the planks chapter to get a deeper understanding of these.
Pike Pushups
Some of you might be surprised to find these here. While they are more commonly employed as a handstand pushup progression, the reason I’ve included them here is because of how effectively they target the delts (shoulders).
You need strong shoulders to hold your bodyweight up when doing the elbow lever and pike pushups are a great way to strengthen them. Plus as an added bonus, they will prep your body for handstand training too.
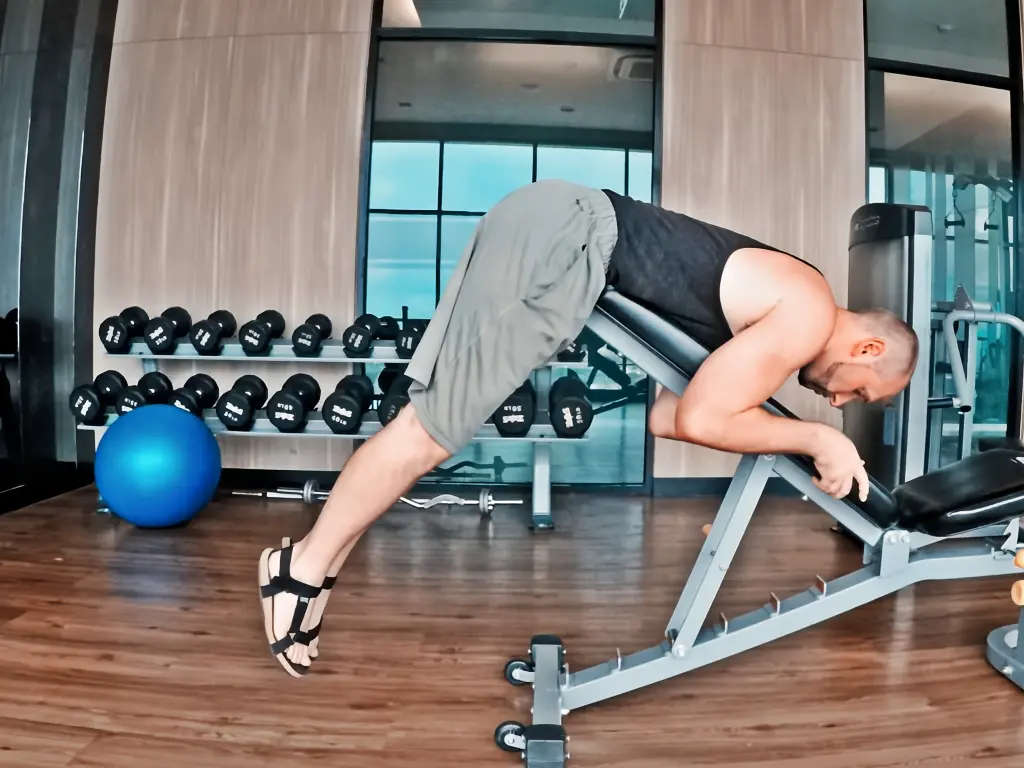
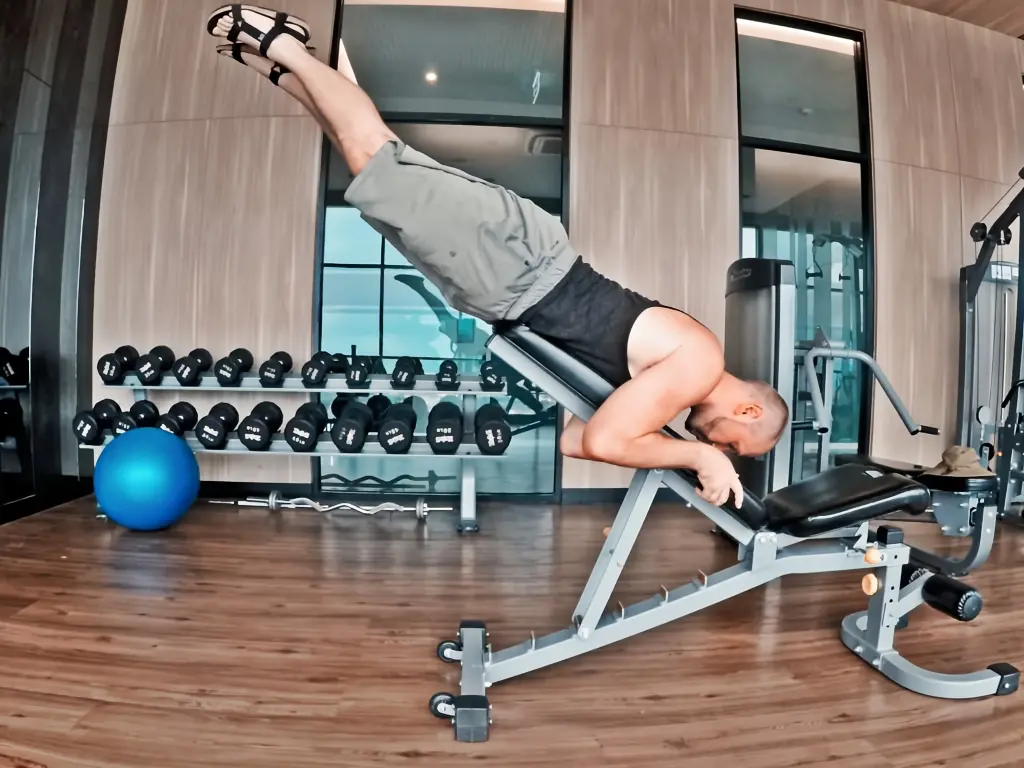
Reverse Hyperextensions
For those of you who already have considerable upper body strength but aren’t used to holding static yoga poses, the hyperextensions may just be the key to unlocking the elbow lever.
The trick is to do them in such a way that mimics what your body will do during the elbow lever.
Put simply, you will mix static holds with reps when performing these.
For every repetition that you do, hold it at the top for 3-5 seconds. If you do enough of these, it should take care of the lower body aspect of the elbow lever.
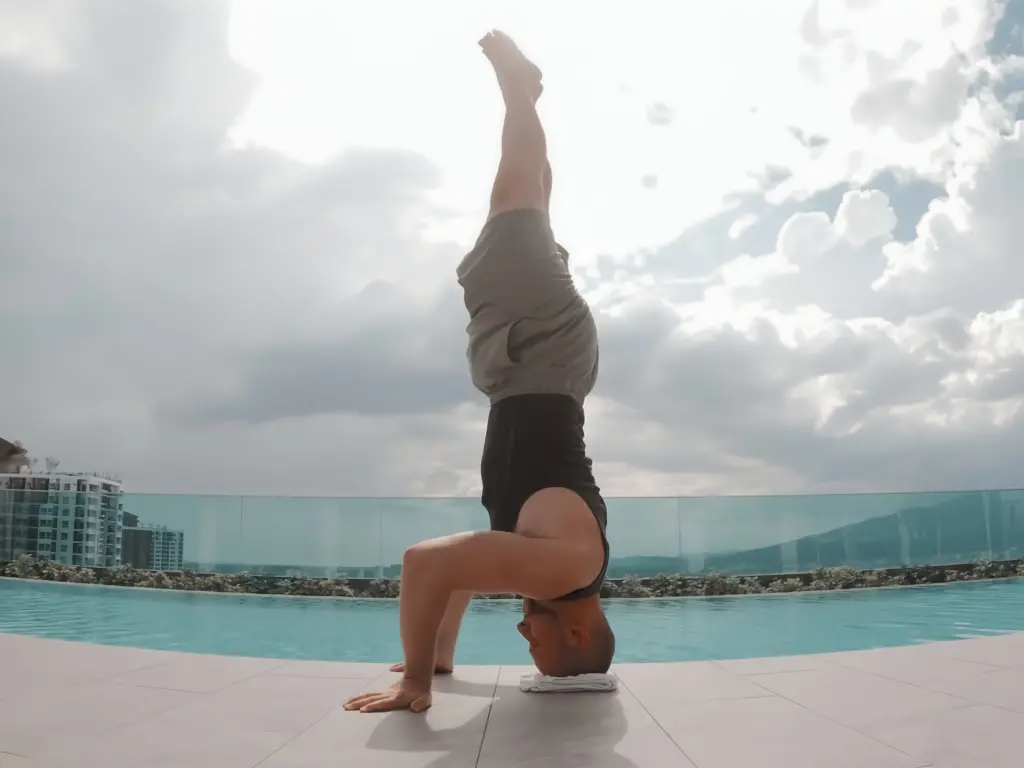
Reverse Hyperextensions in a Headstand Position
Another option for the hyperextensions is to do them from a headstand position.
You obviously need to be able to headstand in order to do them, but they are a nice alternative that will challenge you in a slightly different way.
Personally, I find that I can’t get as many reps as I can doing them off of a bench, but I also enjoy their intensity more on some days.
Ultimately, if your goal is to unlock the elbow lever as fast as possible and your lower body is what’s holding you back, then I’d probably stick to the regular hyperextensions over these.
De-Loaded (Spotted) Elbow Levers
Okay, so you’ve worked the progressions above this for a while now and you are ready to try the real deal. All I can say about that is “go for it!“.
If everything goes well then awesome!
If you are super close, but just need slightly more umph! to execute the move, then I recommend trying some self-spot elbow levers.
These are elbow levers in which you will de-load some of your body weight and then you’ll hold for time. If you do them for 10 sets per session, you will eventually graduate out of them into fully-loaded elbow levers.
There are a few ways to approach de-loading an elbow lever.
My favorite is with the use of bands, but if you don’t have bands at your disposal you can still get creative and do it. Just remember that bands are the ideal method because they will let you get into the identical body position.
The non-band variations are good, but they won’t mirror the actual elbow lever exactly.
Final Thoughts
Good luck on your elbow level journey. I hope this guide helps you make it to the finish line. As is always the case with calisthenics though, even once you reach the finish line, there is more you can explore beyond it.
With the elbow lever in particular, you can try to progress towards the one arm version or alter your hands to perform a fingertip elbow lever.
You can also combine the skill with other moves.
For example, you can start off in a headstand and then lower yourself down into an elbow lever. These are just some ideas that I’ve personally played with, but feel free to explore at your own whim.
Some of the true freaks of the calisthenics kingdom will eventually move on to the 90 degree pushup where you begin in an elbow lever and then press yourself up into a handstand. Unlocking this level of skill and strength will take years of practice though.
If you use this guide to achieve your first elbow lever, please tag @kalisthenics_nomad and #CalisthenicsNomad in your success post on Instagram. I may even repost it to feature you!